James bills
New Member
I have an 1975 Ericson 32-2 does anyone know the on the rub rail or a link to find them it would be greatly appreciated
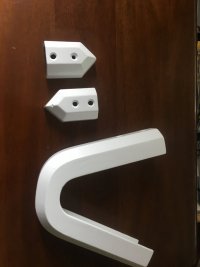
i got replacement from them earlier this year. Went withe gray after son and wife said to bag the less durable white. Bonus, it was cheaper and in stock. Powder coated the end fittings while I was at it.Wefco Rubber in Southern CA made the rail and insert for the 35-2. I’d guess they did the same for the 32-2. I ordered 75 feet of insert last year, and had to wait several months so they could get sufficient orders to make a batch.
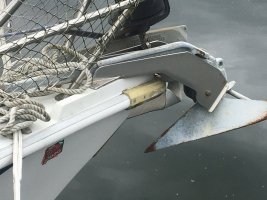
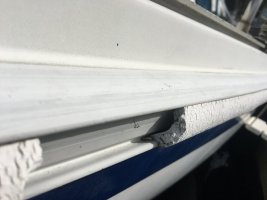
No contact with anything at all that I can see. It's on the dock finger side, well above point of contact with... anything."Yesterday, I went to the marina and the vinyl insert for my port (dock) side rub rail was... gone! I am having a hard time imagining how that disappeared by itself. "
How could this possibly happen in your slip..?!? maybe ripped off by contact with next door boat..?

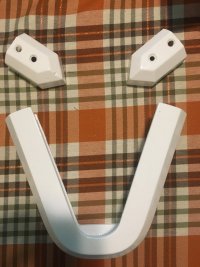
E38, 1980 here’s all I have for before and after. This was very easy to do. On this style of rubrail. It popped right in, i evened and set it with light taps with a a rubber mallet.Hi Touchrain,
What year and model boat do you have? How did the install go? Any photos?
Wefco Rubber in Southern CA made the rail and insert for the 35-2. I’d guess they did the same for the 32-2. I ordered 75 feet of insert last year, and had to wait several months so they could get sufficient orders to make a batch.
Just curious about the durability of the powder coated aluminum. I had my aluminum pedestal powder coated and had the mast wet sprayed with AwlGrip. Both 10 years ago, the mast is like new and the pedestal is blistering everywhere. The guy that painted my mast is the owner of a local powder coater and also a sailor. He advised me not to powder coat aluminum that sees any weather and said Wet Spray with a good primer is the way to go. I have an extra pedestal and just started today to strip it down. Going to sand blast it, etch it use a couple of different primers, fair it and paint it with a two part.i got replacement from them earlier this year. Went withe gray after son and wife said to bag the less durable white. Bonus, it was cheaper and in stock. Powder coated the end fittings while I was at it.
")
I agree!!! I will check it out... Perhaps I will not lower it! TBD. Thanks Loren!One minor caution-- when setting the height, try to be sure that someone's bare foot cannot get painfully jammed under the bottom of the wheel against the cockpit sole.
I have seen this foot hazard on a few "racy" sailboats.
