Farlander
Member II
Hi All,
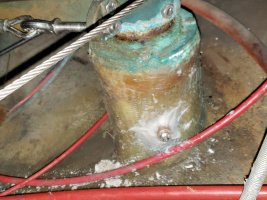
It's been a while since I posted but that's because I've been out enjoying sailing the pants off my E35 2-3x weekly. No however I have a new issue that has flooded the cabin sole several times. I just cleaned the most recent bilge flood out of the carpet and would like to keep it that way.
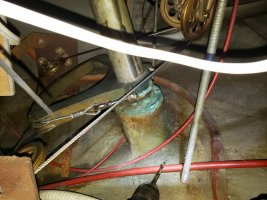
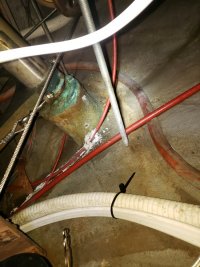
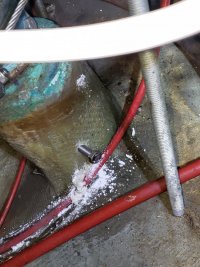
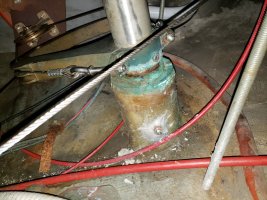
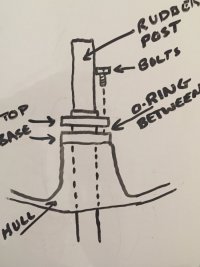
Inspection below decks while underway revealed a leak at the rudder post where it passes through the rudder shaft log. I have no idea what I am going to find in there or how I should prepare... questions:
Is there a removable bearing or seal or does the shaft ride directly in the log?
Should there be a place to grease the log/shaft below deck?
Can this repair be done in the water?
Here is a nice video showing the problem!

It's been a while since I posted but that's because I've been out enjoying sailing the pants off my E35 2-3x weekly. No however I have a new issue that has flooded the cabin sole several times. I just cleaned the most recent bilge flood out of the carpet and would like to keep it that way.
Inspection below decks while underway revealed a leak at the rudder post where it passes through the rudder shaft log. I have no idea what I am going to find in there or how I should prepare... questions:
Is there a removable bearing or seal or does the shaft ride directly in the log?
Should there be a place to grease the log/shaft below deck?
Can this repair be done in the water?
Here is a nice video showing the problem!