• Untitled Document

    Join us on April 26th, 7pm EST

    for the CBEC Virtual Meeting

    All EYO members and followers are welcome to join the fun and get to know the guest speaker!

    See the link below for login credentials and join us!

    April Meeting Info

    (dismiss this notice by hitting 'X', upper right)

E27 Galley Countertop

dt222

Member III
I'm soliciting thoughts on what you might do in this situation. As you can see from the picture, a PO did a hack job on the galley countertop so that a coleman camping stove could sort of be held in place (first thing thrown out).

Any thoughts on how to approach this gaping hole in the off-season?

Thanks.

Don
 

Attachments

  • Galley.jpg
    Galley.jpg
    72.4 KB · Views: 310

Glyn Judson

Moderator
Moderator
Effectively fill that gaping hole in the galley.

Don, Years ago a friend with an E27 faced filling that same hole in his galley after tossing his flare-prone alcohol stove. He still wanted the ability to cook and his solution was a clever one indeed. After fashioning a nice looking cutting board that covered the hole and then some, he bought one of those Chinese-made butane stoves such as this one as being offered on eBay here #280543988773. It got screwed to the board right through the four existing feet on the stove so that when not in use, it simply gets flipped over revealing a nice galley work surface with the stove securely held upside down and out of sight. Heck, I'll bet a guy could even mount two of them on a board large enough to cover the hole in your galley. If it were me, I might be tempted to locate short pins in the counter surround that would align with holes match-drilled in the board. That would secure the board from slipping around in either orientation. Whadda ya think? Glyn Judson, E31 hull #55, Marina del Rey, CA
 

Phil Adams

Member I
Don,

I hade the same problem on Trithena when the original stove packed up. I found an almost direct replacement with the Origo 4100 two burner spirit cooker with cutting board built in. It only took some minor adjustments to the hole to make a really neat fit and the cooker works great!

Regards

Phil Adams
 

stuartm80127

Member II
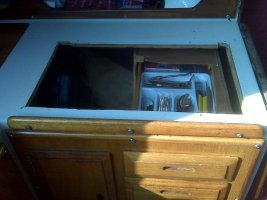
Galley countertop What would I do

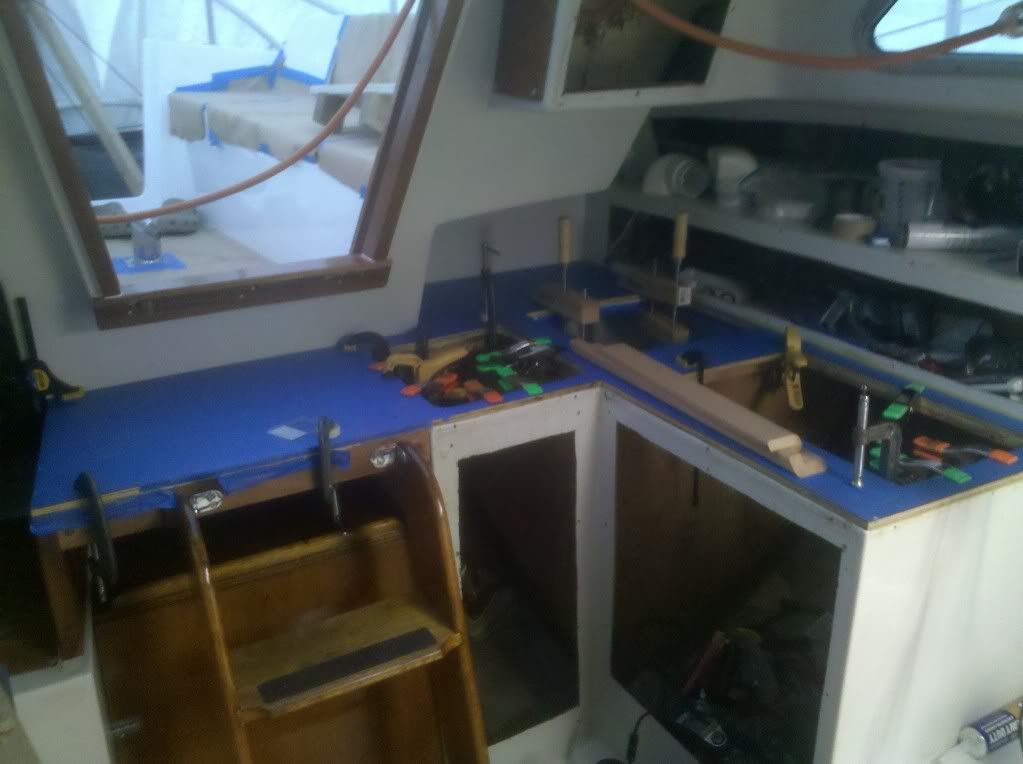
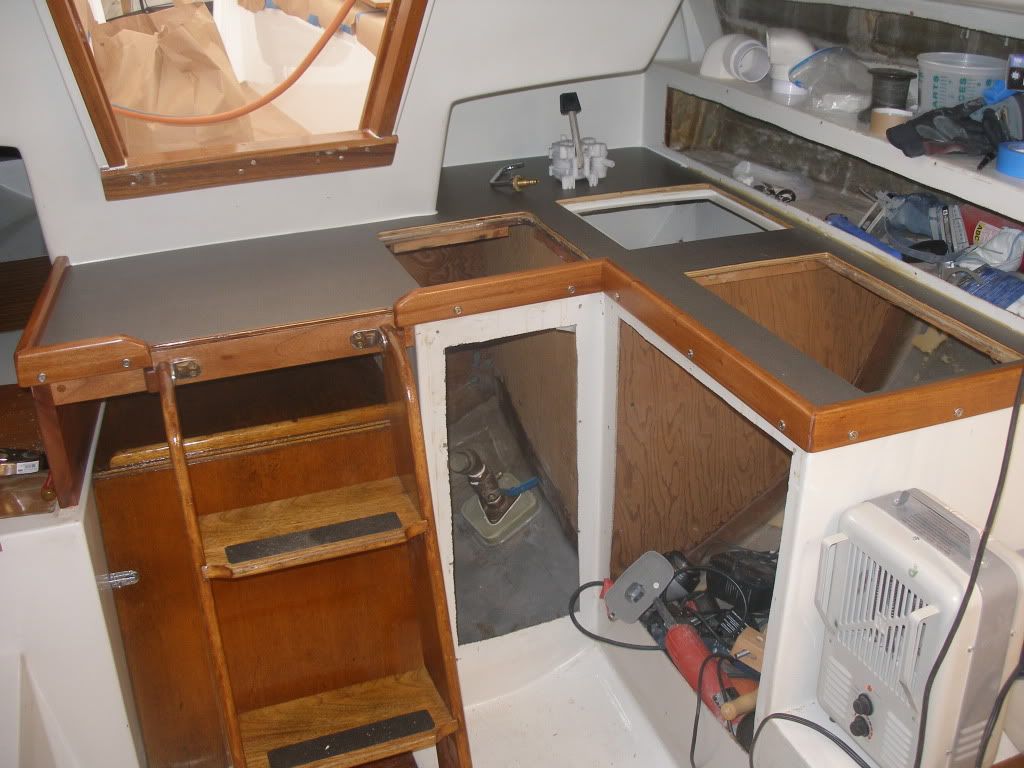
Ouch, That's one heck of a hack job, no pun intended. PO's can present such challenges at times. Not having been able to work on my boat since 15 August, I miss all that work, so here goes :egrin:

A) Read up on West Epoxy and GelCoat(West Marine). Ese the 1#105 epoxy with #205 hardener.

1) Empty out the cabinet drawyers and then remove them.

2) Unscrew all the screws holding the cabinetry in. Leave top screws in on both sides for removal last.

3) Remove the mahogany behind the galley.

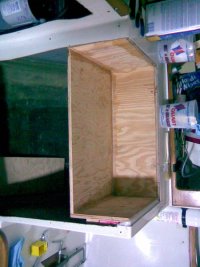
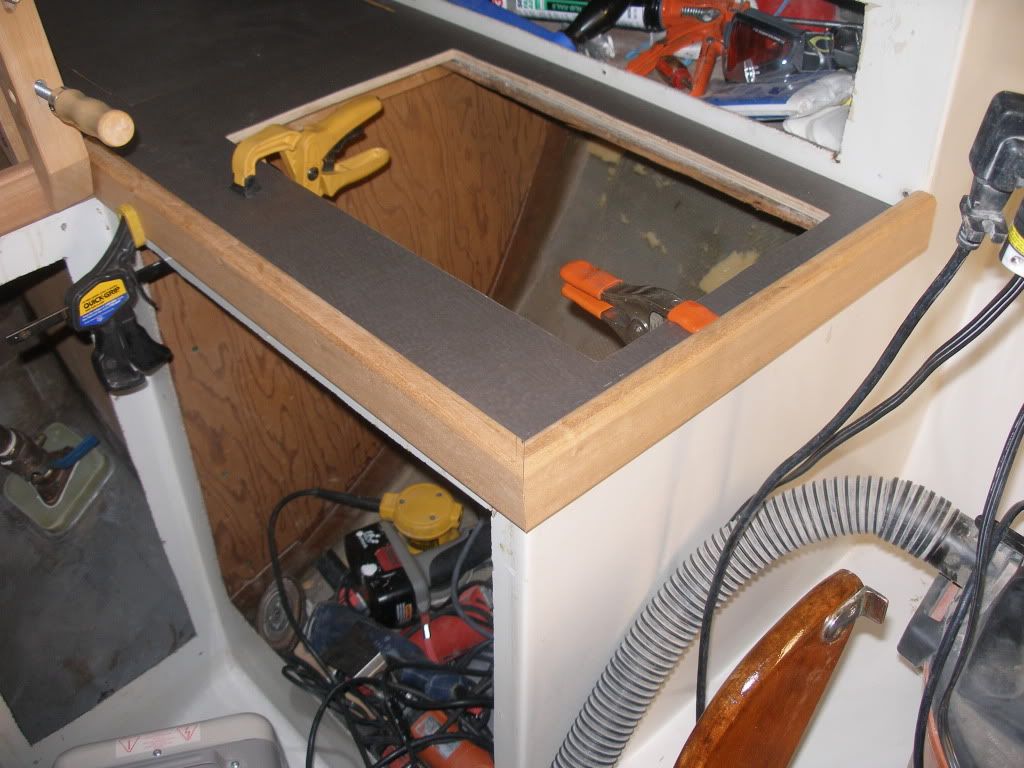
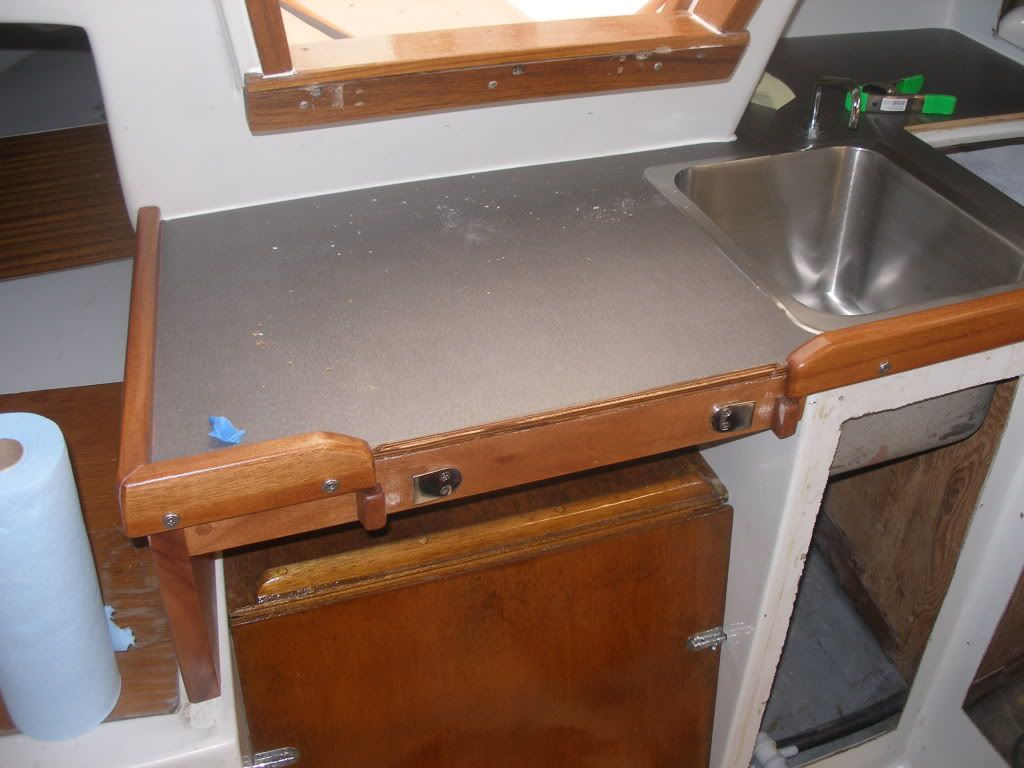
4) Measure the hole and cut a piece of 1/2" Marine grade plywood to closely fit the hole. Measure the thickness of the material at the edge.

5 Grid a bevel for about 1 inch so that the underside protrudes while the topside is cut back. Leave 1/4 inch face at bottom side of edge.

6) Read up on West Epoxy.

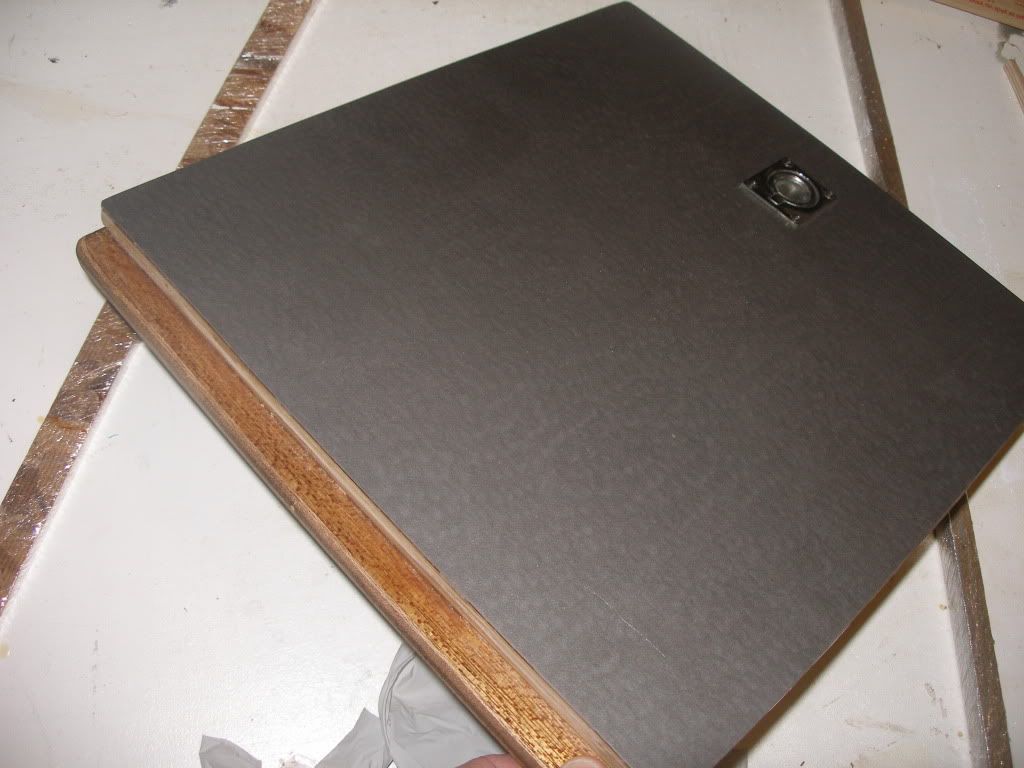
7) Take the Plywood and using West Epoxy brush on epoxy all over backside of board. Flip it and then place on Wax Paper doing other sides. Let sit for 2 hours.

8) Get 10oz bi-axial cloth and add about 8 layers to the board or until you reach the thickness of the original surface minus 1/64". Keep flat and all air bubbles out. When done, cure 48 hours and then come back and clean with 100% denatured alclohol, sand to flat surface with 200 grit paper. Dont take off too much. Prep the back side of board the same way approx 3 inches back from each side.

9) Grind a 1" bevel from bottom side cutting into top side. Point is to end up with a vee around the edgewhen you put the board back into the gaping hole.

10) Using a Free 5GA Paint mixer stick, cut it into 3" strips and secure one to each side of the back of the board with a 3/4" screw. Install this board into the gaping hole and screw (temporary) into place.

11) Cut several(4) 10oz biaxial cloth or tape cut into 4 inch strips by about four inches long. Wet them out on waxpaper and let sit for 30 minutes. Take the remaining epoxy and brush it on the inside ceiling of the counter ply (both added board and surrounding existing ply surface. Only cover the areas around, but not including, the temporary mounts. Wait until it hardens (1 hour) to a tacky sticky surface. Then Using Epoxy thickened with #403 to peanut butter consistency brush on thin layer and then peel the sticky tape and attach to the surface around, but not over the temporary mounts. Babysit for about 1/2 hour to ensure they don't peel off. Come back the next day.

12) Unscrew the temporary mounts and then repeat step 11 to add in another layer of 100z bi-axial cloth. When you make your tape here I would pre-fabricate it on a flat surface using waxpaper. Do three layers of exact length needed and then when gets sticky, then attach to the ceiling around the sides. Wait 1.5 hours and then come back and hit all four edges so that there will be no leaks. Go home and come back the next day.

13) Fill in the sides with glass. Cut and number glass pieces starting with larger pieces first. Lay them into the V areas and cut approx 1/8" from edge
so as not to go over existing counter top gelcoat. Cut smaller layers until you
have a small gap left in middle. Do for all sides.
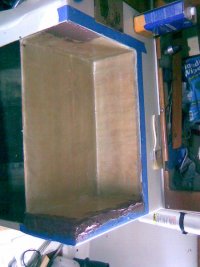
14) Start adding in glass layers with epoxy until you have filled most of the void. Should be no more than 12 layers. Let each 4 layers cool for 1 hour before adding another layer. When all done, add in some peanut butter consistency epoxy with #407 filler into the remaining gaps along the sides and middle. Keeping 1/64" below the top of the surrounding gelcoat surface. Wait 24 hours. Ensure you keep the epoxy off of the surrounding gelcoat. Use acetone to remove.

14) Clean with alcohol and then Sand using #120 wetdry paper to flat surface and clean with alcohol again twice using seperate rags.

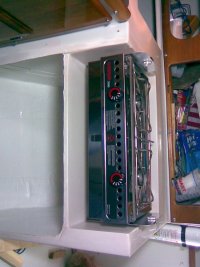
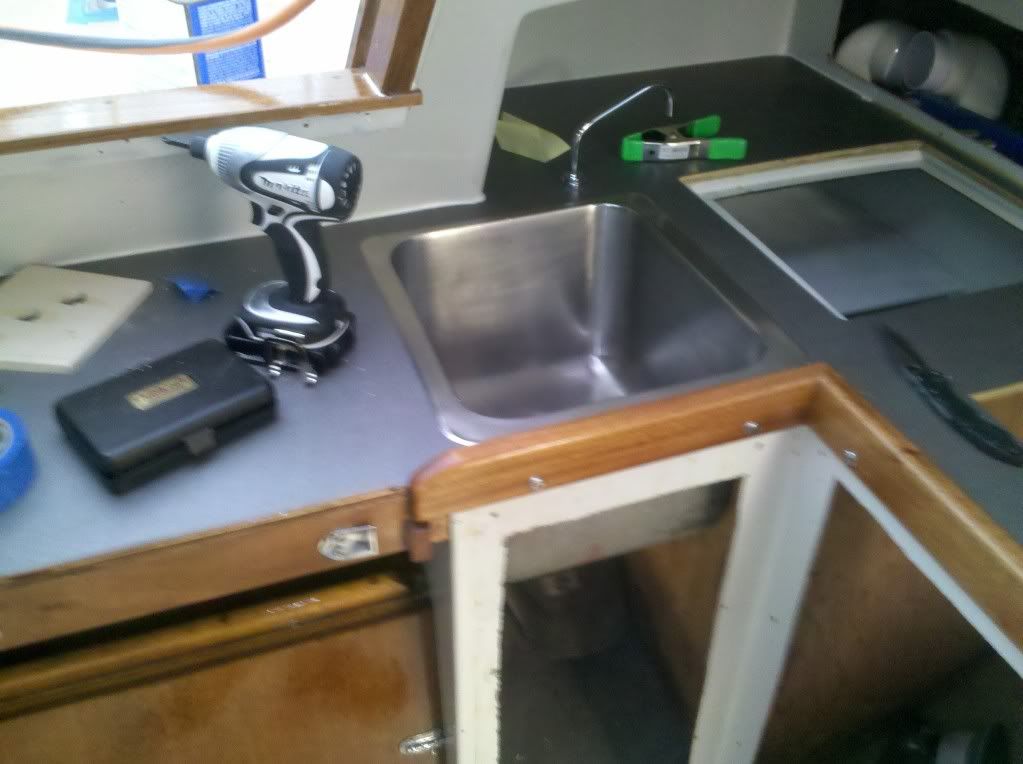
15) Get some gelcoat and coloring agents. Empty an ounce of gelcoat into a second empty can of same size mix in some brown coloring agent in very very small increments. When you think you have close color, dab a bit on the surrounding gelcoat, check and then wipe off. Tape off edges around the job with Then when you get about 4 oz made, start liberally a batch with the hardener in it with a sponge brush along the ply and glass surface. Wait a day and then lightly sand with #220 wet paper (add some water to keep dust down(really bad for you and hard to remove). Wipe with sponge until clean. Alcohol prep surface before adding a second coat... Eventually you will get up to the surrounding surface gelcoat.

16) Sand the gelcoat with #400 and then #600 and then #800. Take the last up to and touch the pre-existing gelcoat with it. Finish with rubbing compound. Should look pretty good and have original strength.

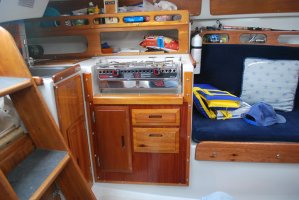
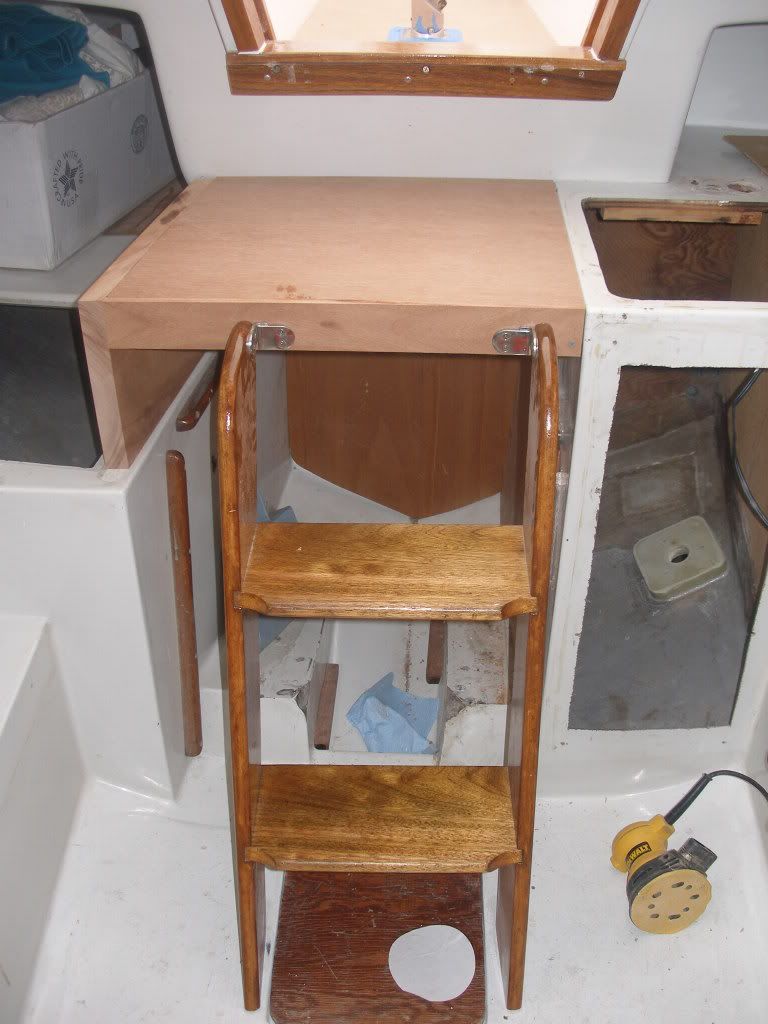
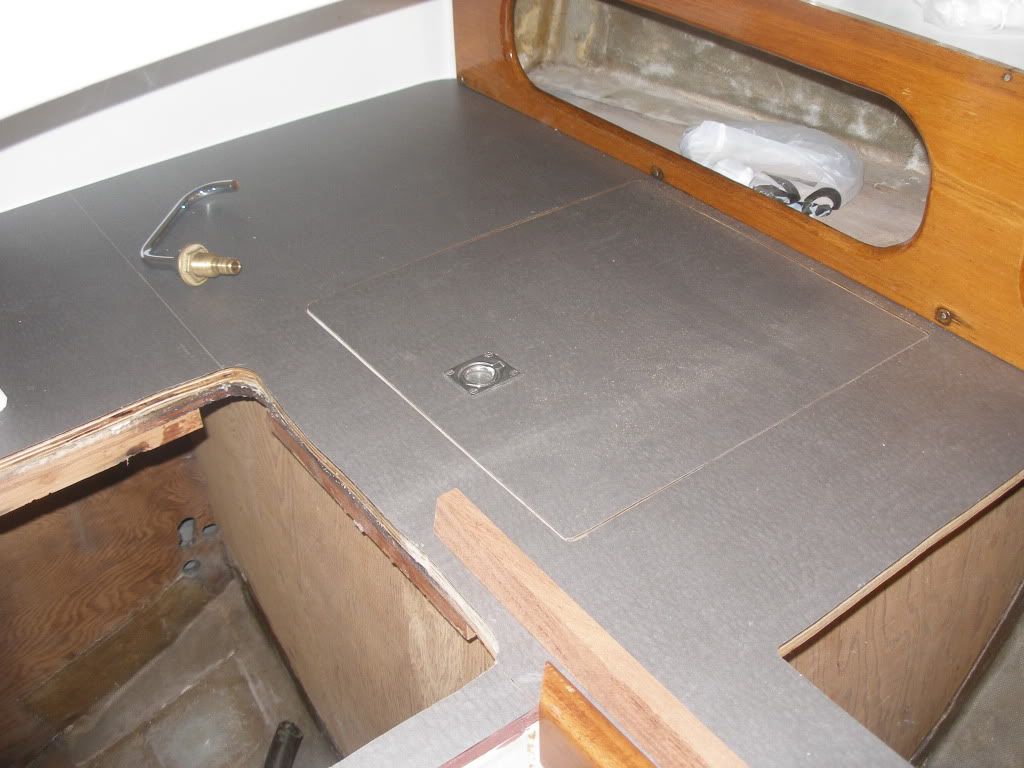
Alternatively, you could also do something like the followng since you already have a gaping hole in your countertop. I actually faired the surface flat and then sprayed about eight layers of gelcoat to complete the job. Used inexpensive and disposable Preval applicators. Then had to shorten the existing cabinetry and added a nee face using Marine grade play with a Honduran mahogany verneer.


Stuart
 

Attachments

  • Image044.jpg
    Image044.jpg
    63.6 KB · Views: 103
  • Image020.jpg
    Image020.jpg
    62.9 KB · Views: 102
  • STOVE21.jpg
    STOVE21.jpg
    57.3 KB · Views: 117
  • DSC_0019.jpg
    DSC_0019.jpg
    93.9 KB · Views: 140

bigd14

Contributing Partner
Blogs Author
I had a similar issue. I solved it by adding a half inch piece of plywood with formica over the top (and extended the countertop under the companionway too). Kind of a major project. And because I raised the height of the countertop, the sink wouldn't fit back in so I had to have the back flange cut down by 1/2 inch. But the finished product looks great and gives a lot more counter space.

The blue is masking tape.
223.jpg


The stove area.
004.jpg


Countertop Extension
028.jpg
 

stuartm80127

Member II
Like that alternative

Nice idea on extending countertop space which on E27 can be quite lacking. You're missing an A4 which makes this an even better use of space.
 

davisr

Member III
Stewart,

Great job on your remodel. Did you do this primarily so that you could fit the gimballed version of the Origo stove into the space? I ask this because it appears that the original poster, Don, could fit the non-gimballed, flush-mount version of the Origo into the existing space.

Obviously, the gimballed version provides greater versatility. Do you have any pictures of the woodwork you did for this project? It appears that you eliminated one of the top drawers and, in general, shorted the entire cabinet facade.

Thanks,
Roscoe
 

ignacio

Member III
Blogs Author
More pics?

Do you have pictures of the final product? This looks great!

I had a similar issue. I solved it by adding a half inch piece of plywood with formica over the top (and extended the countertop under the companionway too). Kind of a major project. And because I raised the height of the countertop, the sink wouldn't fit back in so I had to have the back flange cut down by 1/2 inch. But the finished product looks great and gives a lot more counter space.
 

bigd14

Contributing Partner
Blogs Author
Hey Ignacio- Here is a lousy shot of part of the finished countertop. I will try to get some better photos and post a write up later this weekend!

IMG_20110121_144216.jpg
 

dt222

Member III
Thanks All

This is certainly giving me some options. As soon as the snow melts I'll start working on it. In particular Stuart, thanks fort the step-by-step.
 

bigd14

Contributing Partner
Blogs Author
As promised here are some photos of the more or less complete countertop extension. The process was fairly simple, if time consuming. First I cut a big chunk of mahogany to fit on the side of the quarterberth, put a rabet in it to accept the plywood extension, and made up some cleats and supports. Once this was installed, I made a template of the whole countertop out of cardboard, then out of cheap plywood, then finally out of furniture grade plywood. The counterop was too big to fit on one sheet of plywood so i had to add an extra little piece with some biscuits. Then I put the formica on top. I had to make up some new fiddles too. A table saw and router were the only tools I used for the fiddles.


I had to leave the fiddle off the front of the step area to allow the ladder to be raised up an out.
023.jpg


032.jpg


I had to sand the fiddles in place so I have some more refinishing to do.
033.jpg

Here is the new cooler top. I simply glued the new top to the old one.
034.jpg

New cooler top. A little more shaping and it should fit flush.
028-1.jpg
 
Last edited:

Mark F

Contributing Partner
Blogs Author
Hey Doug,

The galley looks great. Nice clean installation that looks like it was designed that way from the start. Excellent.
 

Phil Adams

Member I
Brilliant use of the space available and lovely cabinet work! photos have inspired the thought....has anyone designed a chart table for their E27? I keep looking at Trithena and wishing there was a dedicated chart table rather than using the cabin table whilst bouncing round the Irish Sea - with this one addition she would be just perfect! :confused:

Phil
 

adam

Member III
I'm soliciting thoughts on what you might do in this situation. As you can see from the picture, a PO did a hack job on the galley countertop so that a coleman camping stove could sort of be held in place (first thing thrown out).

I'm not sure that it's actually a "hack job".

Since I have the same hole on my Ericson 29, I'm guessing that it was originally a kenyon (possibly gimbled) stove in there, which was later replaced with the camping stove.

As someone else said, you might just be able to drop in a replacement Origo 4100 (or cookmate), and not only fix the hole but have a nice stove.
 

stuartm80127

Member II
Hi Roscoe,

thanks. Nice to see other's great ideas here too. Counter space is ever so more precious now that I added the stove. As you thought, I was determined to install the Origo gimballed stove on my boat. After cooking at sea a couple of nights, I was very glad that I had installed the Gimballed stove. Get a set of pot grips for each burner - well worth the cost. However, the cost of adding the stove was the loss of a highly functional top drawyer. As with any 27ft boat, off to find other storage areas that you didn't think existed;).

Sadly, I lost the pictures of my woodwork. I would start with a two hour study of the existing layout and note the notches (likely worn down after 30 years) that hold the drawyer in-place while the boat is heeling up 25 degrees to port :).

I started with a 4*8 piece of 1/2" Marine Grade Ply. I copied most of the existing unit since it was a very good design and I am not much of a designer. I kept a small and a large drawyer and the original door.

For the box that encloses the drawyers, I drilled small pilot holes and then nailed and glued the pieces together. I then added epoxy and 2 layers of 4oz glass around the outside edges for strength. The tight clearance between the hull and the aft back lower corner required that I cut part of an edge off. I then took Honduran Mahogany verneer and epoxied that to the plywood I used for the facade. Once dry, I cut out the smaller actual facade with a very fine tooth saw and then cut out the drawyer openings. I used an edge of 1/2" mahogany and routed with a cove bit. When I installed, I made the edge flush with the facade and left the back offset essentially by the thickness of the verneer. I added in a 4oz layer of glass along the back edges. When I attached the box in which the drawyers are held, I glassed that in as well. A little sanding on the outside edges and it came out strong and looked somewhat good. I ended up keeping my old drawyers and re-gluing them and have one spare. I then finished all the pieces with Capitain's gloss varnish.


Stuart
 
Top