• Untitled Document

    Join us on April 26th, 7pm EST

    for the CBEC Virtual Meeting

    All EYO members and followers are welcome to join the fun and get to know the guest speaker!

    See the link below for login credentials and join us!

    April Meeting Info

    (dismiss this notice by hitting 'X', upper right)

E35-3 rudder post loose attachment

Canopus

1989 35-3
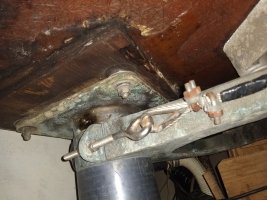
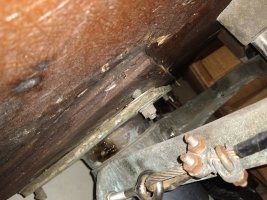
Went out for a beautiful spring sail today, then while docking I noticed some clunking with the steering which didn't sound good to me. I squeezed under and discovered that the plate at the top of the rudder post is barely attached by one loose nut with the others missing :oops:

IMG_20200314_160938710.jpgIMG_20200314_160502679.jpg

Should I just be able to replace the missing nuts, tighten it up and be good to go? Or is there anything else I need to look for. The packing gland looks to be water tight as far as I can tell.
 

Christian Williams

E381 - Los Angeles
Senior Moderator
Blogs Author
Yep. Dunno what we'd do without clunking--the first sign of something amiss. And while you're replacing the nuts and lock washers, put a grease gun on that Zerk (grease fitting) visible in the photo and pump in as much grease as the tube will take. Since the position is awkward, a flexible grease-gun hose may help.
 

Frank Langer

1984 Ericson 30+, Nanaimo, BC
I agree with Christian, but I would also use a screwdriver or "pointy thing" (technical term!) to check the wood piece, as it looks wet and perhaps weakened a bit. If there is any sponginess, I would replace it to ensure that the bolts/nuts have solid wood to hold them in place. That may be a difficult job, as some dismantling of the steering system would be required, but I would still want to know that it's solid.
Frank
 

Canopus

1989 35-3
Thanks for the input, guys! I will grease it and poke the wood. It looked solid, but I haven't poked at it. Hopefully the wood is ok, it appears to be epoxied in place and would be a pain in the rudder to extract it.
 

toddster

Curator of Broken Parts
Blogs Author
I’ve noticed that all of the nuts associated with the rudder post tend to work themselves loose over time. Including the two that actually hold the darned thing onto the boat. And the four that keep water from dripping into the quarterberth. Nothing like leaning back into a 30 degree heel when a stray nut rolls down between your toes. (W. T. F.. ?)
Seems like a job for LocTite.
 

Loren Beach

O34 - Portland, OR
Senior Moderator
Blogs Author
As Frank commented, that plywood backing plate looks 'compromised' by water. If it proves to be solid, then the plate on top (cockpit) probably needs to be lifted and well caulked. Re-secure it with 'nylock' nuts.
Worst case: replace it with a piece of G10 after doing any needed repairs on coring with thickened epoxy. Tedious work, but do-able by an owner. Swearing will be invoked.
 

Canopus

1989 35-3
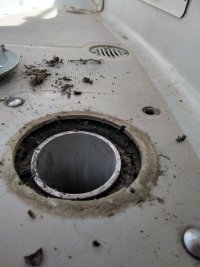
Well, upon closer inspection it appears that the backing plate is in decent shape. However, there is no balsa core around the bolts and deck plate. totally rotten.
I dug around with an allen wrench and wasn't able to probe any solid core, just some wet mulch.

IMG_20200315_152031381_HDR.jpg

Also it appears that the factory hole was too big so only two of the deck plate screws were actually in fiberglass.
 

nquigley

Sustaining Member
Yep. Dunno what we'd do without clunking--the first sign of something amiss. And while you're replacing the nuts and lock washers, put a grease gun on that Zerk (grease fitting) visible in the photo and pump in as much grease as the tube will take. Since the position is awkward, a flexible grease-gun hose may help.
Grease guns - after discovering my zerk nozzle last weekend, I got a cheap grease gun, with a fixed zerk receptacle. I had trouble getting it on and off the zerk nozzle. I then discovered that better ones have a receptacle that can be unscrewed a little before sliding it on the zerk nozzle, and then your screw it up tight (by hand) before pumping in the grease. Then unscrew it again to get it off the nozzle easily.
 

kapnkd

kapnkd
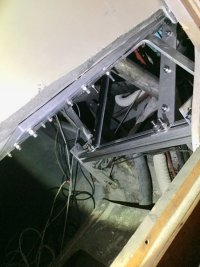
Similar problems on our ‘73 E32-II. The rudder plate above was designed in such a way to allow water to flow in around the post cap and then down into the plywood reinforcing on the underside of the cockpit sole. Didn’t take long before the plywood was destroyed.

We removed a significant piece of the old bad wood and replaced it with a 1/2” piece of aluminum plate we scrounged up. A “U” shape was cut out on the back side of the plate so it could slide in around the rudder without having to pull or drop the rudder. The plate had enough surface to also attach the pedestal turning blocks onto it.

Holes were not only drilled for the upper rudder support plate but also to tie the rest of the aluminum plate into the underneath of the cockpit sole. (The outside cockpit sole will get an EvaTeak covering so the screws will be covered.)

While we were at it, we reinforced the old quadrant turning blocks and tied them into the aluminum plate structure. (You can see a square box aluminum piece in the photo plus angled struts rising up to the main plate. CE104B39-ACED-4E02-97A8-278AF5152CA4.jpeg

Definitely overkill but the steering has never been more righteous!
 

Rufus McCool

Junior Member
Something to consider when bolting up the upper bearing to the new re-worked area is to be mindful of how the bearing fits on the rudder shaft. I personally feel the bearing should be bolted back with nylon stop nuts. That way you can pull it up perpendicular to the rudder shaft and you may not be able to mojo every bolt (some left loose, or looser).

When I did this project, I considered fitting the wood block with thickened epoxy and temporarily bolting the bearing while the epoxy was still wet, all the while making absolutely sure the bearing was square to the shaft. You would hope Ericson got all the cockpit floors square with the rudder shaft, but it's a boat. What on it is square? And you want the bearing to fit square on the shaft. You also want to know that the shaft is riding correctly in the lower sleeve. Once everything has set, then double check that the rudder swings from stop to stop perfectly smooth - no hangs or binds. All this is done with no steering cables attached, obviously.

Also, when it is done, the shaft may not be centered in the deck hole. It will be mostly centered, but not necessarily perfect. The hole is a bit oversized, so adjustments can be made.
 

Christian Williams

E381 - Los Angeles
Senior Moderator
Blogs Author
Good points, "Rufus." Why don't you let us know what boat and engine you have in the Signature line, it helps other members appreciate your experience and keeps us from looking it up. Cheers/Christian
 

bigd14

Contributing Partner
Blogs Author
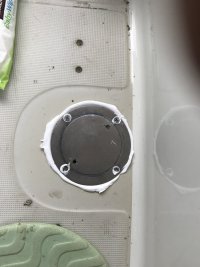
Ugh, that wet core looks very familiar. Clearly a weak spot in the build of these boats. I pulled as much wet core as I could out and packed it as full as possible with thickened epoxy, redrilled the bolt holes and slapped the cover plate down with Sikaflex. No leaks so far and I'm not going to worry about the moisture in the cockpit sole. Much...

27D309E7-566B-4D97-B16B-6D1FA090D923.jpeg
 

Canopus

1989 35-3
Ugh, that wet core looks very familiar. Clearly a weak spot in the build of these boats. I pulled as much wet core as I could out and packed it as full as possible with thickened epoxy, redrilled the bolt holes and slapped the cover plate down with Sikaflex. No leaks so far and I'm not going to worry about the moisture in the cockpit sole. Much...

I'm try to decide if I should go your route and just fill the gaps with thickened epoxy or do a full core replacement of the cockpit sole. At the moment it is just bolted as is so we can still get some sailing in. But I don't really want to keep it like that for very long.
 

bigd14

Contributing Partner
Blogs Author
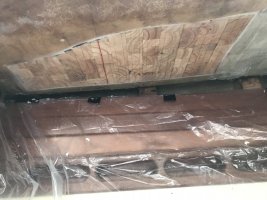
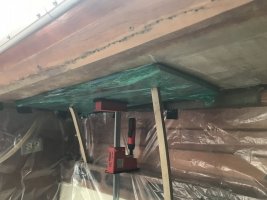
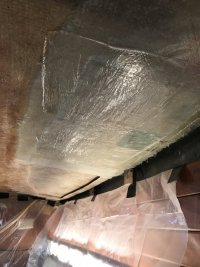
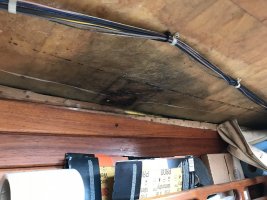
You might see if you can discern the areas of wet core from down below. The bottom skin is pretty thin and you can often see a darker area where the core is rotted (last photo below). Usually the moist core extends a little out from the discolored area. Drilling some strategic holes into the core from the bottom can also reveal where the wet core ends. I was able to find the areas of wet core this way on the side decks, but of course access is easier there. If the area is not too big I would highly recommend repairing from underneath and preserving the gelcoat finish of the cockpit floor. It’s awful messy working upside down but worth it in the end (wear a hat to prevent epoxy in your hair!).


30BEF229-8AAB-427F-A011-840553758C13.jpeg


58CC9531-5F44-4789-9065-FEE63BE81A08.jpeg

B86BC2D5-0A60-4BA1-A599-2C6E689836AF.jpeg

E4D2118D-B84D-4794-B29E-216EDBA7C3FA.jpeg
 
Last edited:
Top