• Untitled Document

    Join us on April 26th, 7pm EST

    for the CBEC Virtual Meeting

    All EYO members and followers are welcome to join the fun and get to know the guest speaker!

    See the link below for login credentials and join us!

    April Meeting Info

    (dismiss this notice by hitting 'X', upper right)

Epoxy to re-bed handrails

simdim

Member II
Folks,
I had discovered that under heavy rain my e29 leaks from under handrails. It leaks a bit from main cabin portholes - but handrails need to be tackled first. It seems like PO did not do a good job reattaching them after refinish. Now I need to re-bed but want to take a quick poll on what brand of epoxy/filler people are using and happy unhappy about.

Cheers,

Simon
 

Captron

Member III
SS Handrails

When I did the same project on Kismet our E-38, I replaced the old teak rails with SS tubing. I had the rails made by a company that makes hand rails for boats. They supplied the oval (cross section) tubing and bent them approximately to the curve I needed. I did the drilling by hand using the old rails as a template.

When I finally screwed them down I had to pull them an additional small amount at each station; no problem.

For reshaping the rail beds I used Marine-Tex but the final bedding was a small amount of 3M 5200.

I wrote an article with pictures ... you can click on

http://members.toast.net/captron/Captain_Ron/stainless_steel_handrails.htm

The pictures are at the bottom.

:egrin:
 

simdim

Member II
Captain Ron,
This sounds like a stellar project for the future summer - but for now - i just need to make water to stop dripping....
From doing more searches on this side it looks like handrails are attached with trough bolts, so I am planning to drill out (or pop them out with #8 wood screws) the plugs from inside rails and unscrew them - do i need to remove plugs from the top rail or nut is permanently attached inside the rail?
After cleaning all I need is to apply 3M 4200 put the railing back, wait for 2-3 day for 4200 to cure and tighten the rails up.

Does it sound about right or am i missing something? Is 4200 the right product for the job?

Cheers,

Simon
 

gareth harris

Sustaining Member
Does it sound about right or am i missing something? Is 4200 the right product for the job?

Cheers,

Simon

That sounds right, some people prefer polysulphide to 4200 (which is a weak polyurethane) but either should work.

In past threads there have been long discussions of lining the core with epoxy to protect the balsa. Doing so is a much longer job than just resealing, but is worth doing if you have the time. If you lack the time for a two day project, then resealing with 4200 now is a still worth doing.

Gareth
Freyja E35 #241 1972
 

Walter Pearson

Member III
The sealant issue is usually a personal one depending on experience with each type. I usually limit 5200 to things I want adhesively bonded and not likely to be taken apart and use the polysulfides for the sealing tasks. If the yellowing bondline is expected to be objectionable, 4200 is then my choice over polysulfide.

You apparently have the opposed handrails with the long fastener between them. On my E27, some of the nuts in the deck handrail stayed put and others turned under the torque. In some cases, I could hold the nuts by jamming a small straight blade screwdriver next to a flat on the nut. (I did not have room to actually get a socket on the nut.) I had to use care so that the nut flat used was facing fore or aft. Otherwise the wedging action would tend to split the handrail.

For reassembly in the holes where the nuts tended to turn, I used the Dremel tool to make little pockets fore and aft and injected epoxy there to form D-shaped blocks to keep the nuts from turning. I thought it was important to make sure the nuts wouldn't turn because long after the deck grab rail was plugged, I wanted to snug up the fastener from below after the sealant had more time to cure. I don't like to tighten too much too soon or the sealant tends to be squished out.

You may want to try tightening from below also to see if that might help seal up the leakage before you go to the whole re-bedding procedure. You could also probably find out quickly whether the nuts are going to turn or not.

The other thing I did with my boat was to do an epoxy injection process to solidify the whole structure between the grab rails where there was a space between the deck and the headliner. I have some sketches of all this if you are interested or I'm not being very clear in my explanations.

Walter Pearson
 

simdim

Member II
Walter,
I usually err on the side of overkill :) and idea of injecting epoxy sounds good to me.
Do you put duct tape on the bottom and just pour epoxy into the hole? How much is enough? What epoxy should i use?

Cheers,

Simon
 

Randy Rutledge

Sustaining Member
First thing, tightening a leaking handrail will not work, second if the sealant is set and you turn the screw you will break the seal.

The flat surface of the carriage roof and the handrail will squeeze out most of the sealant and not leave enough to allow for flex.
The best way to create a good seal is to use a countersink to bevel the hole in the fiberglass of the carriage roof and then there will be enough sealant to form a good seal that will flex and last.

The windows may not leak after the handrail is fixed. The water form the handrail runs down between the liner and outer and hits the window frame and can leak in the unsealed inner window frame appearing to be a window leak.
 

Mark F

Contributing Partner
Blogs Author
Hi Simon,

Drilling the handrail holes (through the cabin top) larger and filling with epoxy is a good idea. After drilling and hogging out the balsa you may have to shove some kind of filler in there to keep the epoxy from flowing down to your windows (believe me). Just make sure you are not getting in the way of forming the plug you will be drilling through for your new rail holes.

If you have leaks and do not want to pull the entire rail try this (you need to have access to the bolts from below). Get some of those plastic hypodermic needles for injecting epoxy, fill with 4200 (or what ever you are using for sealant), get a piece of wood (1x3 - 18" long works)that will fit under rail loop on the topside to use as a lever and a block (spacer) to hold the lever up. Loosen the bolt on the leaking handrail hole. Go topside - slide the lever under the handrail loop, pry up to get enough space to get the needle between the rail and deck then slip the spacer under the lever to hold it up. Squirt some sealant in making sure you have the entire fastener surrounded, remove the lever and tighten the bolt. Works great.
 

gareth harris

Sustaining Member
Walter,
I usually err on the side of overkill

In that case:

1. Remove the old hand rails.

2. Drill right through the deck with a 3/4" hole saw centered on the screw hole.

3. Cover the hole on the underside of the deck with duct tape.

4. Fill the hole, from above, with epoxy mixed with hardener. Allow to cure. This will naturally sag a little, useful for the bevels mentioned by Randy.

5. Remove the duct tape. Dry fit the handrails, and drill through them, right through the deck where you have just filled it with epoxy, with a drill bit sized to the bolts for the rails.

6. Through bolt the handrails through the deck, using appropriate sealant, either polysulphide or 4200.


That is how I did mine.

BTW, a good trick if you are unsure where water is entering your boat is to buy a pack of different coloured food dyes from a supermarket. When it rains, put a little of each colour at each suspected entry point and see what colours come through.

Gareth
Freyja E35 #241 1972
 

Walter Pearson

Member III
I drilled two small holes in the headliner fore and aft of the through holes and injected a non-flowing epoxy into both holes until it came out the through hole. At that point, I put tape over all the holes until the epoxy cured. Then I used a flowable epoxy from above to fill the hole and re-drilled when that material cured.

I used a 3M Duopack adhesive with the integral mixer for the non-sag part of the process, but you could mix West Systems epoxy with one of their thickeners and then load that in a disposable syringe for the injection. I used West epoxy for filling the cavities for drilling.

I like the chamfer approach, but instead I used the suggestion of the marina guy and used a concentric ring of sealant around each fastener and allowed it to cure some before applying the final torque. His rationale was that the turning fastener then did no harm to the integrity of the seal. It's been leak-free for several years. Some sketches:

http://picasaweb.google.com/wadolu.photos/GrabRailHeadlinerE27#
 

Maine Sail

Member III
This will be....

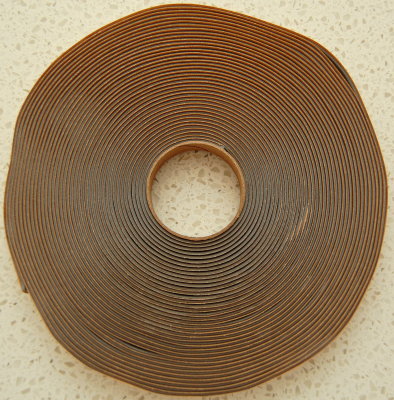
This response will be totally contrary to the general thinking today. For teak hand rails I'd use a premium butyl tape. Marine quality butyl tape can be purchased at Hamilton Marine.

Technique is the most important factor in doing this job. If your decks are dry you can use a Dremel or a drill & bent nail to carve out about 3/16" of balsa from between the skins then fill it with slightly thickened epoxy and re-drill the hole. By leaving the original holes diameter and removing the balsa from between the skins and then filling you retain the structure of the top and bottom laminates for the filled epoxy to bond to. Balsa has a low shear strength and without the top an bottom skins you have little strength in a over drilled and filled hole.

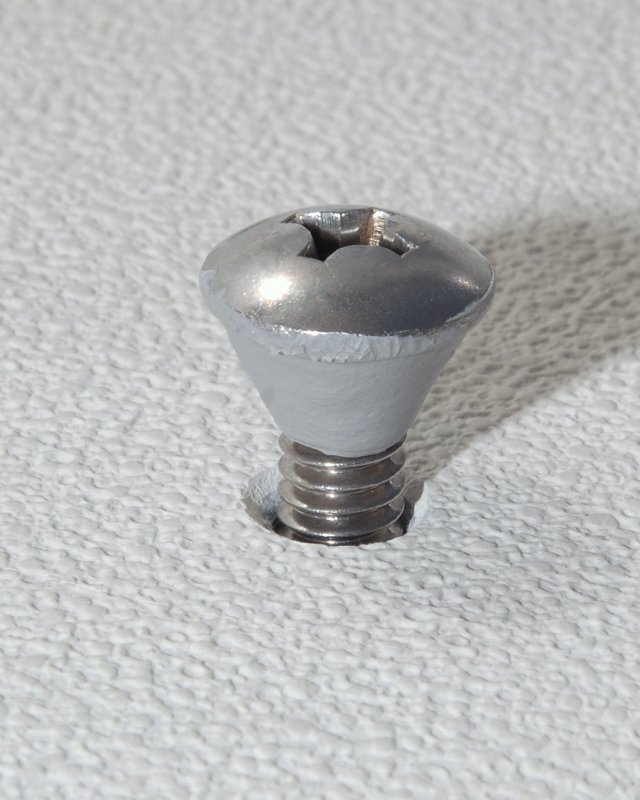
Regardless of whether you pot the hole with thickened epoxy you should bevel or countersink the hole slightly. This will crate an o-ring type effect around the bolt to get a thicker gasket seal.

Note the slight countersinking and the butyl "cone" wrapped around the bolt head:
98525518.jpg


Our entire boat was bedded with butyl tape in 1979 and very, very few of the deck fittings have ever leaked or needed to be re-bedded.

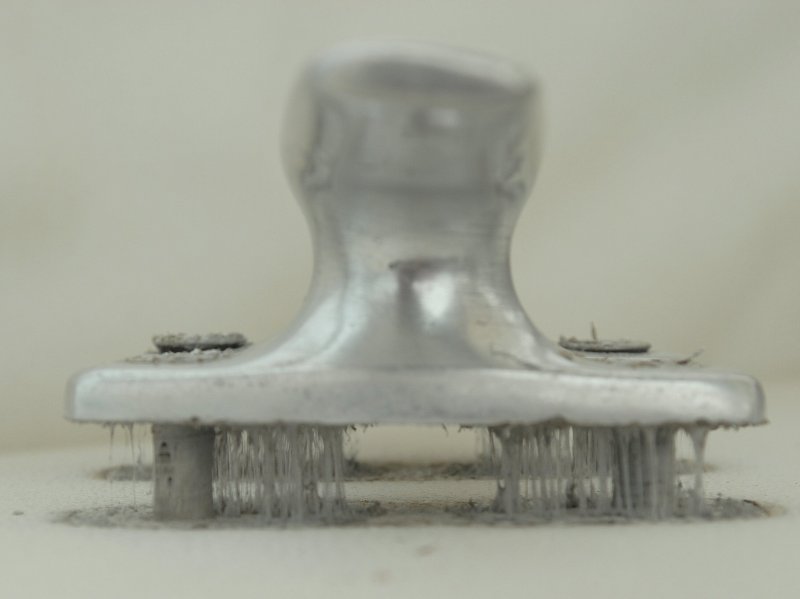
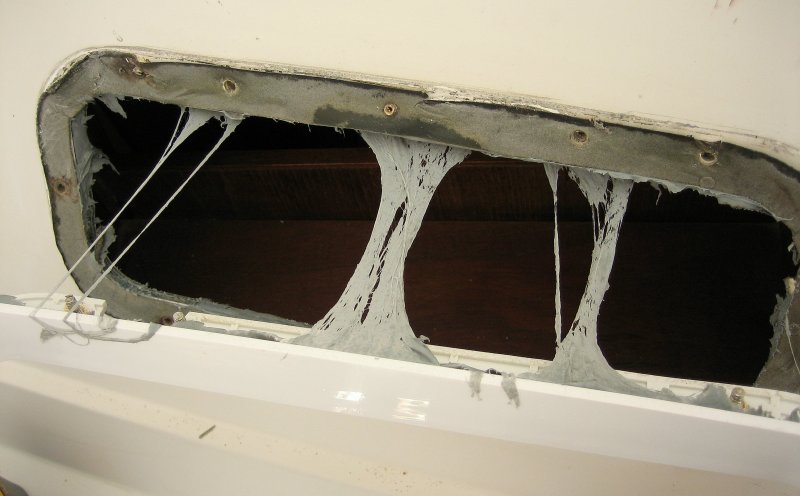
Here are two photos of 29 year old butyl tape that still has about 2000% more elongation before break than any of the polyurethanes or polysulfides. Both of these fittings were BONE dry when removed.
98525509.jpg

96334325.jpg


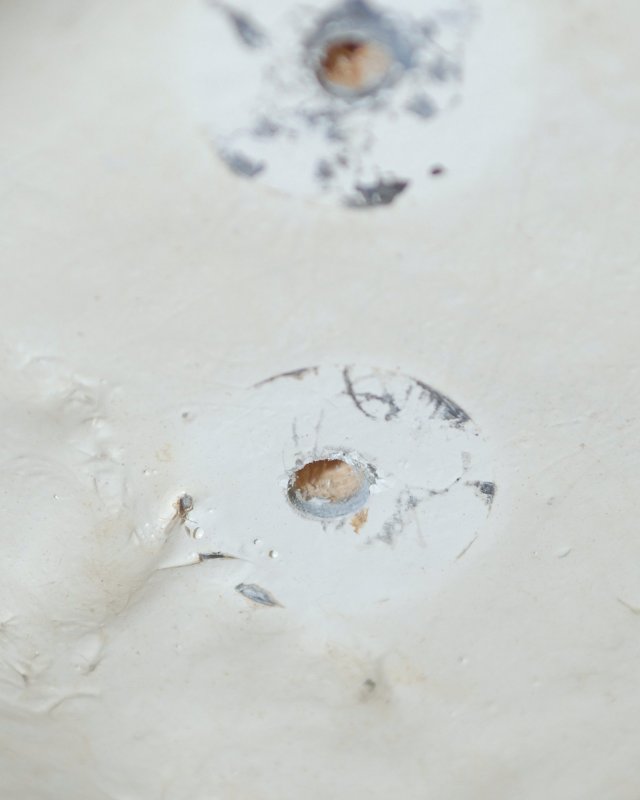
Here's my 29 year old BONE DRY balsa core where the genny cleats were:
98525517.jpg


Gray Butyl Tape:
98525514.jpg


If you don't use butyl tape I'd recommend a polysulfide or Sikaflex 291 as the next best options..
 
Last edited:

simdim

Member II
Folks,
This forum is great! You can not ask for better learning curve :)
I took port rails of last night - there is a lot of wet balsa there... Is alcohol still preferred method of drying balsa?
On the starboard side of my e29 ('79) the inside rail is shorter then the outside rail. Does anyone know if the forward bolt ( somewhere in the head area) is under the headliner or it is just bolted from the top?

Also on the selection of epoxy - I have West system G/Flex already, should I not use it for this job and get a 105/205 instead?

Cheers,
Simon
 

Maine Sail

Member III
Your profile

Your profile shows you in Michigan. For drying out the only thing that really actually works is time. Lucky for you you are in the North and will have six months +/- to let it dry. Adding chemicals, and more moisture, really does not do much of anything to speed up the drying process.

Remove the rails and dab the exterior of the holes with a marine sealant like Sika 291. Do not force it down into the holes just over the tops enough to prevent any more water from entering. Next cover the boat & put the boat in storage. Use small lightbulbs on the inside to keep the deck from freezing. In six months, with these holes open on the inside, you should be somewhat drier and can then pot them with thickened 105/205. Sealing it with epoxy while wet is not a good idea and you'd be better to just countersink/bed rather than epoxy/countersink/bed..
 

Mike.Gritten

Member III
I'm just finishing a project similar to this but on my main hatch sea hood (?). I don't even know if that's the correct term, but it's a "garage" that the main hatch slides into as you open it. The sea hood was attached with 24 - 1/4" coarse thread, self-tapping stainless screws screwed through the deck and into the balsa core, but not into or though the headliner on the interior of the boat. I removed all the screws and threw them away, drilled out each of the mounting holes down to the back side of the headliner with a 1" hole saw and removed all the balsa and the deck plug. I then ground back the balsa core approx 1/8 inch all around the holes to create a "key" to lock the epoxy plug into place. I mixed West Systems 105/205 with 406 colloidal silica filler to a peanut butter consistency and scooped the whole mess into my trusty West Sytems caulking gun tube and filled the holes leaving a shallow depression at the top. I then filled the shallow depressions with epoxy fairing compound, sanded it all smooth and painted with easypoxy white (It's not even going to be visible once the hood is back on but I figured "what the heck"!). I have redrilled all the mounting holes for the new screws and countersunk the tops to allow for the 4000UV to form a good seal. I will be seating and installing the hood tonight!
 
Last edited:

JPS27

Member III
Expoxy and using self tapping SS screws for handrails?

I figured I'd piggyback an old but similar thread. I have taken only one handrail off because I've learned not to create humungous jobs, especially right before the season pics up. My questions are; is it acceptable to fill handrail bolt holes with epoxy and then tap in screws? If so, what filler is best for the epoxy, 403, 404, something else? Can I use butyl tap for sealant?

The background is after reading all the threads on this topic I decided to yank the rail. The rail is now ready to go back on having had two coats of thin epoxy and about 8 coats of varnish.

When I took the rail off, it was a 5 on the beast scale. The thru bolts on the ends were easy to take off and were the culprits of much leaking. Of the five fasteners in between two required patience, pb blaster, etc. The other three came of with nubs of disintegrated nuts fused to the bolts, which were the cause of unsightly rust stains under the handrails. So, in three places the nuts are no longer glassed into the cabin top. But in two others the nuts are still there and in shockingly good condition. I have used a 1/4" tapping tool to help clean them out and new 1/4" - 20 bolts work nicely in them. I hope it save time and headache to fill the other three holes with epoxy and then with pilot holes of course tap in self tapping screws. Bad idea?

I should add that I cleaned out the holes of damp material and after a few weeks of being covered by little plastic tents they seem bone dry.

Jay
 
Last edited:

JSM

Member III
I went thru this exercise a few years ago on my last boat and used butyl tape to bed the rails ...BIG MISTAKE !!. While butyl does a good job of sealing its a pain and a mess to work with.
Whether you lay the tape on the deck or attach it to the contact points on the rails you pretty much have one shot at lining things up. If you're off a bit and have to repositon the rails you're going have a mess on your hands (and deck). The tape also bound up in the screws as we drove them in and it also has a tendency to ooze out from what ever its under.
If you seal with caulk be sure not to use 5200 if you ever want to get the rails off again.
 

footrope

Contributing Partner
Blogs Author
I'm not sure how thick your deck is or what your headliner is like, but I'd use nuts and backing washers on a handrail fastener. Drilling a little oversize, filling and re-drilling is a good idea to prevent future leakage into the core. Epoxy can be tapped and that wouldn't hurt, but I'd want a nut there also.

I hope the other handrail is easier to remove.
 
Top