• Untitled Document

    Join us on April 26th, 7pm EST

    for the CBEC Virtual Meeting

    All EYO members and followers are welcome to join the fun and get to know the guest speaker!

    See the link below for login credentials and join us!

    April Meeting Info

    (dismiss this notice by hitting 'X', upper right)

Noob question for new mounting board

Hagar2sail

Member III
Blogs Author
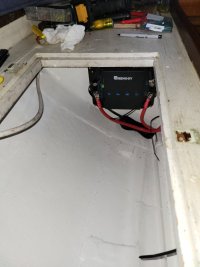
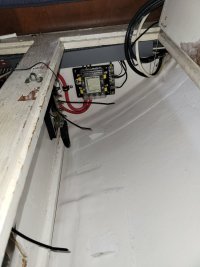
I’m trying to put in a new Dc-Dc charger to support our new lithium bank (blog post to happen when this is all done).
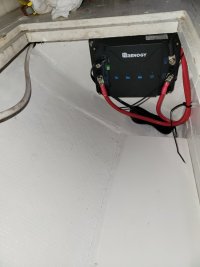
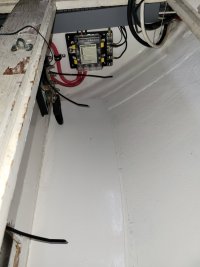
Issue is I need more mounting room. I have decided I need to add a new piece of plywood outboard and next to our starting battery. I made a mock-up of the size of the board and it fits reasonably well. However, I am not very clear on what the “right” way is to attach this to the hull.

For the shelf that supports the battery itself it looks like Ericson just let it sit on the skin, and then tabbed it to the hull. I’m ok with repeating that, but it will make in this case a very small gap that does not allow any access to the hull. It would also mean my tabbing in many places would run over the factory tabbing for the settee which I don’t know if that is great either.

Instead I was thinking of somehow attaching several stand alone blocks to the hull and then screwing the panel to them, but these would seem to have their own issues in terms of how do I make sure they are good enough, the right shape to the shell, and make a single plane for the board. I have considered “gluing” them on with thickened epoxy, but am concerned with making a stress riser in the hull. I recognize that traditional tabbing has give to it that helps.

In all I am probably way overthinking this, but wondering if others have come up with a solution to this issue. I have attached a picture with the panel loosely placed so people can get an idea. It isn’t the final piece of wood in case people start telling me about quality of plywoods, just a mock-up with material I had lying around.
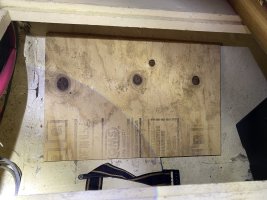
C2CE78B1-7F54-4B0E-B6DF-41C377FA6674.jpeg
 

Tin Kicker

Sustaining Member
Moderator
There are countless ways to tab attachments to the glass and they generally start with sanding to clean glass, then NOT creating a point load, since the hull can take a beating and is only about 3/8" thick in the aft.

Best is to simply build up the area with layers of glass roving in lieu of wood, or at least use marine plywood after giving it heavy coats of sealer to prevent rot. Not Home Depot plywood like OMS which is hopefully just your pattern.
 

goldenstate

Sustaining Member
Blogs Author
The charger is a pretty lightweight little box, right? I wouldn’t overthink it. Glue the board in down there and attach with short screws or mount the charger in a cubby or bulkhead.

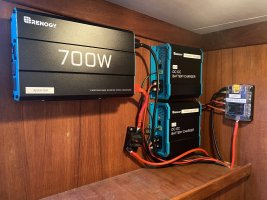
You might want easy access to see the status led lights. I garishly(!) put mine in my aft cabin:

C32689F6-1691-4AD0-8FAF-36FEE43A4C04.jpeg
The charger need not be adjacent to the batteries. A longer wire run may open up better possibilities.
 

Hagar2sail

Member III
Blogs Author
There are countless ways to tab attachments to the glass and they generally start with sanding to clean glass, then NOT creating a point load, since the hull can take a beating and is only about 3/8" thick in the aft.

Best is to simply build up the area with layers of glass roving in lieu of wood, or at least use marine plywood after giving it heavy coats of sealer to prevent rot. Not Home Depot plywood like OMS which is hopefully just your pattern.
So are you saying you would simply build up layers of glass and then screw into it??

See my last statement in last paragraph. This is NOT the quality of plywood I am going to use, just a mock-up. Also, clearly I have to remove the paint in the area once I determine the method of attachment.
 

toddster

Curator of Broken Parts
Blogs Author
Another option: WeldMount studs epoxied to the hull with WeldMount or thickened epoxy of your choice. Or you can make stuff like this on your own. Personally, I prefer plastic panels for mounting things on the boat. I use ABS (same plastic used in car interiors and plumbing drains) but others prefer polyethylene (StarBoard and the like.) It's easy to heat-form if you want an angled tab or such.
51OQ87cCTdL._AC_SL1000_.jpg

Just in case, one thing I learned the hard way. If tabbing anything to the hull, do it when the boat is floating, not in a cradle. The hull won't have quite the same shape...
 

Nick J

Sustaining Member
Moderator
Blogs Author
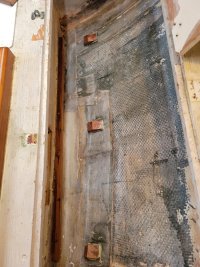
You're not alone in the overthinking this. I'm in the middle of relocating my batteries to below the port settee and installing a DC to DC charger. I built a shelf that spans from the settee plywood to the hull for the batteries to sit. I epoxied wood blocks to the hull and settee plywood that I will screw the shelf to and installed the DC to DC charger on the forward bulkhead in the same compartment. Which DC to DC charger did you end up going with? Here's a pic of the blocks before I painted and installed the shelf. 20220327_140902.jpg
 

Christian Williams

E381 - Los Angeles
Senior Moderator
Blogs Author
That's how I'd do that job, too. Your required battery box and batteries are heavy and definitely need major security.
 

Hagar2sail

Member III
Blogs Author
Another option: WeldMount studs epoxied to the hull with WeldMount or thickened epoxy of your choice. Or you can make stuff like this on your own. Personally, I prefer plastic panels for mounting things on the boat. I use ABS (same plastic used in car interiors and plumbing drains) but others prefer polyethylene (StarBoard and the like.) It's easy to heat-form if you want an angled tab or such.
51OQ87cCTdL._AC_SL1000_.jpg
I considered those weld mount studs, the studs themselves were reasonable…but $45 for the adhesive felt a little rich, plus you have to buy the glue gun separately. If you are doing 50 no big deal, but for 3-4 not so great.
 

Hagar2sail

Member III
Blogs Author
Trickdhat, I am going to be using a bb1230 from sterling, but that is because I can get an almost new one from a friend who is moving up in amperage. If I was going to buy one brand new I would probably go with an Orion from Victron.
 

toddster

Curator of Broken Parts
Blogs Author
I considered those weld mount studs, the studs themselves were reasonable…but $45 for the adhesive felt a little rich, plus you have to buy the glue gun separately. If you are doing 50 no big deal, but for 3-4 not so great.
I usually buy the small size that looks like a double-barreled syringe. No gun needed. About $20. But I also have plenty of West System stuff in the shop - can't help but thinking that it ought to be pretty much the same thing?
 

Hagar2sail

Member III
Blogs Author
I usually buy the small size that looks like a double-barreled syringe. No gun needed. About $20. But I also have plenty of West System stuff in the shop - can't help but thinking that it ought to be pretty much the same thing?
My understanding is the “official” weld mount adhesive is an acrylic versus an epoxy, so no, not the same. That said I can’t speak to how much better or worse it is than epoxy. I didn’t know it came in small tubes, for some reason when I googled I only found the big ones. Intriguing….
 

goldenstate

Sustaining Member
Blogs Author
So are you saying you would simply build up layers of glass and then screw into it??

See my last statement in last paragraph. This is NOT the quality of plywood I am going to use, just a mock-up. Also, clearly I have to remove the paint in the area once I determine the method of attachment.
I don’t think the quality of the plywood is an issue. If the board is going to get wet repeatedly the dc dc charger is going in the wrong place.
 

Nick J

Sustaining Member
Moderator
Blogs Author
I've used these before with thickened West System Epoxy. It held the bracket I had fabricated for the compression post on my 25+. That application didn't apply sheer or tensile forces to the bond, but I would be comfortable using it with moderate loads similar to your DC to DC charger.


Mark F

Contributing Partner
Blogs Author
Tee nuts work well in a similar way. I've used them to secure a DC-AC converter and a battery charger to the hull.
 

dhill

Member III
You're not alone in the overthinking this. I'm in the middle of relocating my batteries to below the port settee and installing a DC to DC charger. I built a shelf that spans from the settee plywood to the hull for the batteries to sit. I epoxied wood blocks to the hull and settee plywood that I will screw the shelf to and installed the DC to DC charger on the forward bulkhead in the same compartment. Which DC to DC charger did you end up going with? Here's a pic of the blocks before I painted and installed the shelf. View attachment 42893

On my 35-3, the outboard side of my port settee encloses a port-side water tank. @trickdhat , did you remove your water tank?

I would like to add battery capacity at some point, but my house batteries are located under the aft inward compartment of the port settee, where there is currently only room for two batteries. I have more room under the starboard settee, aft of my starboard-side water tank, but that would require longer cable runs across the bilge - something I’d rather not do.

BTW, your new tabbed battery compartment looks fantastic! Did you use the Hatteras Off White for paint?
 
Last edited:

Hagar2sail

Member III
Blogs Author
On my 35-3, the outboard side of my port settee encloses a port-side water tank. @trickdhat , did you remove your water tank?

I would like to add battery capacity at some point, but my house batteries are located under the aft inward compartment of the port settee, where there is currently only room for two batteries. I have more room under the starboard settee, aft of my starboard-side water tank, but that would require longer cable runs across the bilge - something I’d rather not do.

BTW, your new tabbed battery compartment looks fantastic! Did you use the Hatteras Off White for paint?
Huh. Our 35-3 only had a tank under the stbd that someone removed and capped off the lines to. Port side has the holding tank for the head foward, then it is just storage until the engine battery in the aft most corner.
 

Nick J

Sustaining Member
Moderator
Blogs Author
On my 35-3, the outboard side of my port settee encloses a port-side water tank. @trickdhat , did you remove your water tank?

I would like to add battery capacity at some point, but my house batteries are located under the aft inward compartment of the port settee, where there is currently only room for two batteries. I have more room under the starboard settee, aft of my starboard-side water tank, but that would require longer cable runs across the bilge - something I’d rather not do.

BTW, your new tabbed battery compartment looks fantastic! Did you use the Hatteras Off White for paint?
No, I have a 50 gallon newer tank under 90% of the starboard settee and a 40 gallon original tank under the V birth. When I was first thinking of relocating the batteries the goal was to help balance out the boat with the 50 gallon tank full. Now that I've decided to go with lithium, I'm not getting as much weight to offset the 50 gallon tank. One nice benefit is the aft section of the port settee is a lot easier to access then the outboard section.

You might be able to add a starting battery to the compartment under the nav desk seat. That would free up a little room in the standard battery compartment. If you're looking for more room, my boat has a large unused space on the port side of the V birth just forward of the shower bulkhead. I would have to cut an access hole to get around the drawers to use it, but it's an easier spot to route battery cables to. I considered this spot for the holding tank when I replaced it, but ultimately decided to keep it where it was.

I used Total Boat Bilge paint. I have enough left over that I will use it for a few other lockers, but I don't recommend it. It's really difficult to put on thin enough to dry quickly. ultimately it will dry hard and durable, but that takes a long time where it ends up a little thick.
 

dhill

Member III
Huh. Our 35-3 only had a tank under the stbd that someone removed and capped off the lines to. Port side has the holding tank for the head foward, then it is just storage until the engine battery in the aft most corner.

This is really interesting re: the different water tank configurations. My holding tank is also under the forward portion of the port settee. The aft-most corner encloses my house batteries. My starter battery is under the nav station seat.
 
Top