racushman
O34 - Los Angeles
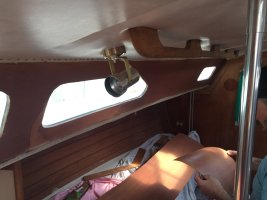
The teak veneer on the inside of the cabin trunk is badly damaged. It’s coming unglued in spots and has some bad water damage around the opening portlights.
My original renovation plan was to remove it and replace with off white Formica. However, was recently looking at it more carefully and wondering if I could remove the veneer, and then paint the area with something like off white Brightsides. I’ve read other posts about people replacing the veneer, but I think I’d rather lighten up the interior with either Formica or paint.
A couple questions for this group:

Thanks,
Rob


My original renovation plan was to remove it and replace with off white Formica. However, was recently looking at it more carefully and wondering if I could remove the veneer, and then paint the area with something like off white Brightsides. I’ve read other posts about people replacing the veneer, but I think I’d rather lighten up the interior with either Formica or paint.
A couple questions for this group:
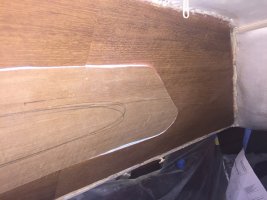
- Is the cabin trunk area around the windows solid fiberglass? It appears to be.
- When others have peeled away the veneer, did you find a surface that was relatively fair (it seems like it would be).
- Has anyone else successfully painted this area and liked the results?
Thanks,
Rob