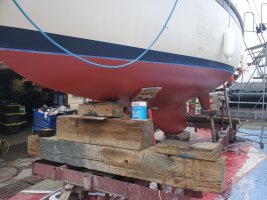
In early December of 2021 we hauled out our ‘72 E27 at Eddie’s Marine in Wilmington, California.
Work performed by me: Replacement of gate valves with Forespar 93 Series seacocks. Installation of seawater strainer. Re-packing of stuffing box. Re-greasing/shimming of rudder post.
Work performed by yard: Bottom paint. New cutlass bearing.
Since I did the work myself and time was an issue, this isn’t a step by step of each repair, but here are some pics and information.
Here’s the old crane at Eddie’s Marine in Wilmington, California. Bottom paint is pretty rough.
A very helpful live aboard at the anchorage helped me re-grease the rudder post. He also showed me how to cut a gasket out of some 3/8” nylon laying around the yard using hole saws in order to remove the vertical play.
Marelon through-hulls in new backing plates made from 1/2” fiberglass sheets (McMaster) qset in cabosil thickened epoxy. These are in the galley. 3/4”engine intake is in the back, and 1 1/2” galley discharge is in front. Had to cut away some of the plywood and foam from the cooler to fit the quite large new seacock.
The old engine intake had a grill clumsily screwed into the hull which created a pathway for water to wick into the old plywood backing plate. I touched it with a screwdriver and the wood disintegrated. Here I have filled in the screw holes with thickened epoxy, and mounted the Marelon through-hulls with lots of 3M 5200.
Forespar 93 Series seacocks installed with 5200. The backing plate for the 1 1/2” valve is slightly smaller than the diameter of the seacock because I didn’t have a large enough hole saw, however, there is plenty of surface for the valve to have stability
Here is the head discharge and intake. I had a fair amount of cavitation behind the old bronze flush mounted through-hulls, which I filled in with Cabosil thickened epoxy.
Head through hulls with fiberglass backing plates. I had to enlarge the hole in the top skin to accommodate the larger backing plate.
Head seacocks installed. 3/4” intake and 1-1/2” discharge. The originals were 1/2” and 1-1/4” bronze, but the Forespar inner diameters in those sizes are slightly smaller. In order to maintain the same functionality, and in order to have the outside flanges fit the recesses a little better you have to upsize by 1/4”.
All of the old bronze through-hulls and valves had to be cut out with a cordless DeWalt multi tool eith. The through-hulls weren’t in too bad of shape, but the backing plates needed to be replaced and I didn’t think I’d be able to get the valves off without destroying them. Plus, I didn’t want to worry about corrosion anymore.
Fresh primer and paint from the boatyard guys.