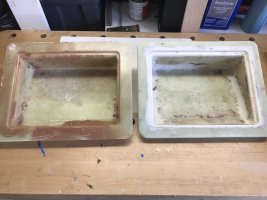
This time I used thickened epoxy on all the edges and let the first course cure before adding the reinforcing layers of biax. This turned out way better with much fewer voids.
Try #2
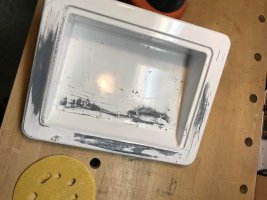
I filled the voids and spent hours sanding it flush. Then I primed it, but the primer cured lumpy, so I spent more hours sanding it smooth.
Primed and test fit
Then I painted it with Interlux Brightsides. And then, when the paint didn’t cure properly, I sanded all the paint off, re-primed it, and sanded it even more.
Failed Paint
By this time familiarity had bred contempt and my standard of perfection was considerably less, so I gave up and painted it. This time the paint cured properly, showing every imperfection I had neglected to sand out underneath it.
By now, two months had passed since I started the project, so I decided not to let the perfect be the enemy of the good and cut all the holes in the enclosure and wired it all up. It looks pretty good from a distance and most importantly is way more durable and functional than the first enclosure.
Wired Up
Final Install
-
20852.jpg
70.8 KB · Views: 1,726
-
20848.jpg
113.5 KB · Views: 436
-
20849.jpg
116 KB · Views: 438
-
20850.jpg
64.1 KB · Views: 414
-
20851.jpg
204.5 KB · Views: 469