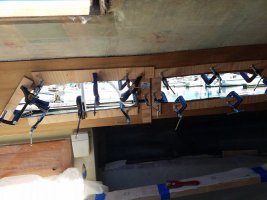
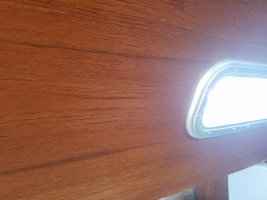
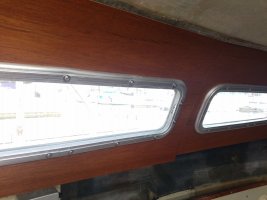
Atach Cabin Side Plywood

Nick J

Contributing Partner
Moderator
Blogs Author
20170128_142341.jpg20170423_111514.jpg20170423_111532.jpg20170423_111545.jpg
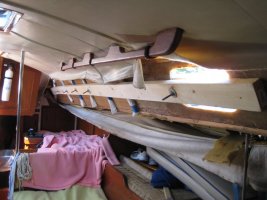
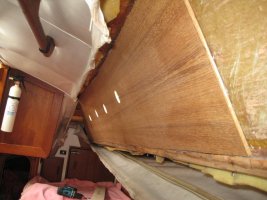
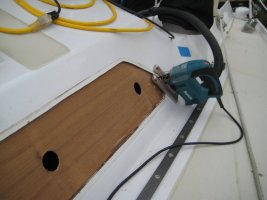
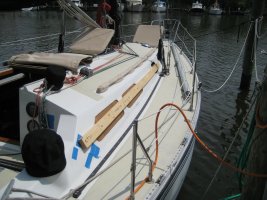
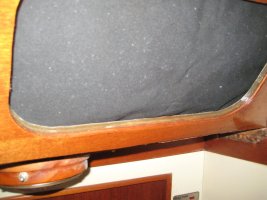
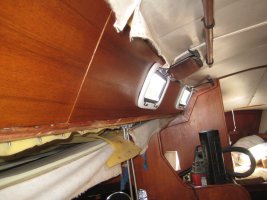
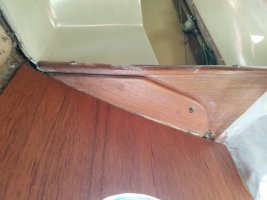
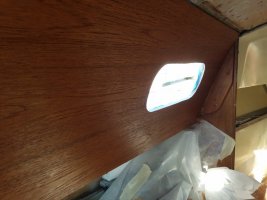
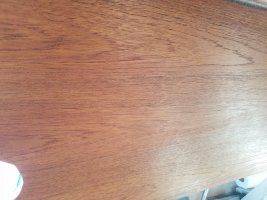
(Pictures are of the template and before the recore)

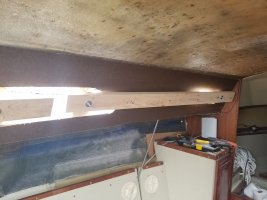
Now that the recore on the port side is done, its time to install the new piece of teak plywood. I've thought about vacuum bagging it, but the aft section would be next to impossible to create a seal and I don't think I could line up the seam between a vacuum bagged piece and a clamped on piece, so I'm wondering how to do it. I've build a clamp using a 2x4, some long bolts, and adjustable table leg feet, but it doesn't seem to apply even enough pressure. I've also thought about placing a bunch of clamps around the ports, but not sure if that would work. Has anyone done this before? What adhesive should I use?

Thanks,

Nick
 

frick

Member III
Holding the Wood

I redid a cabin top once...

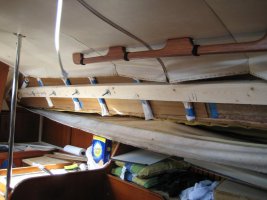
I cut a few two by fours into long stringers.... Bent in them into place let that (Bent Wood) pressure hold the new cabin top wood in place.
Cutting the stringes to the Proper length was done with some extermination...

You could run stringers from the opposite side of the cabin to push the new paneling into place.

Rick+
 

markvone

Sustaining Member
Just did this in Spring

Nick,

I epoxied 1/4 teak veneer plywood to the cabinside using the 2x4 clamping system you show and it worked great with the following tweeks:

Use the LONGEST 2x4 that will fit inside. I used a 10 foot length. You want the inside 2x4 to bolt through both fixed portlight openings AND one forward port opening for the two long aft pieces.

Cut 3/4 inch (half thickness) relief cuts every foot in the inside 2x4 to help it bend and conform to the curve of the interior. Cuts face out toward teak plywood.

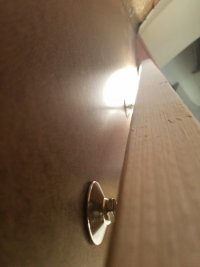
I used 6 inch long 5/16 or 1/4 galvanized carriage bolts from Home Depot with BIG washers (nuts inside) to clamp.

I used 2 bolts per long window cutout (4 total) and 1 in each small (opening) port cutout. Once you tighten the middle bolts in the 2x4 , you force the middle of the 2x4 into a curve against the teak plywood and both ends are sprung against the teak. (In your picture #2, if you had one continuous 2x4 instead of two pieces, the middle bolts would pull the center in to clamp and the ends would be sprung hard into the teak plywood.)

I used vertical boards with felt padding every 15 inches under the inside 2x4 to spread the load to the top and bottom edges of the teak plywood.

I used a cordless drill with deep socket to tighten nuts quickly with one hand while holding the 2x4 and vertical board in place. Snug the bolts to hold the clamping 2x4 in position first and then tighten down starting with the middle bolts.

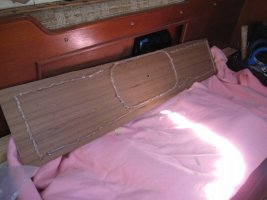
I test clamped each teak piece to test the fit of the plywood to the cabinside and check clamping power. I traced the outline of all the port openings on the outside of the teak plywood during this step to give a guide for applying the West six10 epoxy.

I epoxied one piece at a time using the same 2x4 (and bolts/nuts) for each teak plywood piece. After the two long aft teak plywood pieces were in place on port and stbd, I cut down the inside 2x4 for the remaining 3 short pieces. I did the short piece in the head last and used one bolt through the small port opening which was in the middle to get the 2x4 to conform to the cabinside. As long as you have a bolt in the middle of the 2x4 you will bend it to clamp the teak.

I used West six10 thickened epoxy in the tube. It's more expensive than mixing/thickening your own epoxy but much easier to apply. I tried to mix my own West for my first piece but my hardener was old and that piece literally fell off the next day when I unclamped it. Spreading your own epoxy neatly is a pain compared to the caulking gun. I was also worried about working time because it was hot when I finally got to the epoxy step. Working time with the West six 10 was never an issue so I could take my time and be precise with the fit up and clamping.

I'll post some pictures when I get home tonight along with a description of where to apply the epoxy on the teak plywood to best seal around the port openings to avoid having to do this job again in the future.

Mark
 
Last edited:

Nick J

Contributing Partner
Moderator
Blogs Author
Genius!

I've been worried about this step since I started the project, but now I'm feeling pretty good with your advice.

Did you trim the bottom edge to fit before installing or leave it long and trim after? Any tricks on making the seam between 2 sheets of plywood tight? Thanks again Mark!
 

frick

Member III
Forgot a step...

I redid a cabin top once...

I cut a few two by fours into long stringers.... Bent in them into place let that (Bent Wood) pressure hold the new cabin top wood in place.
Cutting the stringes to the Proper length was done with some extermination...

You could run stringers from the opposite side of the cabin to push the new paneling into place.

Rick+

I also used a rolled on Rubber Cement on the surface of the Wood and the Cabin Top.... Let them dry for 15 or two minutes, and stuck them on, with the stringers holding them in place... I did a dry fit to make sure everything before hand fit... The first pannel is like hanging wall paper ... you get it on straight and the rest are plumb. the glue work really well, and held on as I placed the stringers up.

Rick+
 

markvone

Sustaining Member
Nick,

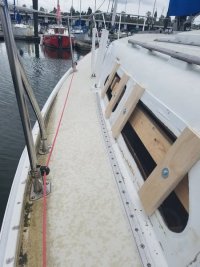
On my boat the teak plywood fits between a trim piece of wood on the bottom edge and the 90 degree corner of the side/top along the top edge (see pic #3). Both of these edges are covered by the edge of the vinyl ceiling material and a piece of teak trim so the teak plywood could be small by up to 1/2 inch along each edge and not matter. That said, I made templates out of manila folders for each of my teak plywood pieces and then cut the pieces out of the 4 x 8 sheet. All of these pieces wound up too wide (top to bottom) due to poor templating on my part and had to be trimmed many times with the jig saw I used to cut them out in order to fit. I wound up test fitting and trimming each piece many times before I got each one ready to clamp. I didn't want to worry about panels not fitting when I had them coated in epoxy ready to kick. Since I did all this fitting, my panels all fit without big gaps along the edges.

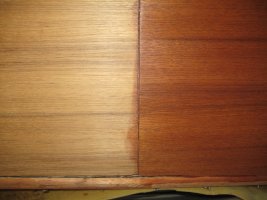
My vertical seam between panels is covered by a trim piece so a super precise fit was not required. I glued my 8 foot long aft sections first then butted the fwd section against it when I was test fitting it. Don't let any epoxy ooze out along this edge or you will have to clean it all out to get the panels to butt together close. I wound up with the gap in pic #5.

Since the ports and portlights when installed will hold the plywood against the cabinside, you don't really need a lot of epoxy to hold the teak plywood on. On my boat, the trim along the upper and lower edges also holds the plywood on so you could really skip the epoxy except for sealing along the edges of the port/portlight cut outs. So, a) run a bead of epoxy around each port cutout (that you traced onto the back of the plywood from the outside) when you were test fitting it and close enough so that it oozes out when you clamp it. and b) DON'T GET ANY EPOXY ANYWHERE NEAR ANY OTHER EDGES (so it won't ooze out!). See pic #4, epoxy bead right against the port cutout oval in the center and the perimeter bead away from the edge by a couple of inches.

Cut out your ports from the outside after the plywood is glued .

Here are some pictures:
 

Attachments

  • IMG_2712.jpg
    IMG_2712.jpg
    80.6 KB · Views: 52
  • IMG_2723.jpg
    IMG_2723.jpg
    83.2 KB · Views: 56
  • IMG_2730.jpg
    IMG_2730.jpg
    91.9 KB · Views: 60
  • IMG_2766.jpg
    IMG_2766.jpg
    68.5 KB · Views: 57
  • IMG_2798.jpg
    IMG_2798.jpg
    93.5 KB · Views: 63
Last edited:

markvone

Sustaining Member
A few more pictures

You want epoxy to ooze out all around the teak plywood/cabinside port cutout on the outside. The jig saw will cut right through it and the plywood using the cutout as a guide. I painted left over six10 on the plywood edge all around each cutout. See picture #3, plywood solidly bonded to fiberglass with no voids and coated on the edge so if the port leaks no water will get into the plywood (again).
 

Attachments

  • IMG_2734.jpg
    IMG_2734.jpg
    65.4 KB · Views: 49
  • IMG_2740.jpg
    IMG_2740.jpg
    108.6 KB · Views: 52
  • IMG_2806.jpg
    IMG_2806.jpg
    76.8 KB · Views: 52
  • IMG_2839.jpg
    IMG_2839.jpg
    91.5 KB · Views: 58
Last edited:

Nick J

Contributing Partner
Moderator
Blogs Author
Wow

That turned out great. What did you use to finish the plywood? I was planning on a light stain (color matched) and teak oil.
 

markvone

Sustaining Member
Nick,

I used Minwax Red Chestnut #232 stain which is a pretty good match to my aged 1981 interior. I covered it with Minwax Helmsman Spar Urethane in satin finish. My interior teak is finished in a satin varnish not oil. Not sure if this was factory or the P.O. but it looks good.

Cover your port cutouts when you stain the teak cabinsides or you will get stain on your deck (don't ask how I know this :mad:).

Mark
 
Last edited:

Nick J

Contributing Partner
Moderator
Blogs Author
I finally got it up!

Including my original idea using cabinet feet, it took 4 attempts, but I finally got it up. The only thing I got to work was using strips of plywood and a ton of clamps around the ports. I had to give up having a good bond between the forward and mid port, but I think it was the only way. My 25+ seems to have a smaller radius curve that didn't allow the 2x4 to conform to the curve. At best, I ended up with 1/4" gaps around the ports.

My first attempt at the 2x4 solution failed when I tested the flex. I only got an inch into the necessary 2 - 3 inch of flex before it broke into 3 pieces. 20170825_111805.jpg
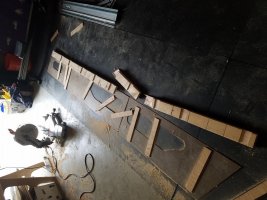
The second one was better, but still left large gaps at the ports. I'm sure you could make it work by picking out a better 2 x 4 (vertical grain or center cut) and playing with the scarf depth and interval, but I really didn't want to down that much time with a disposable jig.

I ended up purchasing 18 clamps from harbor freight and securing the plywood around the ports. The flex in the plywood seemed to provide enough force to get a good bond around the top and sides, but I'll find out tomorrow when I pull the clamps off. I ended up using thickened epoxy applied with a notched spreader. I got good ooze around the ports and bottom edge. I would have liked a little more around the top, but I think it's good enough. Im feeling pretty good about it.
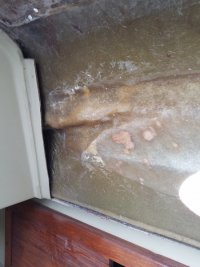
 

Attachments

  • 20170826_123953.jpg
    20170826_123953.jpg
    78.9 KB · Views: 33
  • 20170826_124040.jpg
    20170826_124040.jpg
    83.6 KB · Views: 28

Nick J

Contributing Partner
Moderator
Blogs Author
It's coming together

I got a bit of time yesterday to pop down to the marina and get some more work done. I used a small router with a flush cut trim bit to clean up the ports. I was also able to get the stain on and I'm pretty happy with how it's turning out. I'll epoxy the exposed edges of the plywood around the ports, apply some teak oil, and install the ports next time I get down to the boat. 20170830_180552.jpg20170830_180548.jpg20170830_180543.jpg
 

Nick J

Contributing Partner
Moderator
Blogs Author
Thanks Frank! I was really careful to not zoom out and show the epic pig pen my salon has become with all the tools and material. I got the first coat of oil on today and sealed the edges with epoxy. I think it's actually going to turn out really well.
 

Nick J

Contributing Partner
Moderator
Blogs Author
Ports are in

The last step before being able to sail was getting the ports back in and I was finally able to do it yesterday. Of course, nothing goes as planned and this job was no exception. Before I removed the ports I noticed a gap between the flange of the front port's front corner and the side of the cabin. This was the source of most of the water that caused the plywood to rot. I'm not sure why I thought rebuilding the ports would correct this issue. Sure enough, after tightening the inner ring and compredsing the butyl tape I used to bed the window, the gap was still there. In not sure how I'm going to close it, but I'm thinking of making some shims to go under one inner ring and adding a screw to the inner ring. Hopefully that will be enough to tighten the gap and create a good seal. Overall, I'm happy with how it turned out. Next step is trimming the bottom edge of the plywood, installing trim, replacing the core on the other side of the cabin, installing a headliner, fixing the mast step... Etc but first I think I'm going to get some sailing in. It's about time. 20170904_100151.jpg20170904_125019.jpg
 
Top