I finally got around to installing the MarineBeam LED combo mast light I've had sitting on my shelf for several years. I've been up-and-down the mast a lot this summer doing various projects, so now was the time. I did encounter a few snags along the way which turned this into a ridiculously cumbersome job, but, as I said, I was making multiple trips up the mast anyway.
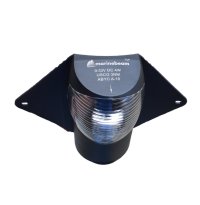
The first snag was that the base (backside) of the lamp is fairly flat. I didn't like that the only thing holding it in place against the curved mast would be one screw in each of the plastic mounting "wings." When I climb the mast, the halyard is weighted with 200+ lbs coming straight down the front of the mast. This tends to push the lamp to one side or the other. I wanted to built a curved mounting base that would fit more snugly against the curved mast.
After kicking around various ideas, I realized that the base of the old AquaSignal combo light I just removed happened to fit nicely behind the back of the MaringBeam lamp, with a better fit against the mast. So, step one was mounting the old lamp's base against the mast. I drilled/tapped two small screw holes in the front of the mast to do this.
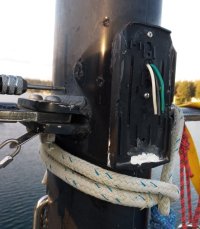
I wasn't left with but about 2.5" of lead wire to work with coming out of the mast. Thus, I couldn't change the position of the light much at all. Then, the second snag came when I realized that the large "wings" of the MarineBeam lamp hit the spreaders before the lamp could be seated against the base I had just mounted. So, I trimmed down the size of the wings and added an aluminum band to the bottom of the lamp. The band would allow me to fasten the bottom of the lamp to the installed baseplate.
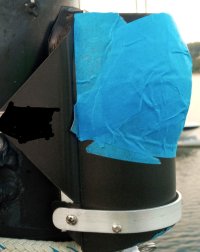
The final snag came when I prepared to attach the plastic wings to the mast. I discovered four old screw holes (from previous lamp installations) on one side of the mast and five holes (one with a jagged, torqued-off, protruding screw end) on the other. I couldn't bring myself to drill another hole in this same vicinity for fear of creating a swiss-cheese-like weakness in the front of the mast. So, I added a stainless steel strap to each of the "wings" to allow the mounting screws to be placed about 2-1/2" further aft. I used a folded-over piece of 316SS hose clamp strap to make the mounting straps.
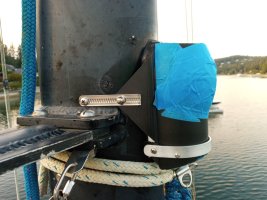
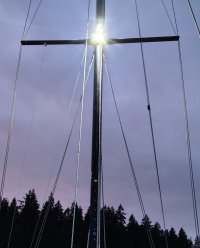
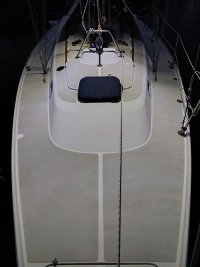
After a successful test-fit, it was back to what a normal light installation should be: crimp and seal a few wires together and Tef-gel all the fasteners in place. In the end, it turned out great. The mounting is rock-solid and the new deck light turns night into day. The two lamps together consume only about 0.7A.

The first snag was that the base (backside) of the lamp is fairly flat. I didn't like that the only thing holding it in place against the curved mast would be one screw in each of the plastic mounting "wings." When I climb the mast, the halyard is weighted with 200+ lbs coming straight down the front of the mast. This tends to push the lamp to one side or the other. I wanted to built a curved mounting base that would fit more snugly against the curved mast.
After kicking around various ideas, I realized that the base of the old AquaSignal combo light I just removed happened to fit nicely behind the back of the MaringBeam lamp, with a better fit against the mast. So, step one was mounting the old lamp's base against the mast. I drilled/tapped two small screw holes in the front of the mast to do this.

I wasn't left with but about 2.5" of lead wire to work with coming out of the mast. Thus, I couldn't change the position of the light much at all. Then, the second snag came when I realized that the large "wings" of the MarineBeam lamp hit the spreaders before the lamp could be seated against the base I had just mounted. So, I trimmed down the size of the wings and added an aluminum band to the bottom of the lamp. The band would allow me to fasten the bottom of the lamp to the installed baseplate.

The final snag came when I prepared to attach the plastic wings to the mast. I discovered four old screw holes (from previous lamp installations) on one side of the mast and five holes (one with a jagged, torqued-off, protruding screw end) on the other. I couldn't bring myself to drill another hole in this same vicinity for fear of creating a swiss-cheese-like weakness in the front of the mast. So, I added a stainless steel strap to each of the "wings" to allow the mounting screws to be placed about 2-1/2" further aft. I used a folded-over piece of 316SS hose clamp strap to make the mounting straps.

After a successful test-fit, it was back to what a normal light installation should be: crimp and seal a few wires together and Tef-gel all the fasteners in place. In the end, it turned out great. The mounting is rock-solid and the new deck light turns night into day. The two lamps together consume only about 0.7A.


Last edited:
