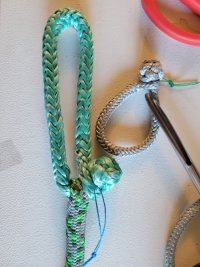
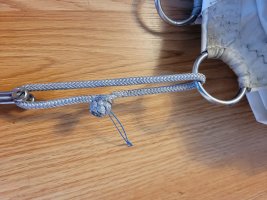
My headsail is generally in good condition, but the Dacron UV cover recently tore where it rubs on the radar dome. I noticed it right before our two week trip to the Gulf Islands this summer, so I decided to wait for the repair until after the season. I had one of the headsails on our 25+ converted to a furling sail which involved having a UV cover installed. I had it done professionally, and I wasn’t too impressed with the job. The stitches weren’t consistent and it looked sloppy. Deciding to do this sail by myself helped me understand the 25+ really wasn’t that bad and these things are way more difficult than I thought. I joked on the October Zoom call that I was 6 weeks into a 2 day job, but when I actually added it all up I realized I’m actually almost 2 months into it!
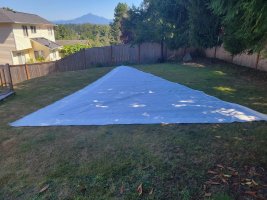
First step was taking it down, laying it out in the back yard and assessing the sails condition. I was optimistic I could get away with replacing the section that was torn. Thankfully, the only issues I found was on the UV cover. The tread was pulling apart and the Dacron was easy to tare. There were also hole in the cover along the edge of the sail, but this did mean the whole cover needed to be replaced.
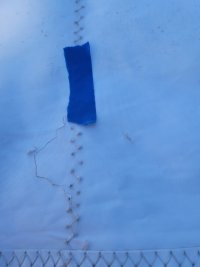
I ordered 8 yards of 4oz UV coted Dacron from Sailrite, 3M 77 adhesive, waxed thread, a speed stitch, and a new leech line cleat. A week later, the order arrived and I started by seem ripping all the stitches used to hold the old cover on. My daughter and I quickly realized I was going to need a few more seem rippers and the deconstruction could have occurred the previous week while we were waiting for the shipment to arrive.
Once all the panels were removed, it was time to lay out the new panels. I chose to go with full length 60” sections to reduce the seams. Sailrite says the tradeoff with larger panels is a less even curve on the foot and leech of the sale, but I didn’t notice too much difficulty with keeing the original shape. I folded and basted a ¾” seam at the inside edge of each section to reinforce the edge. The panels were temporarily glued on the sail with the adhesive. I placed them apx. 1” further in on the sail to offset the seam and cover the old stitch holes.
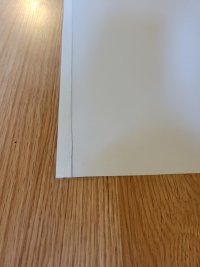
Once they were all in place, I sewed the seams where the panels met. This allowed me to run the seam to the end of the panel and not have to reverse because it would all be folded into the seam on the leach. Next was the inside edge of the cover. This was particularly difficult on my Sailrite Ultrafeed because the throat of the machine is so small. Especially at the head, clew, and tach of the sail where the patches were built up so much it was almost impossible to fold tight enough. The foot and leech of the sail were a bit tricky because I had to follow the original shape with a double folded seem. Basting tape was the key here, but it was another source of delay as I ran out and had to wait a week for a new shipment from Sailrite.
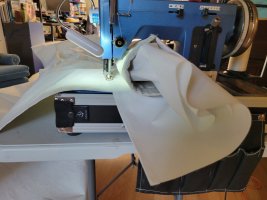
One of the more embarrassing mistakes I made on this project was trying to save time by stitching the old leech line into the new seam and using it as a mousing line to pull the new one in. Of course, the stitches I used to tack to the two together pulled apart about 10’ short which required pulling that section of the new seem apart and retrieving the line.
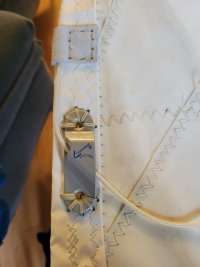
By far the most time-consuming part was finishing the corners. The original UV cover was sewn under the nylon webbing. I didn’t want to remove this as it was an important structural part of the sail, so I decided to place the new cover over the webbing. This was too much for my Ultrafeed to handle and the machine let me know by striking the needle against the bobbin casing and hook. It took me a full day to file, sand, and buff the nick out of the pieces so they didn’t fray the tread anymore.
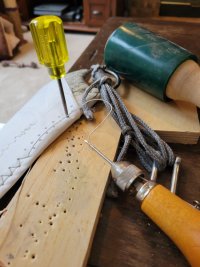
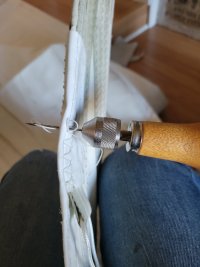
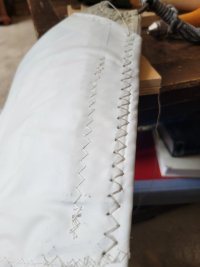
To keep the hand stitching even, I marked out where each hole would go, then used a punch to make a pilot hole. Once all the holes were in place, I used a SpeedStitch (don’t be fooled by the name) to create a lock stitch zig zag. There’s a small section at each corner that isn’t covered by the new UV cover. This was because it was just too thick at those points to sew.
All in all, I think it turned out OK. I do have a newfound respect for sailmakers and industrial sewing machines. I underestimated how important having a space to fully spread out the sail was. Most of the inconsistent stitches and time spent wrestling the sail was due to the sail not having enough room to move around. I had fun doing this, but it’s probably going to be the last UV cover I try to install myself and I have zero desire to sew my own sail. I’ll just have to start saving up for a new one when the time comes.
First step was taking it down, laying it out in the back yard and assessing the sails condition. I was optimistic I could get away with replacing the section that was torn. Thankfully, the only issues I found was on the UV cover. The tread was pulling apart and the Dacron was easy to tare. There were also hole in the cover along the edge of the sail, but this did mean the whole cover needed to be replaced.


I ordered 8 yards of 4oz UV coted Dacron from Sailrite, 3M 77 adhesive, waxed thread, a speed stitch, and a new leech line cleat. A week later, the order arrived and I started by seem ripping all the stitches used to hold the old cover on. My daughter and I quickly realized I was going to need a few more seem rippers and the deconstruction could have occurred the previous week while we were waiting for the shipment to arrive.
Once all the panels were removed, it was time to lay out the new panels. I chose to go with full length 60” sections to reduce the seams. Sailrite says the tradeoff with larger panels is a less even curve on the foot and leech of the sale, but I didn’t notice too much difficulty with keeing the original shape. I folded and basted a ¾” seam at the inside edge of each section to reinforce the edge. The panels were temporarily glued on the sail with the adhesive. I placed them apx. 1” further in on the sail to offset the seam and cover the old stitch holes.

Once they were all in place, I sewed the seams where the panels met. This allowed me to run the seam to the end of the panel and not have to reverse because it would all be folded into the seam on the leach. Next was the inside edge of the cover. This was particularly difficult on my Sailrite Ultrafeed because the throat of the machine is so small. Especially at the head, clew, and tach of the sail where the patches were built up so much it was almost impossible to fold tight enough. The foot and leech of the sail were a bit tricky because I had to follow the original shape with a double folded seem. Basting tape was the key here, but it was another source of delay as I ran out and had to wait a week for a new shipment from Sailrite.

One of the more embarrassing mistakes I made on this project was trying to save time by stitching the old leech line into the new seam and using it as a mousing line to pull the new one in. Of course, the stitches I used to tack to the two together pulled apart about 10’ short which required pulling that section of the new seem apart and retrieving the line.
By far the most time-consuming part was finishing the corners. The original UV cover was sewn under the nylon webbing. I didn’t want to remove this as it was an important structural part of the sail, so I decided to place the new cover over the webbing. This was too much for my Ultrafeed to handle and the machine let me know by striking the needle against the bobbin casing and hook. It took me a full day to file, sand, and buff the nick out of the pieces so they didn’t fray the tread anymore.


To keep the hand stitching even, I marked out where each hole would go, then used a punch to make a pilot hole. Once all the holes were in place, I used a SpeedStitch (don’t be fooled by the name) to create a lock stitch zig zag. There’s a small section at each corner that isn’t covered by the new UV cover. This was because it was just too thick at those points to sew.
All in all, I think it turned out OK. I do have a newfound respect for sailmakers and industrial sewing machines. I underestimated how important having a space to fully spread out the sail was. Most of the inconsistent stitches and time spent wrestling the sail was due to the sail not having enough room to move around. I had fun doing this, but it’s probably going to be the last UV cover I try to install myself and I have zero desire to sew my own sail. I’ll just have to start saving up for a new one when the time comes.

