3/16" UNSCREW-UMS™
 tltools.com
I picked up one of these, several years ago, after having to replace several broken screws in our cabin sole pieces. I decided to be ready for a someday 'next time'. Those sole pieces are screwed down thru an FRP flange. After many years I removed all the sole pieces for refinishing, and ended up enlarging the hole around the broken screw, filling it in with epoxy, and then re-drilling.
Worked fine, but something more efficient really was needed for the "next time." And, here we are in 2025.
So yesterday I was inserting some #6 bronze screws, thru a teak trim batten, and into some solid glass. In a moment of overlooking the ramifications..... I had put in some thickened epoxy to back fill around a 1/4" hole I had to create because the thin surface panel (honeycomb) does not 'hold' screw threads very well going straight into it.
I was tightening the little bronze screws, about ten of 'em and belatedly realized that several had started turning way too easily when almost in. My error was drilling a straight hole like I would in thin surface or in soft material. The hard epoxy can allow threads to cut, but cannot... expand to allow the tapered screw to have room.
So, here I was, contemplating my stupidity, and gazing at little shiny round screw ends, buried in the hard epoxy!
Well, Ratz, as we salty mariners sometimes exclaim.

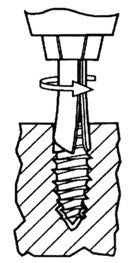
Tried the little tubular "Unscrew-um"device, with its 'teeth' on one end. Slowly turning, in reverse, as the tube cut its way inward, and embraced the broken screw end. Way Cool! ----Just like in their video!
Next I properly re-drilled each hole with a "countersink drill" ( i have a small set sourced from the Woodsmith Store) with its all-important tapered drill end. Screws went in very snug, me being now-careful and paranoid about trying for a last turn!
Anyhow, in a world of over-hyped devices, these are the Real McCoy, IMHO.
I see that on the net, there are many other brands for similar tools, but the URL above is for the one I bought.
Edit: added pix: one with a whole #6 screw and the parts of another broken one afterI removed the threaded part.
Attachments
-
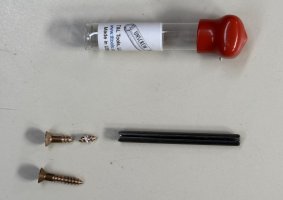 screws & parts.JPG139.7 KB · Views: 8
 -
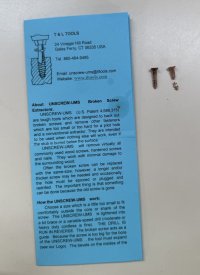 Results & partial datasheet.JPG116.9 KB · Views: 8
Last edited: