• Untitled Document

    Join us on March 29rd, 7pm EST

    for the CBEC Virtual Meeting

    All EYO members and followers are welcome to join the fun and get to know the guest speaker!

    See the link below for login credentials and join us!

    March Meeting Info

    (dismiss this notice by hitting 'X', upper right)

Blue Sea BatteryLink charger?

peaman

Sustaining Member
I need to replace my possibly original battery charger. I've looked at a number of units, including ones mentioned here, all of which seem to be roughly 12" by 8" and 3-4" deep, with either four or five charging steps. I have also looked at the Blue Sea BatteryLink 20A charger which is about 1/2 the physical size of most other chargers, with only three charging steps, but it appears to be a good unit. It includes a built-in ACR (Automatic Charge Relay), and automatic battery isolation at engine start. I wonder if any others here are at all familiar with this unit, or are aware of any concerns over its use? It seems odd that this unit is so much smaller than others of similar capacity while also including the ACR, which I think is not common on other models.

I have 2 banks, one pair of group 24 "maintenance free", and a pair of group 27 flooded 12V batteries.
 

goldenstate

Sustaining Member
Blogs Author
I need to replace my possibly original battery charger. I've looked at a number of units, including ones mentioned here, all of which seem to be roughly 12" by 8" and 3-4" deep, with either four or five charging steps. I have also looked at the Blue Sea BatteryLink 20A charger which is about 1/2 the physical size of most other chargers, with only three charging steps, but it appears to be a good unit. It includes a built-in ACR (Automatic Charge Relay), and automatic battery isolation at engine start. I wonder if any others here are at all familiar with this unit, or are aware of any concerns over its use? It seems odd that this unit is so much smaller than others of similar capacity while also including the ACR, which I think is not common on other models.

I have 2 banks, one pair of group 24 "maintenance free", and a pair of group 27 flooded 12V batteries.
I think of Blue Sea as a well-regarded brand and safe to buy. If form-factor (box size) is your only concern, I would purchase the unit and not worry too much. I have a hazy recollection of there being different types of current inversion methodologies and that probably impacts the form factor.

Speaking from experience, one can twist him/herself in knots for hours with the different charging profiles and methods. One thing my favorite cantakerous marine electronics guy (MaineSail) emphasizes is to disregard the "battery type" selector on the charger and make sure you understand the voltage outputs the charger is serving, and try to make those line up with what you think your batteries want.

Also, this is one of those rare spots where replacing the charger means messing with the AC wiring. You want to make sure that whoever does it, does a good, careful job of installation.
 

Christian Williams

E381 - Los Angeles
Senior Moderator
Blogs Author
For what it's worth, I told a local respected marine electrician to install and set up whatever charger he felt was best. He looked through my AC wiring, fixed a bad outIet, reorganized some grounds and fuses, and briefed me on the switch settings he set up for house vs emergency battery and sailing vs. motoring.

Everything relates to everything else, and I have not regretted professional help in this particular case.
 

Kenneth K

1985 32-3, Puget Sound
Blogs Author
I put in a new 30 A Sterling Pro Charge (from MaineSail's site) 2 years ago. I don't think the Blue Seas charger was on the market then. Some thoughts:

- 20A might be on the low side for charging 2 multi-battery banks, depending on how deeply you discharge them and how quick a re-charge you desire.

- The built-in ACR is interesting. For people who like ACRs (versus just manually using your BATT switch), that could be seen as a plus. But, since ACRs parallel batteries (banks), they are usually connected using full size battery cables (with proper fusing). You likely wouldn't want to use full-sized battery cables as your charger leads (and I doubt the terminals on the Blue Seas charger would accept them). So, this would leave you paralleling battery banks with 10 or 8 GA wire, something which might be viewed as unsafe or at least not standard. I wonder how the Blue Seas installation manual handles this dilemma.

- Specs say the unit draws 10mA when not on AC power. This is probably passive draw from the ACR. While not much, small passive draws are something to consider when away from shore & solar power for extended periods (say on a buoy over the winter, like my boat). ACRs, battery monitors, solar controllers, and automatic bilge pumps/switches all consume these passive loads. Four such loads together will consume 7A-h per week absent some charging source. On a stand-alone ACR, you can typically add an on-off switch to the ground wire to disable the ACR when you don't want it or you know you won't be charging. I don't know if this is an option with the Blue Sea's built-in ACR.
 
Last edited:

Nick J

Sustaining Member
Moderator
Blogs Author
I looked at this as well, but ultimately decided to go with a ProNautic 1230p charger (similar, or maybe even identical to the Sterling charger) connected to my start battery, a Renogy 40 amp DC to DC charger between my start and house bank, and a Blue Sea systems dual bank battery management panel to switch and combine the batteries. I bridged the 3 outputs of the ProNautic to ensure the output diodes are equally loaded.

https://www.renogy.com/dcc50s-12v-50a-dc-dc-on-board-battery-charger-with-mppt/ (now 50 amp instead of the 40 amp I installed)

I found the multi bank function of these chargers wasn't what I needed because they all use the same charge profile. If you are using the same type of batteries for your start and house bank, it could work. If not, you will not be charging one bank correctly and could limit the lifespan. As Ken pointed out, the ACR function requires much larger cables than the 20amp capacity would lead you to believe due to the potential of passing alternator and start current. Blue Sea does a great job of pointing this out in the instrucitons, but it's still easy to overlook of your replacing an exisitng charger.

My solution is far from the one box solution, but I really like how it turns out and it's functioned very well for me and my family since installing.
 

Mr. Scarlett

Member III
No knowledge of this charger but I trust Blue Sea. Is 20A enough? The venerable Maine Sail recommends that charger output should be a minimum of 10% of the bank it is charging.
Everything relates to everything else
This is very true. If you decide to get advice and do it yourself, stick with one person's method and stick with it from start to finish. There's more than one way to do a lot of this stuff, but blending methods/parts from several sources can lead to problems.
 

peaman

Sustaining Member
Thanks to all for your insightful comments, especially KennethK in highlighting the need for much heavier cables for the BatteryLink than for conventional chargers. The BatteryLink has 3/8" terminals for those cables, so no problem there.

After getting deeper into the planning, I was initially confused about primary switching. Since the BatteryLink is intended for a dedicated start/house battery bank distinction, it is not really compatible with a conventional 1-both-2 selector switch. But it appears I can easily replace the existing switch with a new dual-circuit (DPST) battery switch to allow killing all circuits from both banks, or manually combining both.
 

Nick J

Sustaining Member
Moderator
Blogs Author
The 1,2, both switches are good but they have a few drawbacks. The first is the inability to independently turn on your house or starter circuits. This comes into play when you are moored at your slip and would like to keep switched DC circuits on (refrigerator is the main one) without turning on your starter circuit. The second drawback is it's inability to isolate a bad battery bank. If you have an internal short or external short before the switch, using the combine position on the switch will still have the bad bank connected to the system. These aren't huge issues and there are probably hundreds of thousands of installs, but the added benefits of having separate switches for each bank and a combine function may be worth a look. The battery panel I linked above was only slightly larger than the old Guest battery switch I replaced.
 

Kenneth K

1985 32-3, Puget Sound
Blogs Author
After picking a charger, the next difficult decision is where to mount it. Location has a huge impact on the length of the wiring runs. I mounted mine on the sidewall below the nav table because it is out of sight, out of the way (my knees don't hit it), and in close proximity to the battery box and DC panel. Post here: https://ericsonyachts.org/ie/ubs/battery-systems-upgrade.921/

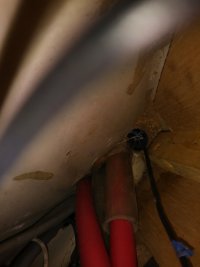
The most logical place to mount an ACR, is of course, where you can't do so--in the middle of the DC panel where all the battery cables come together at the BATT switch. If you can keep it close the DC panel, you can keep the wiring runs short, but it's pretty difficult to drill large holes and run large cables up through the cabinetry floor below the narrow void under the DC panel, shown below:
20200521_234707.jpg (the black wire at the right is a tag line I used to pull a new battery cable with)

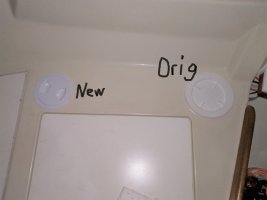
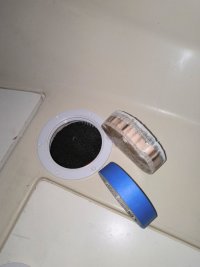
Another place where all the battery cables run close together is the battery box. My house batts/cables are in the battery box and the starter battery cable ran behind the battery box. You can cut additional access ports outboard of the battery box, but have to be careful because there are cables & wiring runs p-clipped to the surface you are cutting into.
20210519_220801.jpg 20210519_233625~2.jpg

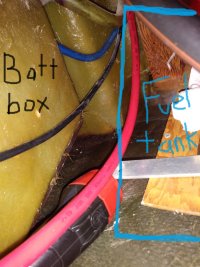
There is also a bit of space (and proximity to the cables) aft of the battery box, but you have to remove the fuel tank to get access to it.
20200229_201738.jpg
 

Solarken

Member II
I need to replace my possibly original battery charger. I've looked at a number of units, including ones mentioned here, all of which seem to be roughly 12" by 8" and 3-4" deep, with either four or five charging steps. I have also looked at the Blue Sea BatteryLink 20A charger which is about 1/2 the physical size of most other chargers, with only three charging steps, but it appears to be a good unit. It includes a built-in ACR (Automatic Charge Relay), and automatic battery isolation at engine start. I wonder if any others here are at all familiar with this unit, or are aware of any concerns over its use? It seems odd that this unit is so much smaller than others of similar capacity while also including the ACR, which I think is not common on other models.

I have 2 banks, one pair of group 24 "maintenance free", and a pair of group 27 flooded 12V batteries.
I would select one of the NoCo chargers. Then you are set for whatever you do with batteries in the future. They’re waterproof and designed to be in boats. I use several types of battery banks at times. Very easy to change.
 

peaman

Sustaining Member
Good notes, KennethK. I intend to mount my new charger under the nav table, as you did. And the integrated ACR in the Blue Sea BatteryLink simplifies some wiring/mounting issues. My 32-3 has the battery switch mounted on the side of the quarter berth, inboard of the battery box, instead of on the DC panel (thankfully) as yours is. I'll replace that switch with Blue Sea "Dual Circuit Plus" battery switch, which is maybe not as flexible as trickdhat's triple-switch solution, but it seems a good improvement from the existing 1/both/2 switch.

Your blog link is appreciated as it shows a number of things I will be getting into, like the fused battery terminal block, and possibly the battery bank kill switch. Your installation of instruments on the panel between the two outboard cubbie holes is an inspired solution and very well executed.
 

Tin Kicker

Sustaining Member
Moderator
On the 32-3 I mounted the charger beneath the nav desk since it is so close to the batteries but don't remember the brand. There's also quite a bit of free space for the ACR or you could "hide" them outboard of the trash door in the cabinet beneath the desk. It is easier to run the cables to the back of the rotary selector switch from there, because it is so tight to get between the grid and hull to get to the actual batteries.

One thing I did for both the Ericson and ODay was to NOT directly wire the charger into the AC system. Instead, I installed a new breaker (BAT CHGR) to a dedicated new outlet next to the chargers. The outlet proved handy for occasionally plugging in all sorts of other things, such as the tool battery charger, portable vacuum, etc.

On the ODay I installed a NOCO GENIUS charger and it's worked just as well for a lot less money. If/when it dies in a dozen years, I just need to unplug it and plug in a new one.
 

GrandpaSteve

Sustaining Member
I would select one of the NoCo chargers. Then you are set for whatever you do with batteries in the future. They’re waterproof and designed to be in boats. I use several types of battery banks at times. Very easy to change.
One of the NoCo reviews mentioned a problem with the charger shutting down because of the refrigerator load when on shore power when away from the boat. Do you have any experience with that situation?
 

Tin Kicker

Sustaining Member
Moderator
One of the NoCo reviews mentioned a problem with the charger shutting down because of the refrigerator load when on shore power when away from the boat. Do you have any experience with that situation?
Not on mine but then my fridge is just a 35L fridge/freezer chest that draws something like 6 amps max.
 

Nick J

Sustaining Member
Moderator
Blogs Author
Although not specific to NOCO chargers, I remember reading about some issues specific to sealed units. I tried to google the article and again found Rod's MarineHowTo. He has some good cautionary info on the NOCO chargers:


When I was looking for my new charger, I thought about going the sealed rout for the same reasons I choose heat shrink wire connectors, but at the end of the day the charger is going in a dry conditioned cabin. If the environment in the cabin changes to one that would require a sealed unit, you'd have a lot more issues than a malfunctioning battery charger. With how much we rely on our batteries and the amount we have invested in them, a good high quality battery charger is worth the investment. The Blue Sea Systems unit above is a good example of a quality unit even if the features aren't for everyone.
 

peaman

Sustaining Member
I could have replaced my 90's era battery charger with a newer one, pretty much in-kind for a simple replacement project. But I had read about the benefits of having separate start and house banks, and an ACR, and, along with the compelling form factor of the Blue Sea Battery Link charger, I decided to go that way. I had also read about the recommendation to have overcurrent protection on all hot wires, so along with the fusing recommended by Blue Sea for the chosen charger, the project was starting to get complicated. But I persisted and have now completed a considerable re-work of my power wiring system.

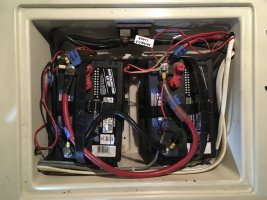
The "factory" battery bank under the quarter berth had been hacked over time, with several "always on" power connections with various fuse types, the battery compartment had been used as a convenient path for wiring to simply pass through, and a non-functioning dual shunt served as the main ground bus:
IMG_3284.JPG
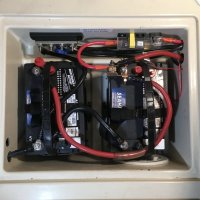
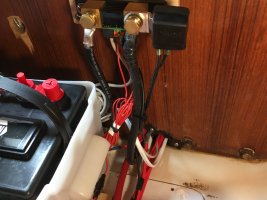
After installation of the new charger, and relocation of the "always on" connections to the dedicated house bank, the starter bank looks a bit cleaner:
IMG_3350.JPG
For fusing at the battery, I liked the idea of an MRBF for compactness, but the height of the fuse block was too much. I was able to solve that problem when I found this kit from Fisheries Supply, so the fuse blocks could be installed horizontally.

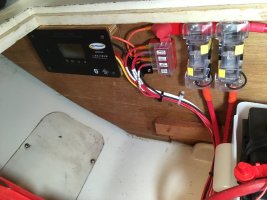
Meanwhile, the dedicated house bank compartment, in the settee just forward of the nav table, was used for installation of fuse blocks recommended by Blue Sea for the charger and alternator connections, and a small fuse block was installed for the "always on" loads. A solar panel controller was also installed. Originally, the alternator output was connected directly to the battery cable at the starter motor. In the revised circuitry, the alternator output is instead connected to the house bank, since that bank will typically need more charging, and more often. Not one to casually modify the complex wiring of my engine, I wondered if that was necessary, but it is recommended by both Blue Sea and MaineSail when start and house duties are separated. In the image below, the two larger fuse blocks join with the smaller 4-circuit unit with a 3-way bus link and a post from Blue Sea.
IMG_3347.JPG
Because so many wires were extended to the house bank (alternator output, charger, "always on", solar), I installed a new conduit from the house bank to the DC panel/charger area, using a 1-1/4" flexible hose intended for a small shop vac:
IMG_3348.JPG

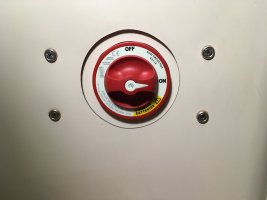
The separate battery banks are connected to their respective loads through a 2-pole switch in place of the original off-1-2-both switch. The smaller face of the new switch necessitated fitting a trim ring for aesthetics, accomplished with some of the same almond colored formica I had used in replacing the countertop in the head. (A 48x90 sheet of Formica goes a long way!)
IMG_3351.JPG

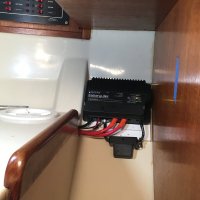
At the heart of all the changes is the charger, which thanks to its compact form factor fits neatly under the nav table:
IMG_3349.JPG
With these improvements, my batteries will be charged by a modern 3-step charger, and my start and house batteries will be kept separated unless a problem arises. So less fiddling with the selector switch, and little chance of draining the start battery accidentally. And while considerable "stuff" has been added to the locker which houses the house bank, there is no appreciable loss in storage capacity, and trouble shooting of any issues in the electrical system has likely been simplified.

Thanks again especially to KennethK for thought provoking comments and blog information.
 

Kenneth K

1985 32-3, Puget Sound
Blogs Author
Nice modifications. I like your setup with the forward battery box under the settee--I don't have that. My starter battery is just "floating" out on its own near the engine compartment, so I had to run all my components back to the main battery box and DC panel, which is a bit more crowded. I like the sideways-mounted battery fuses--why didn't I think of that. Yeah, they don't fit under the lid when upright. Like the bus link bar setup to the fuse blocks, as well.

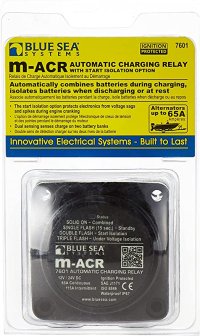
When I did my upgrade 18 mos. ago, I didn't want an ACR but had planned to add a second solar panel. After 18 mos. use, I've changed priorities. The single 50W solar panel keeps the house batteries full most all the time, so the controller just dissipates a lot of potential power. I've felt little need to add a second panel. I do have two other batteries, though, which the solar could easily manage, so my priority switched to adding an ACR, which I'm installing as we speak. I'm generally only using it for solar, so I went with the smaller, Blue Sea M-ACR. But at 65A, it could handle my Motorola alternator too, if I wanted.
810ocno1zuL._AC_SY879_.jpg

Yeah, it's a great feeling to pull off these major electrical re-do's.
 
Last edited:

peaman

Sustaining Member
I like the sideways-mounted battery fuses--why didn't I think of that. Yeah, they don't fit under the lid when upright.
This project cost me far more engineering time than I ever expected, from understanding how it would all work together, to figuring all of the interconnections, to sizing all of the wiring, and then to selecting the hardware to connect it all together in an orderly manner. I bought the larger fuse blocks first, so I could think about layout, but then struggled with making it work. The two minor pieces I linked, the angles, and the triple link were really key to my finding a solution, so I figured I should highlight those for others. If I were to do it over, I would look more closely at the many fuse block packages offered by Blue Sea. But I'm happy with what I have as is.

The forward battery bank was installed by previous owner, with nothing more than individual battery trays with covers. I rotated the batteries so they would be properly run port/stbd versus fore/aft, and added cleats and hold-down straps. The short step from main sole to nav station sole provides space for running wiring discreetly from the forward bank to the quarter berth area.

My 110W solar panel will be installed in a month or two, and I'm looking forward to what charging they can provide. The little m-ACR you found looks like a good solution to keeping everything topped up.
 

goldenstate

Sustaining Member
Blogs Author
I could have replaced my 90's era battery charger with a newer one, pretty much in-kind for a simple replacement project. But I had read about the benefits of having separate start and house banks, and an ACR, and, along with the compelling form factor of the Blue Sea Battery Link charger, I decided to go that way. I had also read about the recommendation to have overcurrent protection on all hot wires, so along with the fusing recommended by Blue Sea for the chosen charger, the project was starting to get complicated. But I persisted and have now completed a considerable re-work of my power wiring system.

The "factory" battery bank under the quarter berth had been hacked over time, with several "always on" power connections with various fuse types, the battery compartment had been used as a convenient path for wiring to simply pass through, and a non-functioning dual shunt served as the main ground bus:
View attachment 46243
After installation of the new charger, and relocation of the "always on" connections to the dedicated house bank, the starter bank looks a bit cleaner:
View attachment 46244
For fusing at the battery, I liked the idea of an MRBF for compactness, but the height of the fuse block was too much. I was able to solve that problem when I found this kit from Fisheries Supply, so the fuse blocks could be installed horizontally.

Meanwhile, the dedicated house bank compartment, in the settee just forward of the nav table, was used for installation of fuse blocks recommended by Blue Sea for the charger and alternator connections, and a small fuse block was installed for the "always on" loads. A solar panel controller was also installed. Originally, the alternator output was connected directly to the battery cable at the starter motor. In the revised circuitry, the alternator output is instead connected to the house bank, since that bank will typically need more charging, and more often. Not one to casually modify the complex wiring of my engine, I wondered if that was necessary, but it is recommended by both Blue Sea and MaineSail when start and house duties are separated. In the image below, the two larger fuse blocks join with the smaller 4-circuit unit with a 3-way bus link and a post from Blue Sea.
View attachment 46245
Because so many wires were extended to the house bank (alternator output, charger, "always on", solar), I installed a new conduit from the house bank to the DC panel/charger area, using a 1-1/4" flexible hose intended for a small shop vac:
View attachment 46246

The separate battery banks are connected to their respective loads through a 2-pole switch in place of the original off-1-2-both switch. The smaller face of the new switch necessitated fitting a trim ring for aesthetics, accomplished with some of the same almond colored formica I had used in replacing the countertop in the head. (A 48x90 sheet of Formica goes a long way!)
View attachment 46247

At the heart of all the changes is the charger, which thanks to its compact form factor fits neatly under the nav table:
View attachment 46248
With these improvements, my batteries will be charged by a modern 3-step charger, and my start and house batteries will be kept separated unless a problem arises. So less fiddling with the selector switch, and little chance of draining the start battery accidentally. And while considerable "stuff" has been added to the locker which houses the house bank, there is no appreciable loss in storage capacity, and trouble shooting of any issues in the electrical system has likely been simplified.

Thanks again especially to KennethK for thought provoking comments and blog information.
Tidy wiring, nice work!
 
Top