• Untitled Document

    Join us on March 28th, 7pm EDT

    for the CBEC Virtual Meeting

    EY.o March Zoom Meeting

    All EYO members and followers are welcome to join the fun and get to know the people you've met online!

    See the link below for login credentials and join us!

    March Meeting Info

    (dismiss this notice by hitting 'X', upper right)

Boom end clean up

Nick J

Contributing Partner
Moderator
Blogs Author
I'm lazy and interested in technology. That can be an expensive combination.

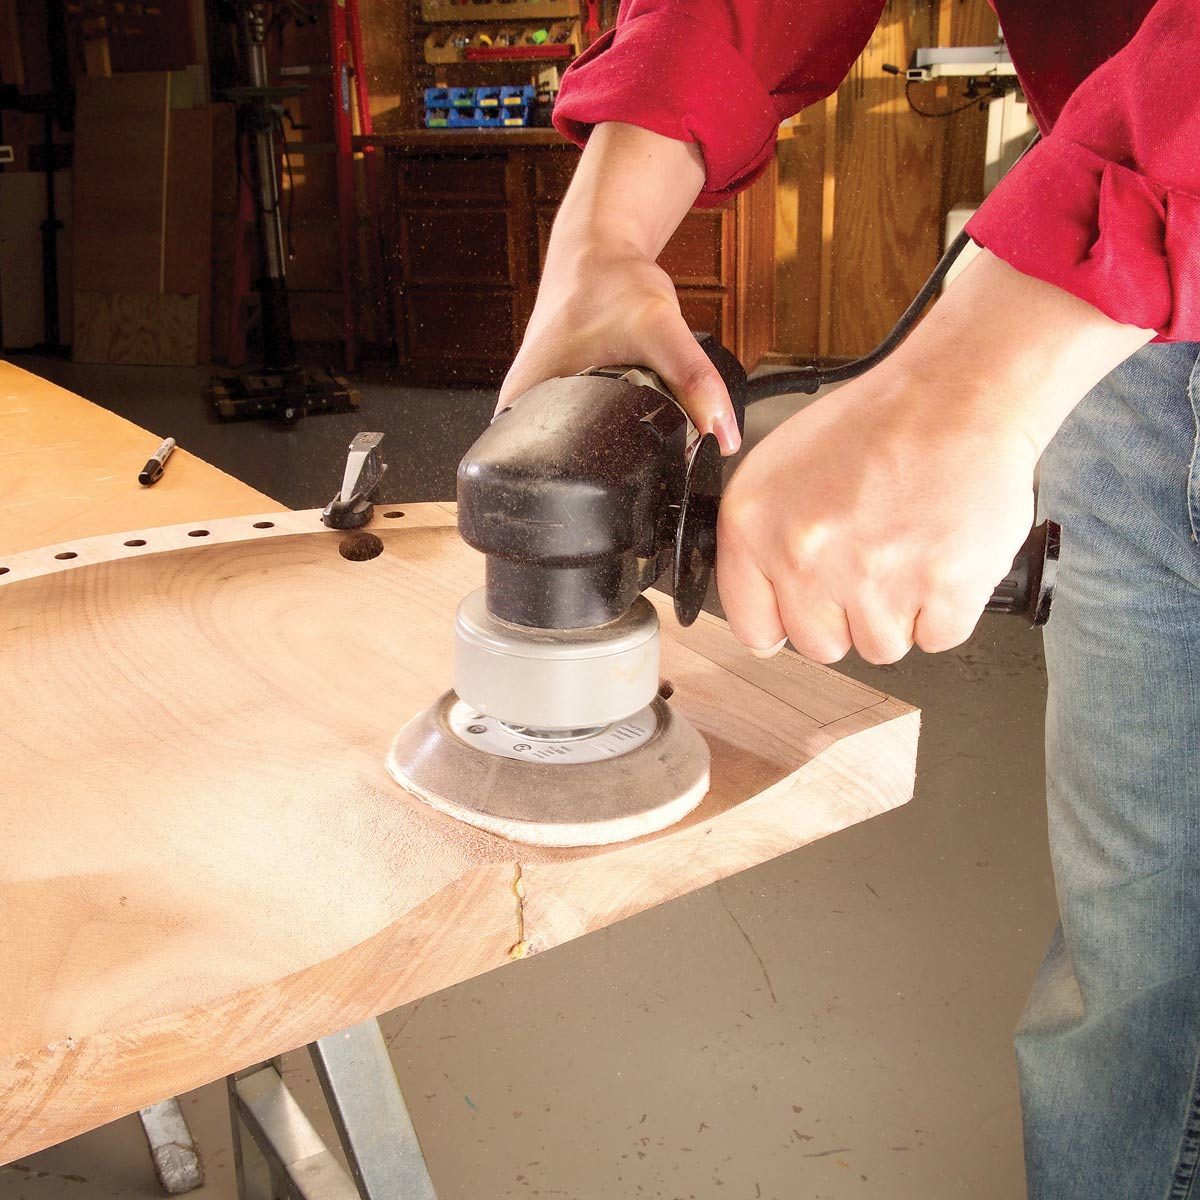
I currently have the boom pulled apart in preparation for painting and the current task at hand is cleaning up the boom ends. Most of the large easily accessible surfaces cleaned up easily with a sander. Now I'm left with the detail sections.

20250124_180040.jpg
20250311_055707.jpg

I've been looking for a media blaster and found a company that specializes in dry ice blasting. I called to request a quote and they said they didn't recommend dry ice blasting because itvwasnt abrasive enough, but they offer a laser cleaning service that may help. He hadn't worked on a sailboat before, so he was excited to try and potentially open up a new market.

Unfortunately it didn't work. The laser removed the paint week, but left the corrosion below want removed and would still require sanding. It was interesting to watch and might have some other applications on our boats. The dry ice blasting might be a good solution for bottom paint and could potentially be an envirinmently friendly alternative. I told him I'd give him a call next time we're out of the water if he wanted to give it a try.

20250312_100224.jpg

So, now I'm back to hand work with a dremel. My experience with a few manufactures of wire wheels is horrible. I haven't found one that lasts longer than a few minutes. I went through a box of 50 cleaning and painting the transmission and ended up with tiny wires impeded in my cloths and exposed skin. Not fun. I didn't learn my lesson and tried again on the mast afew days ago with the same results. Does anyone have a recommendation for a more reliable wire wheel for a dremel?
 

Prairie Schooner

Jeff & Donna, E35-3 purchased 7/21
Hi Nick,

I admire how thoroughly you're going at this. Thanks for the great documentation.
Danger: Data Torrent Ahead

For fine scale detail sanding there are a bunch of tools used in metal finishing and jewelry that might work well for you.
Somewhat scattershot are:

There are variations you can do for a sanding mop with a mandrel and sand paper.
- https://www.instructables.com/Make-your-own-Sanding-Mop/
cu hm sanding mop L2.jpg

Smaller mandrels are available.
cu pm screw mandrel.png
For a smaller mop to use in a flex shaft I take a one inch strip, fold it over itself in 1" laps as many times as I like and punch a hole in the middle. I don't cut radial strips like the mops show in the link. I don't even slice the folds. A few passes on something coarse will break the corners and regulate the edges.


You can use a split mandrel with a strip of sandpaper wound around it. This is great for honing holes or inside radii. It's not a precise hone, so I wouldn't use it for tight tolerance compression cylinders, but otherwise quite handy.
cu pm split mandrel.png
All these things can be scaled up or down for your needs.


Sanding sticks:
Get wooden, plastic, or ? shapes that are the negative form of what you want to sand and apply sandpaper. I've used rubber cement, spray mount, or double stick tape. Foam double stick can be useful if you want to add a little flex to the contact.
Shapes can be flats, dowels, complex curves, little 'fingers'.
cu hm sanding sticks vid.png
This guy's 4 minute video is pretty much summed up in this screen shot. And I'd use something more robust than a glue stick. Slice them apart with a utility knife.

cu pm stix 1.jpg
Shapes/tools like this are available commercially. I've made similar.

If you Want to use technology, you could 3D print out some custom shapes:
cu hm 3Dp stix 2.jpg
There have got to be digital files available out there.

But I've used these types of tools and like the glued on wood forms better.
cu pm loop stix 1.jpg

You really don't even need to glue the sandpaper on. You can just tear/cut it to size and hold it on by hand.


There are shapes made of elastomers embedded with abrasive, available in different shapes. One long-running brand is Cratex.
- https://contenti.com/finishing-abrasives/arbors-n-mandrels
- https://contenti.com/finishing-abrasives/abrasives/mini-rotary-abrasives
Rio Grande is another jewelry supply house with even more selection, but you may need to start an account there.
cu pm cratex shapes.jpg

A spiral mandrel is needed for some of them.
cu pm spiral mandrel.png


On Amazon look for "Dedeco Sunburst Radial Bristle Discs". Those spirals are useful, but then scroll down to "products related to this item". You'll find a bunch of other options. I picked Dedeco randomly. No particular brand recommendation implied.


I've used these abrasive buffing wheels, essentially scotchbrite, to good effect. They're available in different sizes and shapes.
cu pm abrasive wheels.jpg

Continued in Part 2
 

Prairie Schooner

Jeff & Donna, E35-3 purchased 7/21
Data Torrent part 2

Scrapers can be quite effective. Just an old pocket knife works. For some extra control, hold it with one hand and push with the other thumb. More specialized is a triangular scraper, sometimes called a machinist scraper. For a proper edge you'll probably need to hone the faces of anything you buy at a moderate price.
cu pm scraper 1.jpg

For more precise scraping you can use gravers:
cu pm gravers 2.jpg


This page has some great tips, including some I want to try out:

I just sort of belched all this out. Some may need further explanation. Hopefully something will be of help.

Cheers,

Jeff
 

Nick J

Contributing Partner
Moderator
Blogs Author
Wow Jeff, Thank You. that's a ton of information. It looks like the Contenti site is going to be a great resource.
 

Kenneth K

1985 32-3, Puget Sound
Blogs Author
For nooks & corners, have you tried a chemical paint remover? $31.50 on Amazon.

paint remover.jpg

Unfortunately, I've had the same experience with Dremel wire wheels--you end up wearing them. :(
 

Christian Williams

E381 - Los Angeles
Senior Moderator
Blogs Author
Technology runs amok everywhere, but dental techs still use a pick to scrape the plaque off the hidden recesses of teeth . Mechanical method works.

Also, nobody but us bothers to look closely at a gooseneck, and a few sprays with Rustoleum black gloss on raw and rough aluminum has worked for me.

I mean, not to take the fun out of it all....
 

Nick J

Contributing Partner
Moderator
Blogs Author
Paint removal actually isn't the difficult part. There's a layer of corrosion between the paint and good metal, so if the paint is dissolved, burned off, or mechanically removed, I still have to remove the corrosion. You can see it in close up picture of the fitting. it's a white layer between the blue paint and shiny metal. I guess there was enough dissimilar metals contact in the boom end to cover almost the entire fitting with corrosion. On the rest of the spars, the corrosion is isolated to a few inches around each fitting. Enough to need a repaint, at least in my mind, but not affecting structural integrity yet. On the relatively flat surfaces of the mast and boom, it comes off easily with a sander. Now I'm just trying to figure out the best tool to mechanically remove the stuff in the tight spots. Jeff has some great options above.
 

gabriel

Live free or die hard
That part just needs to be sandblasted to ‘white’, then finished with your coating of choice.

Out of curiosity, why blast it with laser instead of sand?
 

Prairie Schooner

Jeff & Donna, E35-3 purchased 7/21
Technology runs amok everywhere, but dental techs still use a pick to scrape the plaque off the hidden recesses of teeth . Mechanical method works.

Also, nobody but us bothers to look closely at a gooseneck, and a few sprays with Rustoleum black gloss on raw and rough aluminum has worked for me.

I mean, not to take the fun out of it all....

As I was teaching shop for college ID students, shortly before a due date there would inevitably be a line at certain machines. With over a dozen students waiting for the band saw, one of us instructors would direct one of them over to a cabinet where we selected an appropriate hand saw and reminded them how to complete the cut in a trice. The others usually got the hint. Power tools are great but sometimes a simpler solution is equal or better.

But it is fun learning about new technologies and I've got my share of power tools. I've seen videos of the laser tool on rusty ferrous parts. It looked amazing. Thanks, Nick, for the report on it with aluminum.
 

Nick J

Contributing Partner
Moderator
Blogs Author
Friday was an interesting day. In addition to cleaning up the boom, I’m still trying to get a few of the chain plate backing blocks replaced due to corrosion. I met with a high precision CNC machine shop a few weeks ago, but they were too expensive due to the CAD time necessary to model the parts. They recommended finding a shop that specializes in manual machining. My rigger recommended Everett Sound Machine Works so I stopped in and met with them on Friday.

1742304380788.png

It was like stepping back in time. Even the floor was raw wood planks that showed the ware of decades of machining work. They had everything from welding to mills, and the remnants of a paint booth. He said he wouldn’t recommend leaving him the parts because he was swamped and would have a difficult time matching the tie rod socket contour. I’m a manufacturing engineering by education, but ended up in Telecom and don’t get to too many chances to see machine shops anymore, so I asked for a tour of the shop. As soon as I said Telecom, he lit up and said I have something for you. It turns out ESMW was the original manufacturer for most of the equipment racks, cable trays, battery racks, and most other metal items used in GTE’s (our local telephone company) central offices. My first job out of collage was for GTE’s successor, Verizon and I recognized all lot of the remnants left over from the business scattered around the shop. When we made our way to the office, he pulled out a product catalog I had used at Verizon to order some equipment. Turns out, he drew most of the engineering drawings in the catalog. It’s a small world.

I had the boom fittings in the box of parts that included the chain plate backing blocks and he asked if I was looking for some help cleaning them up. He recommended I took them across the street to Pacific Performance Coatings and have them sand blasted.

The guys at Pacific had the boom ends done in 90 minutes and $40. From there, I used a Dremel with some of the polishing bits Jeff recommended above. With all the paint and corrosion removed, you can see how the part was manufactured. It looks like the gooseneck end is actually cast in two parts with a base piece that caps the extrusion and the ears that hold the reefing and outhaul sheaves as well as the actual gooseneck connection.

20250314_195610.jpg
20250314_195618.jpg
20250314_195628.jpg
 

Christian Williams

E381 - Los Angeles
Senior Moderator
Blogs Author
they were too expensive due to the CAD time necessary to model the parts.

I got a bid on CAD modeling, sent the company some photos of my gooseneck. Came back $2500.
 

Nick J

Contributing Partner
Moderator
Blogs Author
they were too expensive due to the CAD time necessary to model the parts.

I got a bid on CAD modeling, sent the company some photos of my gooseneck. Came back $2500.
No guarantees yet, but I just downloaded AutoCAD Fusion 360 and purchased a 3D printer. In addition to modeling and testing the fit of replacement u-bolt backing blocks, I'm going to try to model the boom end fittings and see if I can come up with a way to have parts manufactured. This is a huge stretch goal and more of a fun project than a necessity, but there are a lot of owners out there who are more in the necessity camp than nice to have. I'm still moving forward with using the existing fittings, so this project won't hold up the refit project.

20250317_205836.jpg
 

Prairie Schooner

Jeff & Donna, E35-3 purchased 7/21
No guarantees yet, but I just downloaded AutoCAD Fusion 360 and purchased a 3D printer. In addition to modeling and testing the fit of replacement u-bolt backing blocks, I'm going to try to model the boom end fittings and see if I can come up with a way to have parts manufactured. This is a huge stretch goal and more of a fun project than a necessity, but there are a lot of owners out there who are more in the necessity camp than nice to have. I'm still moving forward with using the existing fittings, so this project won't hold up the refit project.
Nick,

If you're thinking of casting, it's possible to 3D print in a wax that can be lost-wax cast. In using ceramic shell molds you can get complex geometries and undercuts that are not possible with sand casting. One thing to factor in is shrink rates. But one of the advantages of parametric modeling is that you can scale up easily. Personally, I'd model to size then scale up the wax model based on recommendations of the foundry. Also, assure that while being modeled the part has a relatively consistent wall thickness throughout (nominal wall thickness) so it cools/shrinks equally, reducing sink and warpage. In my limited experience with the wax filament it was temperamental. I'd print iterations at 1:1 in regular filament to test fit then send the enlarged final digital model to a 3D printing vendor to print in wax. Outsource that headache. I used Fusion 360 and liked it a lot, though I've gotten rusty as I haven't had much need for 3D modeling in recent years.

If you already know this stuff, my apologies for being pedantic. I've had some experience with it, but it's dated and I was never an expert.

What are those green parts? Are those the final part or test models? 3D printed or something else? What's the material?

Cheers,
Jeff
 

Nick J

Contributing Partner
Moderator
Blogs Author
Thanks Jeff! The green parts are 3d printed PLA parts from a Bambu P1S printer.

20250317_200229.jpg

I haven't tried it yet, but according to the interwebs, you can use PLA in place of wax for lost casting. My original plan was to model the contour of the boom so I could create a new end plate, then have ears welded to that to create the final part (similar to this post a few years ago: https://ericsonyachts.org/ie/threads/kenyon-gooseneck.17211/). After messing around with the 3D printer, Fusion, and doing some research, the lost PSA option seems like a viable option as well. This is all still just theory, but it's fun to tinker with.
 

Kenneth K

1985 32-3, Puget Sound
Blogs Author
The guys at Pacific had the boom ends done in 90 minutes and $40.
Perfect!

I happened to stumble upon a small machine shop about 5 miles away from my house after I used their parking lot one day to do a U-turn. I stopped in to talk to the guy a week later. It's just a 2-man shop, and yeah, he was happy to give me a tour after I expressed interest in his machinery. He routinely makes one-off boat parts for locals for cash. When I drop parts off, he typically takes about 3 weeks to get them done. It might pay to just drop-in on some other local shops--probably, the smaller the better.

20250314_195610.jpg 20190717_180011.jpg
Also, you may be aware of this, but those main gooseneck bolts and bolt-holes often get misshapen/enlarged due boom loads. The more misshapen they get, the more play it allows in the fitting, which I think is what eventually leads to failure of those holes. I forget the actual sizes, but I think my original gooseneck bolt was 3/8" dia. The gooseneck holes were already worn larger than that so I re-drilled them (and the associated SS fitting on the mast) to 10mm and upsized the bolt to 10mm.
 

Prairie Schooner

Jeff & Donna, E35-3 purchased 7/21
Thanks Jeff! The green parts are 3d printed PLA parts from a Bambu P1S printer.

I haven't tried it yet, but according to the interwebs, you can use PLA in place of wax for lost casting. My original plan was to model the contour of the boom so I could create a new end plate, then have ears welded to that to create the final part (similar to this post a few years ago: https://ericsonyachts.org/ie/threads/kenyon-gooseneck.17211/). After messing around with the 3D printer, Fusion, and doing some research, the lost PSA option seems like a viable option as well. This is all still just theory, but it's fun to tinker with.

Green parts: Are those trial pieces to test fit? Will you have the final pieces CNC-ed?

Casting w PLA: I've heard of that too. The issue would be residual ash which could contaminate the casting. For such a critical structural part I'd want the best quality. But if you have a foundry who will work with you it's worth experimenting with. I've heard of people doing a blast of air to clear out ash. A bit tricky with a mold that might be 1000º.

Thanks for sharing that gooseneck thread. It was a little before my advent here and I hadn't seen it.

J
 

Nick J

Contributing Partner
Moderator
Blogs Author
Green parts: Are those trial pieces to test fit? Will you have the final pieces CNC-ed?

Yes - Sending parts out to get machined is expensive, so this allows me to test fit before going down that path. It's also a lot of fun.

I'll have to take a look at the wax filament. It would be really cool to get a good model that we can share and have others make with their local foundry or CNC shop

I spent a little time last night taking a preliminary stab at modeling the boom end contour. I first traced the boom end on a sheet of graph paper, took a picture of it, imported it to Fusion and traced to make the outline. First stab wasn't bad. It needs some refinement, but it's close. I think some of the error was due to me not centering the camera directly over the sheet of paper. I should be able to get a better print by scanning the sheet of paper instead of taking a picture of it.
20250319_055131.jpg
20250319_055213.jpg
 

Prairie Schooner

Jeff & Donna, E35-3 purchased 7/21
Nice, Nick. Make's me want to fire up Fusion again and maybe buy a printer.

Did you use your phone for the pic? The standard phone lens is typically wide angle which would create some distortion. The closer you can get to a 'normal' lens, the better the reproduction would be. Using optical 'telephoto' or backing away from the part should help. - Great functionality in the CAD to be able to trace like that.
 

ConchyDug

Member III
Those Bambu units are slick, I was able to design and replace all the light bezels in my boat with the translucent PETG with my P1S. Also fired out some nice cleat chicks for some sport boats so they don't snag spinnaker sheets. Also found a model for mounting fans to the Victron products like the MPPT and DC-DC chargers to keep them cooler... gotta have hobbies right.

I'll definitely be watching this post to see what happens with the 3d printing.
 

Nick J

Contributing Partner
Moderator
Blogs Author
Those Bambu units are slick, I was able to design and replace all the light bezels in my boat with the translucent PETG with my P1S. Also fired out some nice cleat chicks for some sport boats so they don't snag spinnaker sheets. Also found a model for mounting fans to the Victron products like the MPPT and DC-DC chargers to keep them cooler... gotta have hobbies right.

I'll definitely be watching this post to see what happens with the 3d printing.
Yeah, the Bambu seemed like the best easy-to-use, low maintenance printer on the market. I've been looking at printers for a few years and finally pulled the trigger. My son has a resin printer, but that thing is a mess and not very practical to use. I think the PS1 is going to be a huge help both with part verification before sending to a machine shop and making little parts like organization trays and and adapters for things like oil extractors and inflatables. I'm also planning to print some drill guides for drilling the U-Bolt holes. The possibilities are endless.
 
Top