Good day friends!
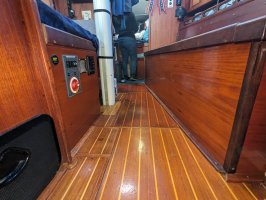
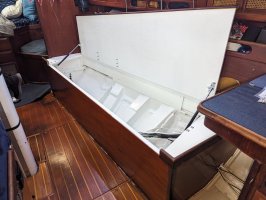
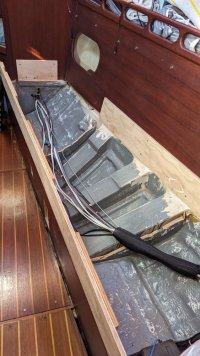
We recently completed the installation of our new Solarmaax 10 water maker from Electromaax. I'm writing this post just offshore of Moonstone Cove at the White's Complex at Catalina Island California. This is our sixth night here and I am so happy to report that the system has performed unbelievably well. The water is clear and the water temp is currently 56F. We are finding that the system consistently produces 8.5 to 9 gallons of water while consuming less than 110 watts of power. We have a relatively small water tank as we removed the thirty-five gallon tank under the port settee ahead of the sink for our 900ah LifePO4 battery bank and now only use the twenty-five gallon tank in the lazarette. We use a lot of water each day! I have restless leg syndrome. The best therapy short of walking or swimming is a shower. We use to have to take the dingy to Avalon which is about 3.5 mile or 15-20 minute dinghy ride daily to fill (3) 5g jugs to top off the tank from that previous days use. We really had to watch our consumption to only use 15g per day. Now, we have limitless water. We are finding that its easiest for us to simply turn on the device when we take showers to replenish what we're using while keeping the tank topped off. Same goes for washing the boat. I simply turn the device on and let it run. With so little power used and its nearly silent operation with the lazarette closed it just does its thing in the background. When we notice water coming from the tank vent we shut it down. We have 1200 watts of solar on the boat normally and then when at anchor we deploy our solar boom shade which each side has an additional 500 watts of solar. In that mode we have 1900 watts deployed. Needless to say, we have enough power to run the heater at night and the electric hot water heater in this mode. If we experience a cloudier day, we can fire up the Westerbeke which we have an Electromaax 250 amp alternator connected to which only burns around .6gph at 1600 rpms putting out between 160 and 180 amps of power at that range. In short order, we can top off the batteries if need be with the bonus of hot water. We installed a dedicated Victron smart shunt for the water maker to make it easy to track usage.
Astral, our 1989 Ericson 380-200 is the perfect cruising boat for my wife, cat, and I. The boat is a smaller than many other 38-footers, but with economical access to smaller more efficient systems, we have found the boat has more than enough room for all of the systems we need and assuming we do the work ourselves, quite economical to refit with modern systems. And oh my does she sail well!
John Stevens and his team at Electromaax have helped us with our system design and provided us with numerous components and stellar support. Peter Kennedy at PKYS Inc. also offered a ton of guidance for our ships electrical system, provided us with quite an array of Victron gear, and helped make sure we have a safe and ABYC compliant installation.
Short video of the system running -> https://photos.app.goo.gl/D1KqbZipW8HwviqS7


Luisa and Seth Mixon
S/V Astral
We recently completed the installation of our new Solarmaax 10 water maker from Electromaax. I'm writing this post just offshore of Moonstone Cove at the White's Complex at Catalina Island California. This is our sixth night here and I am so happy to report that the system has performed unbelievably well. The water is clear and the water temp is currently 56F. We are finding that the system consistently produces 8.5 to 9 gallons of water while consuming less than 110 watts of power. We have a relatively small water tank as we removed the thirty-five gallon tank under the port settee ahead of the sink for our 900ah LifePO4 battery bank and now only use the twenty-five gallon tank in the lazarette. We use a lot of water each day! I have restless leg syndrome. The best therapy short of walking or swimming is a shower. We use to have to take the dingy to Avalon which is about 3.5 mile or 15-20 minute dinghy ride daily to fill (3) 5g jugs to top off the tank from that previous days use. We really had to watch our consumption to only use 15g per day. Now, we have limitless water. We are finding that its easiest for us to simply turn on the device when we take showers to replenish what we're using while keeping the tank topped off. Same goes for washing the boat. I simply turn the device on and let it run. With so little power used and its nearly silent operation with the lazarette closed it just does its thing in the background. When we notice water coming from the tank vent we shut it down. We have 1200 watts of solar on the boat normally and then when at anchor we deploy our solar boom shade which each side has an additional 500 watts of solar. In that mode we have 1900 watts deployed. Needless to say, we have enough power to run the heater at night and the electric hot water heater in this mode. If we experience a cloudier day, we can fire up the Westerbeke which we have an Electromaax 250 amp alternator connected to which only burns around .6gph at 1600 rpms putting out between 160 and 180 amps of power at that range. In short order, we can top off the batteries if need be with the bonus of hot water. We installed a dedicated Victron smart shunt for the water maker to make it easy to track usage.
Astral, our 1989 Ericson 380-200 is the perfect cruising boat for my wife, cat, and I. The boat is a smaller than many other 38-footers, but with economical access to smaller more efficient systems, we have found the boat has more than enough room for all of the systems we need and assuming we do the work ourselves, quite economical to refit with modern systems. And oh my does she sail well!
John Stevens and his team at Electromaax have helped us with our system design and provided us with numerous components and stellar support. Peter Kennedy at PKYS Inc. also offered a ton of guidance for our ships electrical system, provided us with quite an array of Victron gear, and helped make sure we have a safe and ABYC compliant installation.
Short video of the system running -> https://photos.app.goo.gl/D1KqbZipW8HwviqS7
Luisa and Seth Mixon
S/V Astral
Last edited: