Ericson 30+ Rub Rail Replacement and Cost

Tin Kicker

Sustaining Member
Moderator
The following discussion is relevant to Ericson 30+ owners:
Image 1 - bow after metal cap is removed.

View attachment 41975

Now that you know how to do the rub rail joints, the forestay chainplate is screaming for attention. The glass behind it has been crushed and the screw is loose, as if somewhere it bumped straight into a dock or piling. Also needing inspection is why there is a horizontal crease above the screw because this is how the flex area looks before a horizontal crack starts from the screw hole. Seen it.
bow-straight-on-jpg.41975


I would recommend taking the chainplate off, inspecting the back side of it and the hole with a 10X magnifier & dye penetrant, and then seeing what glass damage needs to be repaired behind it. Once removed and because re-rigging will be required anyway, replacing the chainplate as a precaution would not relatively add a lot of cost ($500?).

Sorry
 

Christian Williams

E381 - Los Angeles
Senior Moderator
Blogs Author
For the record, thickening epoxy is widely accepted and a best use of the product:


mjsouleman

Sustaining Member
Moderator
Tin Kicker

Good eyes, I was waiting for someone to pick that up. Discovery is a 1983 Ericson and I have to guess the chainplates are original and are next up on the Spring repair list and yes the glass behind it need to be attended to when the chainplates are removed. So much work, so little time.

Mark "Souleman" Soule
 

mjsouleman

Sustaining Member
Moderator
Thank you again Tin Kicker, In the back of my mind I have had nagging thoughts of hull flex and brittle epoxy. Watch the April 22nd Virtual meeting to see the next phase of this experiment.

Mark "Souleman" Soule
 

Tin Kicker

Sustaining Member
Moderator
For the record, thickening epoxy is widely accepted and a best use of the product:

I agree with you and your link Christian, to a certain point.

I got into this during an accident investigation in which the builder of an experimental kit airplane needed to add micro balloons. The bond didn't hold and he ended up dead. We did tests with the airplane designer and had a lot of talk with the epoxy maker too.

The short version was that some can increase the strength, but the amount is really hard to determine. Optimum was something between runny and honey. Unfortunately most people have no idea and create something more like thick plaster, which is far beyond the peak of the strength curve.

Regards,
Bob
 
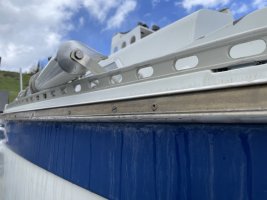
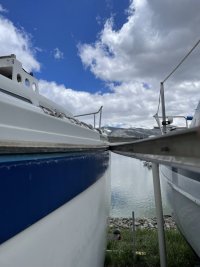
Since we had a few inches of snow this morning, I headed over to the marina to check for water intrusion, and this is what I found.
The water in the video is coming from slowly melting snow on the deck, flowing onto the rub rail and seeping through the hull penetrations.
There appeared to be penetrations from the installation of the rub rail, screws and rivets penetrating the hull unbedded.

IMG_0171.JPEG
The pvc base attached to the boat came right off with little effort.
IMG_0172.JPEG
Water was clearly running behind the rub rail and into the boat.
My plan is to clean up the joint and plug the holes with epoxy, after which I will install a new rub rail.
@Christian Williams, I recall your video on rub rail installation. That is the the kind of extrusion I am looking for. Can you recommend a source?
Thanks.
 

Christian Williams

E381 - Los Angeles
Senior Moderator
Blogs Author
The replacement is Taco product A11-0511, four 20-foot sections at $275 each from West Marine, which provides the necessary free shipping (shipping long items is very expensive). Such design reportedly being phased out of production by Taco.

But it looks to me like your rub rail takes an insert of rubber or such. If the insert is available, all you'd have to do is pull off the rub rail, fill the holes, re-screw and rebed and put in new insert.

Thanks, but the base of the two-part rub rail was a pvc or similar plastic, which was quite brittle with age. Had I been less a bull in a china shop, I might have been able to save more of it, but sometimes tearing out something cheap and poorly installed becomes a cathartic experience, which, in retrospect, might have been ill advised.
So it looks like I will be installing new rub rail, whether I want to or not.
But at least it won't be leaking!
 

Christian Williams

E381 - Los Angeles
Senior Moderator
Blogs Author
The issue will be the flange, and finding something to fit over it. One member who was painting his boat ground off the flange. Another made custom rubrails out of Trex, routing a groove for the flange.
 
Top