• Untitled Document

    Join us on March 29rd, 7pm EST

    for the CBEC Virtual Meeting

    All EYO members and followers are welcome to join the fun and get to know the guest speaker!

    See the link below for login credentials and join us!

    March Meeting Info

    (dismiss this notice by hitting 'X', upper right)

Need advice, please, on aluminum diesel tank repair

Frank Langer

1984 Ericson 30+, Nanaimo, BC
Yeah its a problem when all the stuff is mounted on that bulkhead. Mine had the fuel filters, fuel pump, and a bunch of wiring and hoses on it. These all were relocated straight down below the wood panel. I put my battery charger on the little angled aft facing wall just behind the storage cubbies to the starboard of the nav desk. I suppose one could leave the aft end of the bulkhead in place for mounting items and only cut out the front half.

Frank do you have pictures of the rest of the compartment back there? I am always interested in how other's boats are sorted out.

Thanks
Bigd14,
The boat is still a mess as I have the heat exchanger, water heater, locker floor and fuel tank removed, so the salon and quarterberth are filled with all the stuff that normally goes in the locker. When it's all back together I can take some pics. What areas are you wanting to see?
Frank
 

bigd14

Contributing Partner
Blogs Author
No problem, I was just interested in the aft end of the motor/shaft seal area. I think it's just interesting to compare how each boat has evolved over the years as various owners have added or replaced things. Here are some photos of the engine compartment on my boat, after replacing almost everything (and before adding wiring). At least 6 different hose sizes involved!

7C5E5BF2-AB71-4799-AD1F-534FD586F5F1_1_105_c.jpeg

82EF86D0-90AA-46C9-A457-D3807EC3AF4D_1_105_c.jpeg

2AFE32E3-9673-431E-98ED-977D5F2E5FC5_1_105_c.jpeg

D21D5073-6B6D-4F26-B7B3-7CF28E3179DC_1_105_c.jpeg
 

Dave G.

1984 E30+ Ludington, MI
BigD, Do you actually run that engine ? Man that is one clean boat ! Makes me want to pull mine apart further just so I can clean. Very nice, I really like the liner in the 30+2 boats as it looks like a finished boat, mine not so much.
 

bigd14

Contributing Partner
Blogs Author
Hah, I do use the boat and run that engine. Those photos were taken a few years back when I had to remove everything to replace the strut and leaking fuel tank. Its gotten a bit dirtier since then. "While I was in there" I took the opportunity to replace all thru hulls and hoses, reroute the cockpit drains, move the sink drain thruhull forward to where one could actually reach the seacock handle, drop the rudder, install new zerk fittings, re-bed the rudder plate in the cockpit, put in a new exhaust, new PSS shaft seal, new shaft, new fuel system, electrical, etc. basically new everything back there. And of course, clean it all up. Everything was at the very end of its life, or beyond (old PSS shaft seal was totally rotten and probably minutes from letting go). I figured it was my only chance to get all those things done while the tank and engine were removed. Took a long time, but most of it should last another 35 years. I would do some things differently now, but it all seems to be working well.
 

Christian Williams

E381 - Los Angeles
Senior Moderator
Blogs Author
And the hose clamps are exactly the right length, revealing intention fulfilled by achievement.

I'll ask Sean why the psychiatry bot that crawls the forum is flashing red. Probably means nothing.
 

bigd14

Contributing Partner
Blogs Author
And the hose clamps are exactly the right length, revealing intention fulfilled by achievement.
If only! Don't look too close.

Christian, if it's my post that flummoxed the psychiatry bot, its been a good day! Anytime I can outsmart AI is a win. We better enjoy that now, it wont be for long.

Sorry for any headache though.
 

Frank Langer

1984 Ericson 30+, Nanaimo, BC
Bigd14,
I took a few pics of the engine compartment as you requested. I don't have my fuel tank, locker floor or water heater installed, so no pic of that area yet.
Frank
20210323_152552.jpg20210323_130841.jpg20210323_130833.jpg
 

Attachments

  • 20210323_152600.jpg
    20210323_152600.jpg
    142.2 KB · Views: 11

Frank Langer

1984 Ericson 30+, Nanaimo, BC
Sorry, I tried to delete that duplicate pic, but couldn't see a way to do that. If one of the experts can do that, please do so.
Thanks,
Frank
 

Dave G.

1984 E30+ Ludington, MI
Very nice too Frank ! Your engine bed/stringers are different than mine too. It looks like the nut is missing from your forward engine mount ? Is your battery switch on the bulkhead under the sink ?
 

Frank Langer

1984 Ericson 30+, Nanaimo, BC
Hi Dave,
Yes, the battery switch is on the bulkhead under the sink. I would rather have it in the nav station area, but I guess it was built that way.
There is a nut on the motor mount, but it is rusty, so hard to see. I put the white paint line on the nut and the base so I can see quickly if there is any movement.
I took my heat exchanger and fuel tank to the radiator shop today. The heat exchanger needed cleaning, but is in good shape, and I've reinstalled it now. The fuel tank which looked clean, and solid, failed the pressure test. The guy said he could weld / patch it, but with no guarantee that it wouldn't start to leak elsewhere. I was surprised to hear that cause it looked so solid, and was only beginning to sweat a bit, not dripping at all. Obviously my earlier thought that I could just epoxy patch it was wrong. I'm glad now that I removed the tank. I've begun contacting metal fabricators, but they all seem really busy with minimum of several weeks wait. I tried to contact the initial tank builder, Custom Marine, but they apparently went out of business a year ago. I'll let you know how things progress.
Frank
 

Dave G.

1984 E30+ Ludington, MI
I would take it somewhere else. There shouldn't be any problem repairing that tank unless they are not confident in their welding abilities. Just from your pics your tank looks a whole lot better condition than mine. I'm still going to do the epoxy repair and found much more anecdotal evidence of it being valid and long term repair so I'm pretty confident it will succeed. My battery switch is mounted on the DC panel at the Nav station. Wonder if all the 30+2's are like yours ? Maybe Bigd can chime in on where his is at.
 

bigd14

Contributing Partner
Blogs Author
Thanks Frank, your engine has quite a different profile than the M18 in mine. It seems to take up a lot more of the engine compartment. I see what you mean about your accumulator tank, that would be difficult to relocate. I see that the feet of your engine mounts extend a bit over the engine beds like mine do too. I added a chunk of G10 under them, which was probably unnecessary.

Dave, my battery switch is located on the lower panel of the quarterberth. I am not sure if this is the original location, but I suspect so since its right next to the battery box under the quarterberth. The nice expensive aftermarket Blue Sea AC and DC panels were situated above the nav station where the fan is in the photo in a funky wood box that was simply stuffed into place with a rat nest of wiring behind it also stuffed into place. An awful install and a boat fire waiting to happen with AC and DC wires mixing everywhere. I relocated the AC panel and bilge pump switch next to the battery switch and the DC panel to the storage locker aft of the nav station (where I think it was originally). I do have an issue with accidenally switching off the DC panel switch, the bilge pump switch and the AC panel main with my leg. I need to manufacture a guard structure but for now I just remember to check the switches regularly. You can also see the battery charger mounted in the left of the photo above and aft of the DC panel.

Amazing how many different ways people come up with to accomplish the same thing in these boats. That is the fun of working on them, and the challenge of buying someone else's boat who may have thought of the same things differently.

B4F349B4-0555-4943-9907-63E8A80DFB7B_1_105_c.jpeg

65FEA99C-0B0C-40C7-9F13-A51486958E0A_1_105_c.jpeg
 
Last edited:

Dave G.

1984 E30+ Ludington, MI
Nice set up, though the location does look prone to bumping into. My AC panel is inside the galley sink cabinet above my fuel filter & you can hardly reach it and have to kneel down to even see the darn thing. I need to move it but a whole lot of rewiring to do that. Is that a Costco PB Pretzel container I see next to your sink?
 

mjsouleman

Sustaining Member
Moderator
Frank, I'll echo what has been said before. Thank you for the details. All of us with older Ericsons can learn and take heat from your work.

Mark "Souleman" Soule
 

bigd14

Contributing Partner
Blogs Author
Dave, keen eye! That is indeed a PB pretzel container. Unfortunately it's empty at the moment.
 

Frank Langer

1984 Ericson 30+, Nanaimo, BC
I am continuing to post on this subject as I continue to learn stuff that may help other owners. I had taken the aluminum fuel tank which was sweating only very slightly now and then, to the radiator shop, thinking they could clean it, test it, and re-weld any weak spots. The radiator shop said they tested it and found weakness in the bottom near the front end of the tank, an area about 8 inches by 6 inches, quite significant.

I couldn't see that, but took their word for it. I decided to take the tank to another metal fabricator, who said that diesel fuel is a lubricant and doesn't easily corrode aluminum. When it does, it should show as white powdery stain, none of which was visible on my tank. He thought my tank was still good, and might just need the lowest weld re-done, as he thought he saw a slight separation/crack in the weld. He sent me away to sand the outside of the tank with 80 grit paper/orbital sander so we could inspect it better, clean the inside with Castrol Super Clean and rinse with lots of hot water to get rid of all diesel in preparation for any welding, and bring it back to him for repair.

As the tank is 36 years old, and others have posted about leaks in their tanks, I decided to also get quotes on a new tank. I received three quotes, $690, 700 - 800 and 1,400 in Canadian dollars, all for the same tank based on the picture and measurements I sent them. Time frame quoted was one week, three weeks, four to six weeks and two months. I actually asked for more quotes, but three other metal fabrication shops didn't get back to me.

One fabricator, who sounded very knowledgeable, said that the diesel fuel does affect the aluminum so that despite attempts to clean it, it is still hard to get a good weld repair or epoxy adhesion, and therefore he would consider any such repair as a temporary fix, not a longer term permanent repair.

As the weld repair would likely cost $200 or more, I decided to go with the $690/one week quote as I don't ever want to have to remove the water heater, locker floor, fuel tank and all the associated fluids, lines, etc. again, and want the peace of mind that it's a good fix.

My experience shows that one should shop around as estimates can vary dramatically, and opinions and knowledge about products and repairs varies significantly. Unfortunately, it makes it hard to come to a sound, fact-based decision for those of us who are mainly sailors, not engineers or other specialists. I generally try to do most work on our boat myself when possible, taking lots of time, care and attention, hire reputable specialists when I'm over my head on a project, but think it through carefully, getting as many different quotes and opinions as reasonable.

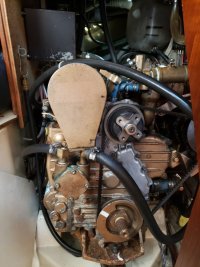
Next week l'll install the tank, locker floor, new water heater to replace the 16 year old current one. It will likely take me two days to do that, making the various connections, electrical and plumbing as well as heat exchanger, adding coolant, bleeding the fuel system, etc. I will likely have saved about $1,000 or more doing that work myself rather than hiring a pro at $100/hr.

And then I can go sailing again! :)

Frank
 
Last edited:

bigd14

Contributing Partner
Blogs Author
Thanks for the continuing updates Frank. I had the same wildly varying time frame and cost estimates for a new tank from various shops in and around the area, even with the original as a template. I think I ended up paying about $600US for my new tank a couple years ago. You'll be happy to get it all sorted out and not have to worry about it again.
 

Frank Langer

1984 Ericson 30+, Nanaimo, BC
Thanks for the continuing updates Frank. I had the same wildly varying time frame and cost estimates for a new tank from various shops in and around the area, even with the original as a template. I think I ended up paying about $600US for my new tank a couple years ago. You'll be happy to get it all sorted out and not have to worry about it again.
I finished this repair today - - installed the new diesel fuel tank, the locker floor board, new Kuuma 6 gallon water heater, reinstalled the whale gusher pump and start battery that I had removed to take out the floor board, and replaced the coolant.
It all went fairly smoothly, the engine started well without needing to bleed it, the temp gauge climbed until I had bled enough air bubbles from the coolant / new water heater, but then settled. After running it a while, no water, coolant or fuel leaks are apparent, though I'll continue to monitor for a while.
Without doubt, this has been the most challenging repair project I've done on my own, but with careful planning and attention to detail, and endless contortions in the cockpit locker, it was doable, revealed a section under the locker floor that I had never seen before, and saved me a pile of money in professional fees had I hired someone to do this job.
Frank
 

Dave G.

1984 E30+ Ludington, MI
Good job Frank and thanks for the update. New water heater too ! Hopefully you'll never need to visit those areas again. We've had a few warm days here on the Great Lakes so today I did the epoxy repair on my fuel tank. But a new tank would be much more reassuring for sure. How did you bleed the air out of the coolant system ?
 

Frank Langer

1984 Ericson 30+, Nanaimo, BC
Good job Frank and thanks for the update. New water heater too ! Hopefully you'll never need to visit those areas again. We've had a few warm days here on the Great Lakes so today I did the epoxy repair on my fuel tank. But a new tank would be much more reassuring for sure. How did you bleed the air out of the coolant system ?
Hi Dave,
I'm glad to hear you were able to do the epoxy repair on your tank. I hope it is permanently solid for you!
I bled my cooling system by filling the engine coolant as full as possible, the metal tank to within an inch of the top and the plastic overflow tank half full. I kept the pressure lid off the metal tank and opened the small pet cock near the thermostat housing to allow air to escape, then started the engine. I ran it at idle speed for ten minutes, then put it in gear at the dock and increased speed to help it gain operating temp. It soon began to overheat, blowing slight steam but no coolant out of the petcock. I shut the engine off to avoid damage, let it continue to blow steam for about 5 minutes, began to see air/coolant bubbles at the petcock, and as soon as the petcock started showing coolant with no bubbles I closed it, added the pressure cap to the metal tank and restarted the engine. The temp immediately dropped to normal and stayed there for the next few minutes before I shut the engine off.
Today I'll motor to get fuel to fill the diesel tank, and will watch the temp gauge carefully in case it overheats again, a sign of a few more air bubbles, though I think it will likely be fine now.
Interestingly, I had expected to have to bleed the fuel system after removing the tank and undoing fuel lines, but it started right up when I tried to start it.
Frank
 
Top