Varnish: What am I doing wrong?

peaman

Sustaining Member
I have read a bit about best practice, and have tried to adhere to recommended processes and products, and I have been satisfied, even happy, with results on smaller projects. But now, I am trying to get good results with an item which is particularly demanding due to size and proximity of typical use: my dinette table.

IMG_3842.JPG
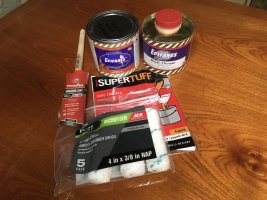
I am using "roll-and-tip" method, something I have not done before very recently. Image above shows my choice of varnish, thinner, filter, brush and roller. I handle the rollers before use in order to remove loose fibers.

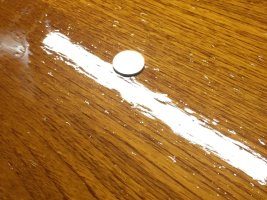
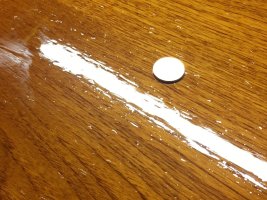
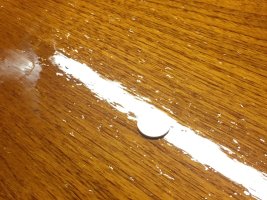
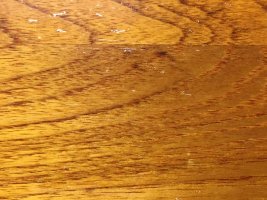
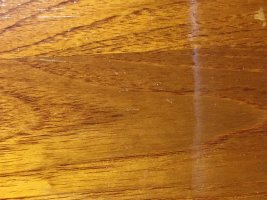
Attached images are of my latest attempt, with a penny included for scale in some images:
IMG_3836.JPG

IMG_3837.JPG

IMG_3838.JPG

IMG_3839.JPG

IMG_3840.JPG

Running my hand over the dried finish feels like bits of sand. It is not smooth, but looks good from a distance. What procedure or product is screwing up my result, and what should I do/buy differently?
 

Gaviate

Member III
I don't have experience with Epiphanes products but haven't heard anything to sway me away from them. Microfibre rollers I do have experience with and suspect that is the source of trouble. Fibers do come loose during use, especially if working to long and finish gets sticky. Switch to mohair roller. Around here, I can only find these at the local Sherwin Williams store.
The roller is just to deliver the finish to the surface in a timely fashion and generally even. The tipping is the final evening and takes out any air bubbles or overlaps. Also, if sanding, become severely critical in removal of all dust. I use a dampened microfibre towel(s) as a tack cloth, and will take multiple swipes on my surface. During final swipe, surface never gets touched with dirty side of towel(s).
The last thought is if you are applying to much at once, though that may be what Epiphanes calls for?
 

Pete the Cat

Sustaining Member
I had that same experience at one time. But owning a wooden Folkboat taught me a lot about varnish. What is screwing things up for you is likely dust. Dust you cannot see or feel. In the Hinckley factory (at least the one time I visited some years ago) they have rooms where they sand and do prep and rooms where they do the finish varnish, and then drying rooms and airlocks in between.
Here is what I have learned:
1. I generally no longer plan to varnish on the same day that I sand. I know I need to not be in a hurry and probably need to be wearing different clothes so that I am not the contaminator. Clean up takes more time than sanding.
2. Cleanliness is much more important than godlliness to varnish results. It may endanger your future in eternity to be swearing while you are varnishing, but what really counts for a beautiful varnish outcome is making sure you have a very clean environment. After sanding each coat (220 on the early coats, lightly 320 on final) here are my steps:
a. vacuum everything with a drywall filter bag--a regular shop vac bag is likely to spread the dust you can't see more evenly all around the area but it will still be there to rain on your varnish. Close up anything that stirs the air and take anything you can off the boat and to a room with no breeze whatsoever. Some pros who work in my yard actually hose down the area when working outside, but this extends drying time and you don't need a lot of moisture around.
b. Then thoroughly wipe down everything with real tack rags. I use the Crystal Premium brand and prefer them above all others. I do this immediately after finishing sanding and vacuuming and then wipe down again the following day with a clean tack rage before I actually varnish.
c. On varnish day, I wear different clothes from those I sand in.
d. I used to use a badger bristle brush but have changed to Jen Manufacturing 2" foam brushes (they are stiff enough to help you "tip" the varnish--the cheap ones at Home Depot are not, and some will fall apart under the solvents) because I have decided that the environmental effect is not any worse than all the toxic solvents I had to use to clean my old bristle brush. A bad brush will leave little nodules of dried varnish in your finish. I think brush dirt might be part of your issue--the new varnish sometimes releases old stuff in the bristles, but I can't tell from the picture. it is either dust or varnish particles.
e. If you want that absolutely smooth finish you are going to have to commit to 5 or 6 coats of gloss (I prefer Captain's or Flagship Varnish over Epiphanes) to fill in the grain. Epiphanes is a deeper color and requires more thinning--probably has better UV inhibitors, but the Petit products are easier to use and seem to level better and dry faster. I recommend more coats of thinner varnish rather than trying to slather it on in fewer coats. I heard you groan-patience is the price of mirror finishes. Thinning is key. I start out with 15% thinner with Captains varnish and end up with full strength. More thinner if you are using Epiphanes. If you want a smooth finish the thinning will vary with the temp and humidity of the day you do it, the brand of varnish, and your technique. There are a lot of good videos on tipping varnish but it is an acquired skill--keep a wet edge and avoid going back to "touch up". You need gloss as an under layer even if you finish with a matt or rubbed effect--it is the only way to fill in the grain and provide UV resistance.
f. I leave the area after spreading and tipping the varnish. Stirring around where there is wet varnish is asking for dust generation. I try to only varnish when the temp is above 50 and below 70. I have found that the first coat generally takes more than a day to dry no matter how much I thin it. Subsequent coats go faster. I do not use the "no sand" varnishes because, IMHO, they really do not level out all that well.
Varnishing technique is probably as controversial as choosing an anchor, but I actually enjoy the zen of the process. And as I have improved my technique over the last 40 years, it is nice to have a visible result to document your effort. Much more satisfying than most of the other boat chores.
 

Frank Langer

1984 Ericson 30+, Nanaimo, BC
I have also learned that if the imperfections are few and/or very minor, they can sometimes be rubbed out gently with a marine polish, being careful to not go through the last coat of varnish. And only after the varnish has dried completely.
If you need to add another coat of varnish after that, you would need to remove any residue of that polish before sanding or varnishing, but hopefully that wouldn't be necessary.
Frank
 

Navman

Member III
I think the issue is the rollers. I use a 4" foam brush. I only apply the brush in one direction. When you go back and forth with the brush, it releases the air bubbles trapped on the following edge. Go slow. Never work out of the can. How much are you thinning the varnish?
 

G Kiba

Sustaining Member
Varnish is barely in my wheel house but looking at your photos I have to ask... How many coats, and are you sanding between coats? I believe the instructions on the can recommend that you thin the final coats.
 

peaman

Sustaining Member
How much are you thinning the varnish?
That was maybe 15% thinner. It felt right going on. I will sand it well and find a different roller.

I believe the instructions on the can recommend that you thin the final coats.
Instructions say to start with 50:50, reduce thinning with next two coats and use all-varnish for fourth and subsequent coats, with thinning as needed for good workability.
 

Christian Williams

E381 - Los Angeles
Senior Moderator
Blogs Author
I think the pictures show varnish too thick. Thinning depends on weather conditions and I rarely get it right the first time. It is the key to leveling, and if there's any brush drag when tipping that's a signal.

I use expensive badger hair brushes to tip, with plenty of disappointment. I am going to try good quality foam.

I recently used foam rollers (for Brightside), and found they didn't leave the telltale squiggle debris of woven rollers. I think I see some in the photos. .

As far as I'm concerned, bubbles are the enemy and thinning is the cure. Atmospheric schmutz and bugs, well, inevitable. Isolate from air currents or dust but keep a shrug handy.

Make sure surface is scuffed dull between coats with no shiny left. When a good coat occurs for whatever reason or lack of reason, stop!

Video excerpt here.

(also, I'd use 1/4" nap rollers (not 3/8"), or foam for smooth surfaces.)
 
Last edited:

bigd14

Contributing Partner
Blogs Author
what should I do/buy differently
How about lowering your expectations?:egrin:

I’m kidding of course, but I say this because I just went through a varnishing project and just after finishing I managed to put scrapes and dings in it while assembling the pieces. Now it matches the rest of the boat perfectly!

In the past I have had similar problems with rollers leaving debris like that. I only use brushes now. And thinning it properly helps a lot too.
 

peaman

Sustaining Member
I use expensive badger hair brushes to tip, with plenty of disappointment. I am going to try good quality foam.
....
As far as I'm concerned, bubbles are the enemy and thinning is the cure.
It was my understanding that foam brushes create bubbles in varnish, so should not be used. Foam rollers should be okay since tipping should get rid of the bubbles. I used a foam roller from Wooster for my latest attempt, and the result so far looks much better. Seems those microfiber rollers were the major problem.
 
Top