Come on in, the water is fine!
As promised, I'm reporting back on the QL water heater install.
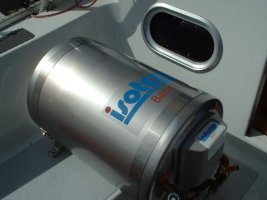
Everything went like clockwork. I prepared a piece of plywood to fit on top of the existing water heater mount. Coated it with two coats of epoxy. I drilled and counter sunk four carriage bolts to fit the mounting feet on the water heater. Once that was done, I screwed down the new board on top of the old one with 6 ss wood screws. Once that was done it was a matter of taking the QL water heater apart, taking off the foam and sliding the tank through the lazerette opening. No cutting required!
")
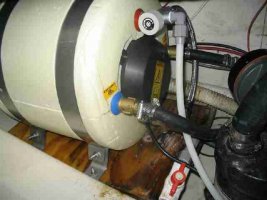
Once the water heater was reassembled, it was boled down using the four carriage bolts and secured with large washers and nuts.
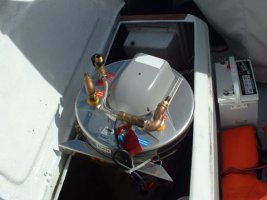
The messiest part of the project was connecting the heat exchanger. We used two pair of vice grips to pinch the hose (gently) and and pair of forceps on the overflow tube on the coolent reservoir. This provided an air-lock so that the entire coolent reservoir would not drain out whrn the hoses were split. It worked pretty well but we still got some coolent leaking during the hookup.
Finally, it came to hooking up the hot and cold water fittings. The local home improvement store had the proper 3/8" fittings and I had some of the Quest tubing left over from another project so that part was a snap. We decided to add a shutoff to the cold water supply while we were at it.
The electrical hookup was easy. We cut off the plug and installed ring terminals. This was hoolked up to the terminal strip then covered with the clear plastic protective cover I fabricated from a piece of plexiglass using a heat gun to soften it.
After the install was complete, we started the engine (taking care to remove the vice grips and forceps. As the engine got up to temp, I had to 'burp' the engine. This involved carefully opening the petcock on the top of the thermostat housing to get out the accumulated air. This took about 1/2 hour to let ithe engine idle, burp it, wait a bit, burp it again till no moe air bubbles came out. We topped off the coolent tank the we went out motoring. The engine ran fine, never getting above 160 degrees which is normal for our M25 with the larger heat exchanger.
Thanks to everyone for the information. Would I do it again? Not if I didn't have to but as projects go, this one was not bad (way better than replacing the holding tank). The folks at Great Water were great (pardon the pun) to work with. They pre-installed the thermostatic mixing valve and supplied couplers so all I had to do was supply the hose barbs fittings for the heat exchanger and the hot and cold Quest fittings. I'd highly recommend them.
Paul