Retired from newspapers and television, currently sailing Thelonious II, a 1984 Ericson 381.
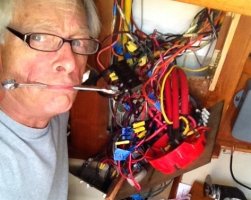
A yacht distribution panel that is a bad hair day from the 1980s is easy to ignore if the boat electronics sort of work. When I changed stereos last year I just crimped and crammed the new wires in. Then a few months later came a new GPS. Soon I was wiring in a wheel pilot, and noticing that my new stereo connectors were already falling apart. By now the panel lid closed like the door of a Japanese subway at rush hour. A couple of weeks ago, with a new AIS to install, there was no choice but to dive in and deal with the mess.

The Ericson 32-3 DC panel lid comes screwed down and has to be pulled out and turned against the resistance of three heavy battery cables.A hinged door works better. Since the plastic lid is robust enough to hold 15 circuit breakers and the battery selector switch, I just cut two 3/4 x 3/4 stiles and fixed one at either end using the original screw holes. The right-side stile has four hardware-store brass hinges, allowing the door to open 110 degrees. You can see the hinges in the picture above.
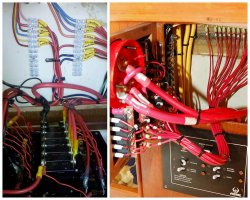
Now to the tangle. My inspiration for neatness was photos of other members’ successes, and a professional example by Maine Sail.

They say 12 volts won't kill you unless you really deserve it. But I had watched enough episodes of “Danger UXB” to know that cutting mystery wires with your eyes closed can lead to a distant explosion that turns every head in the pub. Blimey, another new guy just blew himself up.
So the first goal was to discover what every single unlabelled wire was, did, was supposed to do, or was disconnected from. And they were all unlabelled.
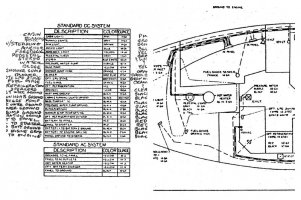
By day’s end I had identified the wiring remains of Loran, a stone-age transducer, a speed paddlewheel, several coax cables, a refrigerator I don't have, a blower I don't use, a shower bilge pump that isn't there, and three previous stereo tape decks. My guide was the original Ericson wiring diagrams, available for most boats in the archives here at EY.org (when the archives come back on line).

However, just understanding the wires took me all over the boat from engine panel to engine harness and battery compartment, through bilges, under the zippers of the headliner, inside the mast, under the pedestal, and through the river to grandma’s little house in the bow pulpit where the running lights live.
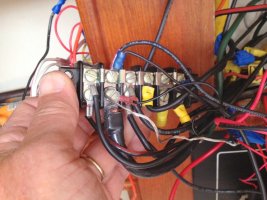
Sure the wiring is color-coded. But I soon discovered that a wire’s color, and even its gauge, can change sneakily at any hidden butt connector. How good are you at telling orange from red or gray from white by flashlight? Who hooked up the the tiny NMEA wires from the pedestal this stupid way? (oh, it was me). Why did the factory pigtail the dozen original black negative wires down to three? Apparently so they’d all fit on a really small bus bar.
Took forever, but it’s not a bad idea to really understand your own boat. You’re probably the first person since launch who ever did.
For the benefit of other novices, the wiring plan of a 12-volt system is is simplified by attaching many wires to common points called bus bars and terminal blocks (also called connector strips). One side of each circuit breaker joins a positive bus bar. The other side of each breaker leads through its electrical device and completes the circuit at a negative bus bar. By definition a bus bar connects to positive or negative, and therefore so does any wire attached to it. A terminal block isn't connected to anything--it's just a convenient meeting place for wires that need to stop for a rest, change direction, or pick up friends. My panel was a mess because it had no connector strips and my negative bus bar was small, overloaded and floating unsecured in the tangle.

By now I sort of had a plan, thanks to hours with Nigel Calder’s “Boatowners Mechanical and Electrical Manual", Professor Maine Sail on small wires, labelling and tools , and many excellent forum threads like this one. But before cutting the first wire I needed a whole bunch of specific electrical components and some decent tools. My rusty amateur electrical kit was cheapskate junk--and the reason the crimps of my stereo wire connectors were failing after only six months. .
I knew I wouldn't get the parts list entirely right, but I'm glad I tried. A mail order house like Defender has better prices and choices than any retail outlet, and there are hundreds of sizes and styles for some of this stuff.
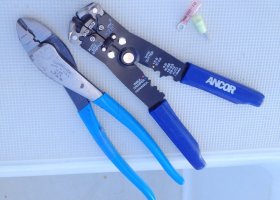
My favorite tool turned out to be a Channellock #909 crimper, with long handles for power and reach and good snippers at the end. The 25 bucks for an Ancor "autostrip" wire stripper was money well spent. A tiny ratcheted 90-degree screwdriver came in less handy than I expected. A new set of every screwdriver size imaginable helped a lot, and I think I used them all. Those damned-in-hell-forever shallow-slot screw heads on older circuit breakers will only stick on the tip of a driver that fits perfectly. Or one with, ugh, chewing gum on the tip. Only after the job did I realize there are numerous types of screw-holding screwdrivers designed specifically for hard-to-access areas.

I chose BSP Clear Seal ring terminals and butt connectors -- 25 each of 18-22, 14-16 and 10-12 . Maybe it's overkill, but they crimp well and the integral heat shrink with glue fits right every time even for an amateur. When ordering, note that the stud size of terminal blocks and bus bars must match that of the ring terminals. I bought 50 feet of expensive tinned #10 wire (too much) and not enough #14 wire; 20-stud Blue Sea bus and terminal bars; six feet of one-inch loom; a store of nylon wire hangers and small stainless screws for them; several new circuit breakers and various heat shrink tubing. I did run out of the small ring terminals, but that's all right. Side trips for unanticipated parts are inevitable, and that's where my local West Marine comes in. I never complain about the price when what you need is right there on the shelf.
It took a week for the Defender order to arrive, providing plenty of time to wonder why I had chosen to open the can of colorful worms now waiting at the bottom of the companionway ladder. Would I ever get this jack-in-the-box back in the box?
Part II is here.

The Ericson 32-3 DC panel lid comes screwed down and has to be pulled out and turned against the resistance of three heavy battery cables.A hinged door works better. Since the plastic lid is robust enough to hold 15 circuit breakers and the battery selector switch, I just cut two 3/4 x 3/4 stiles and fixed one at either end using the original screw holes. The right-side stile has four hardware-store brass hinges, allowing the door to open 110 degrees. You can see the hinges in the picture above.
Now to the tangle. My inspiration for neatness was photos of other members’ successes, and a professional example by Maine Sail.

They say 12 volts won't kill you unless you really deserve it. But I had watched enough episodes of “Danger UXB” to know that cutting mystery wires with your eyes closed can lead to a distant explosion that turns every head in the pub. Blimey, another new guy just blew himself up.
So the first goal was to discover what every single unlabelled wire was, did, was supposed to do, or was disconnected from. And they were all unlabelled.
By day’s end I had identified the wiring remains of Loran, a stone-age transducer, a speed paddlewheel, several coax cables, a refrigerator I don't have, a blower I don't use, a shower bilge pump that isn't there, and three previous stereo tape decks. My guide was the original Ericson wiring diagrams, available for most boats in the archives here at EY.org (when the archives come back on line).

However, just understanding the wires took me all over the boat from engine panel to engine harness and battery compartment, through bilges, under the zippers of the headliner, inside the mast, under the pedestal, and through the river to grandma’s little house in the bow pulpit where the running lights live.
Sure the wiring is color-coded. But I soon discovered that a wire’s color, and even its gauge, can change sneakily at any hidden butt connector. How good are you at telling orange from red or gray from white by flashlight? Who hooked up the the tiny NMEA wires from the pedestal this stupid way? (oh, it was me). Why did the factory pigtail the dozen original black negative wires down to three? Apparently so they’d all fit on a really small bus bar.
Took forever, but it’s not a bad idea to really understand your own boat. You’re probably the first person since launch who ever did.
For the benefit of other novices, the wiring plan of a 12-volt system is is simplified by attaching many wires to common points called bus bars and terminal blocks (also called connector strips). One side of each circuit breaker joins a positive bus bar. The other side of each breaker leads through its electrical device and completes the circuit at a negative bus bar. By definition a bus bar connects to positive or negative, and therefore so does any wire attached to it. A terminal block isn't connected to anything--it's just a convenient meeting place for wires that need to stop for a rest, change direction, or pick up friends. My panel was a mess because it had no connector strips and my negative bus bar was small, overloaded and floating unsecured in the tangle.

By now I sort of had a plan, thanks to hours with Nigel Calder’s “Boatowners Mechanical and Electrical Manual", Professor Maine Sail on small wires, labelling and tools , and many excellent forum threads like this one. But before cutting the first wire I needed a whole bunch of specific electrical components and some decent tools. My rusty amateur electrical kit was cheapskate junk--and the reason the crimps of my stereo wire connectors were failing after only six months. .
I knew I wouldn't get the parts list entirely right, but I'm glad I tried. A mail order house like Defender has better prices and choices than any retail outlet, and there are hundreds of sizes and styles for some of this stuff.
My favorite tool turned out to be a Channellock #909 crimper, with long handles for power and reach and good snippers at the end. The 25 bucks for an Ancor "autostrip" wire stripper was money well spent. A tiny ratcheted 90-degree screwdriver came in less handy than I expected. A new set of every screwdriver size imaginable helped a lot, and I think I used them all. Those damned-in-hell-forever shallow-slot screw heads on older circuit breakers will only stick on the tip of a driver that fits perfectly. Or one with, ugh, chewing gum on the tip. Only after the job did I realize there are numerous types of screw-holding screwdrivers designed specifically for hard-to-access areas.

I chose BSP Clear Seal ring terminals and butt connectors -- 25 each of 18-22, 14-16 and 10-12 . Maybe it's overkill, but they crimp well and the integral heat shrink with glue fits right every time even for an amateur. When ordering, note that the stud size of terminal blocks and bus bars must match that of the ring terminals. I bought 50 feet of expensive tinned #10 wire (too much) and not enough #14 wire; 20-stud Blue Sea bus and terminal bars; six feet of one-inch loom; a store of nylon wire hangers and small stainless screws for them; several new circuit breakers and various heat shrink tubing. I did run out of the small ring terminals, but that's all right. Side trips for unanticipated parts are inevitable, and that's where my local West Marine comes in. I never complain about the price when what you need is right there on the shelf.
It took a week for the Defender order to arrive, providing plenty of time to wonder why I had chosen to open the can of colorful worms now waiting at the bottom of the companionway ladder. Would I ever get this jack-in-the-box back in the box?
Part II is here.

