Retired from newspapers and television, currently sailing Thelonious II, a 1984 Ericson 381.
Every wire was now crudely identified. There were shiny new Blue Sea bus bars and connector strips to mount, so I cut pieces of half-inch marine plywood, painted it white to increase visibiity, and screwed it to a batten against the bare hull inside the panel. That made mounting gear and wire hangers easy.
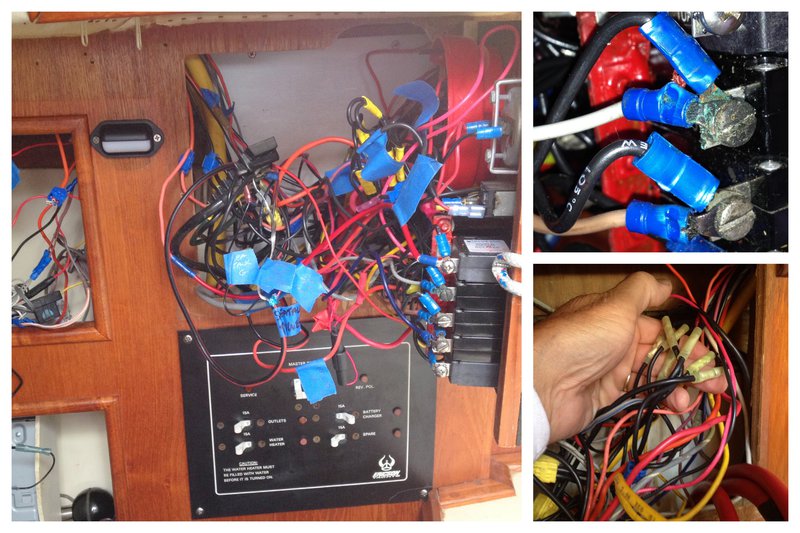
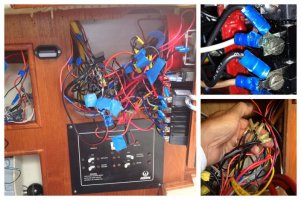
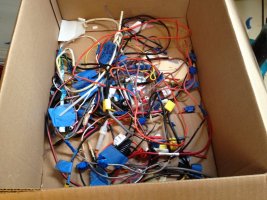
Finally it was time to plunge in and start cutting away the original wire mess. I discovered corrosion, but not all that much after 27 years. The top right hand photo above shows the circuit breaker posts, which I cleaned up with sandpaper. The photo beneath it is of the pigtailed black grounds. I cut all the the pigtails out so that each ground connects individually to the new bus bar. I don't know if it was necessary but, like a fifth can of beer, it seemed right at the time. I did notice that when I stripped the original untinned copper wire, it was black from corrosion. My expensive new wire is all tinned. And frankly, it seems like overkill. Anyway, soon I had a box full of extra wire left behind by previous installers.

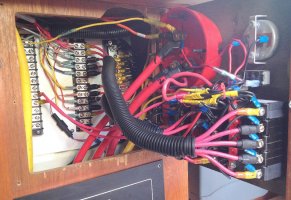
Now it was just a matter of trimming every negative lead to neatly join the new 20-post bus bar, heat-shrinking on a ring connector and connecting it up. Maine Sail's clever labeling technique is here. I just wrote on a paper label, cut it to fit under the Clear Seal heat shrink, and applied the heat gun. During this the dozens of other leads were temporarily bound up and tied carefully out of the way. I had learned quickly that clearing the small panel work area was the key to sanity. When the negative bus was filled I installed two big new connector strips nearby--almost double what I currently need, but room for future expansion.
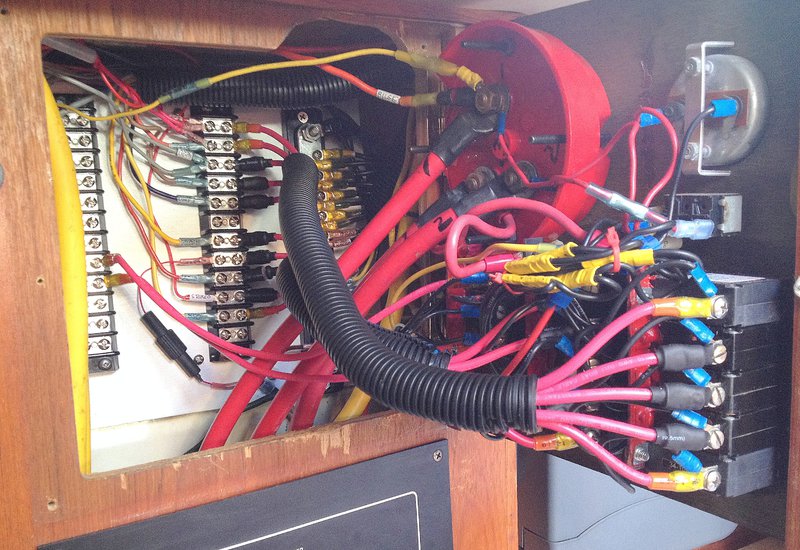
The idea of connector strips may be obvious, but makes all the difference. You lead the boat's wires to the strips, then run jumpers from the strips to the circuit breakers. Each is labelled. The jumpers are carefully sized to the panel lid or door, guaranteeing that it will open fully for business and a human being can work on it without a dental mirror and a hara-kiri dagger within reach.
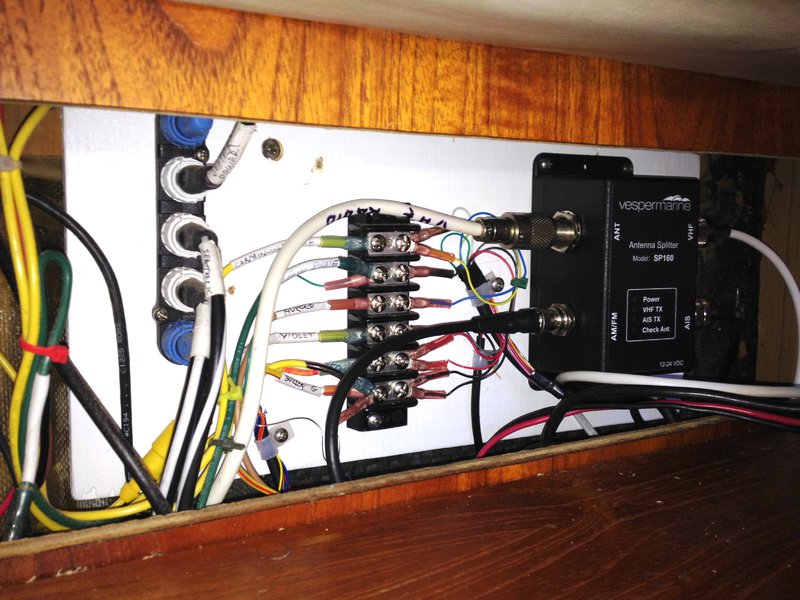
I turned an adjacent space into the Realm of Very Small Wires. I was adding a new Watchmate 850 dedicated AIS, and with it an antenna splitter that required independent power. Those two gizmos, like my GPS, Blue Tooth stereo and DSC VHF radio, are little Rapunzels who let down hair-sized sub 22-gauge NMEA 0183 wires that seem more like fuzz. The Raymarine wheel pilot has its own miniature communications world of 2000NG, all of it proprietary and cursed.
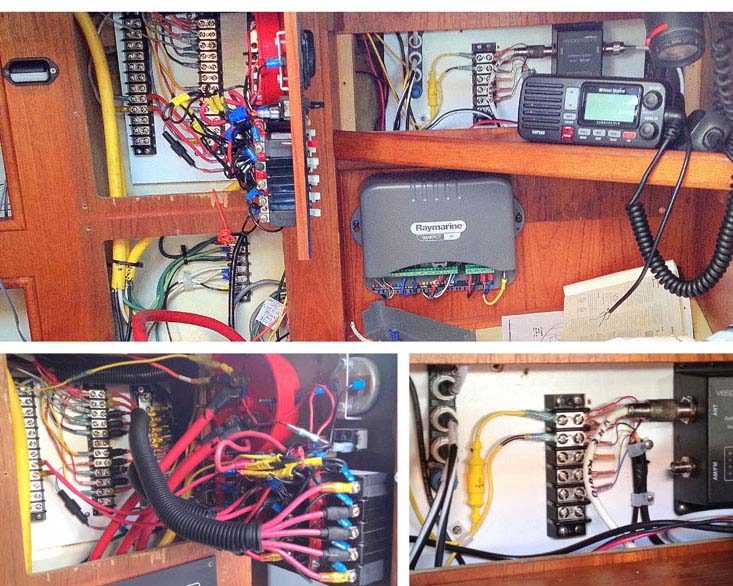
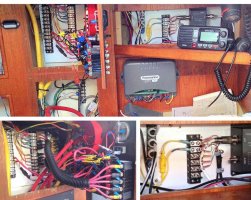
The photo below shows the connector strip for Preposterously Small Wires finally ready for business. It's now a real fairyland in that compartment. Why, you expect to see Tinkerbell fly in through one of the opening ports, land on one of those delicate little threads and start chattering away in NMEA sentences.
These DSC, GPS and AIS wires make 22-gauge seem big. They obviously aren't designed for a standard ring connector. Some say to double the wire over to make it thicker. Some say solder. Some say "D-sub crimp die" . But why should the manufacturer of a $150 marine VHF radio expect a boat owner to deal with 26 gauge wires? OK, got it. We're just customers.
There is a workaround, even for these tiny connections, and that's to use Clear Seal 18-22 gauge heat shrink ring terminals. For some reason the barrel of this brand is smaller than the same-size nylon connectors in my kit. If you use the "insulated" jaw of the crimper, which neatly flattens the barrel around the stripped wire-end, no dice--they still won't pass the tug test. But if you crimp with the "non-insulated" jaw, which makes a dimple in the barrel, the connection is sound. Of course the dimple usually punctures the heat shrink. But at least they won't come apart, and the glue in the shrink helps reinforce the mechanical bond. Not saying it's right, but it worked for me.
The finished job came out pretty well and solved the tangle problem. I think I have every wire protected with the appropriate fuse or breaker. I think I did the right thing in making my main bilge pump "always on" by attaching it to the battery selector switch. The stereo is "always on" too, in the sense that there's an AAC wire to preserve the settings, even though the stereo turns off with the breaker. I think my panel is safe, but I hope to hear from anybody who sees a flaw or a danger.
Overall this was an inside job with no heavy lifting. Don't forget your reading glasses and bilge tweezers. Prepare to pay several hundred of dollars in "stuff," appreciate why it costs a lot to have a professional do it all, and spend more time than predicted.
Of course, when you close the panel door nobody can see all the work you did. But you've definitely learned something.
In my case, that I'd better get busy and upgrade the engine panel and wiring harness, too.

Finally it was time to plunge in and start cutting away the original wire mess. I discovered corrosion, but not all that much after 27 years. The top right hand photo above shows the circuit breaker posts, which I cleaned up with sandpaper. The photo beneath it is of the pigtailed black grounds. I cut all the the pigtails out so that each ground connects individually to the new bus bar. I don't know if it was necessary but, like a fifth can of beer, it seemed right at the time. I did notice that when I stripped the original untinned copper wire, it was black from corrosion. My expensive new wire is all tinned. And frankly, it seems like overkill. Anyway, soon I had a box full of extra wire left behind by previous installers.

Now it was just a matter of trimming every negative lead to neatly join the new 20-post bus bar, heat-shrinking on a ring connector and connecting it up. Maine Sail's clever labeling technique is here. I just wrote on a paper label, cut it to fit under the Clear Seal heat shrink, and applied the heat gun. During this the dozens of other leads were temporarily bound up and tied carefully out of the way. I had learned quickly that clearing the small panel work area was the key to sanity. When the negative bus was filled I installed two big new connector strips nearby--almost double what I currently need, but room for future expansion.

The idea of connector strips may be obvious, but makes all the difference. You lead the boat's wires to the strips, then run jumpers from the strips to the circuit breakers. Each is labelled. The jumpers are carefully sized to the panel lid or door, guaranteeing that it will open fully for business and a human being can work on it without a dental mirror and a hara-kiri dagger within reach.
I turned an adjacent space into the Realm of Very Small Wires. I was adding a new Watchmate 850 dedicated AIS, and with it an antenna splitter that required independent power. Those two gizmos, like my GPS, Blue Tooth stereo and DSC VHF radio, are little Rapunzels who let down hair-sized sub 22-gauge NMEA 0183 wires that seem more like fuzz. The Raymarine wheel pilot has its own miniature communications world of 2000NG, all of it proprietary and cursed.

The photo below shows the connector strip for Preposterously Small Wires finally ready for business. It's now a real fairyland in that compartment. Why, you expect to see Tinkerbell fly in through one of the opening ports, land on one of those delicate little threads and start chattering away in NMEA sentences.

These DSC, GPS and AIS wires make 22-gauge seem big. They obviously aren't designed for a standard ring connector. Some say to double the wire over to make it thicker. Some say solder. Some say "D-sub crimp die" . But why should the manufacturer of a $150 marine VHF radio expect a boat owner to deal with 26 gauge wires? OK, got it. We're just customers.
There is a workaround, even for these tiny connections, and that's to use Clear Seal 18-22 gauge heat shrink ring terminals. For some reason the barrel of this brand is smaller than the same-size nylon connectors in my kit. If you use the "insulated" jaw of the crimper, which neatly flattens the barrel around the stripped wire-end, no dice--they still won't pass the tug test. But if you crimp with the "non-insulated" jaw, which makes a dimple in the barrel, the connection is sound. Of course the dimple usually punctures the heat shrink. But at least they won't come apart, and the glue in the shrink helps reinforce the mechanical bond. Not saying it's right, but it worked for me.
The finished job came out pretty well and solved the tangle problem. I think I have every wire protected with the appropriate fuse or breaker. I think I did the right thing in making my main bilge pump "always on" by attaching it to the battery selector switch. The stereo is "always on" too, in the sense that there's an AAC wire to preserve the settings, even though the stereo turns off with the breaker. I think my panel is safe, but I hope to hear from anybody who sees a flaw or a danger.
Overall this was an inside job with no heavy lifting. Don't forget your reading glasses and bilge tweezers. Prepare to pay several hundred of dollars in "stuff," appreciate why it costs a lot to have a professional do it all, and spend more time than predicted.
Of course, when you close the panel door nobody can see all the work you did. But you've definitely learned something.
In my case, that I'd better get busy and upgrade the engine panel and wiring harness, too.

