• Untitled Document

    Join us on March 29rd, 7pm EST

    for the CBEC Virtual Meeting

    All EYO members and followers are welcome to join the fun and get to know the guest speaker!

    See the link below for login credentials and join us!

    March Meeting Info

    (dismiss this notice by hitting 'X', upper right)

Engine Compartment Clean up

Loren Beach

O34 - Portland, OR
Senior Moderator
Blogs Author
Wow! The picture of the recently-vacated engine bay looks a lot like ours did, well into our engine replacement project.
I hope your blog entries are better-detailed than mine were.
Thanks again for sharing. The cleanup work is well worth the time, imho.
:)
 

Nick J

Sustaining Member
Moderator
Blogs Author
Thanks Loren! It's good to hear some words or encouragement now that we're committed.

One of the items I found was the molded section below the shaft log doesn't connect to the drain tube under the engine. There's a small hole that drains stuffing box water down to the hull where it can find its way to the tube, but the configuration allows stuff to get lost and/or stuck. It also makes the drain tube impossible to clean.

I'm thinking of extending the existing cut out of this molded section all the way to the engine pan. I don't think it's bonded to the hull in this area as it flexes when you press on it. It doesn't seem to offer any advantage that I can think of.
 

Attachments

  • 20221002_182515.jpg
    20221002_182515.jpg
    298.3 KB · Views: 38
  • 20221002_182700.jpg
    20221002_182700.jpg
    171.5 KB · Views: 38

dhill

Member III
@Prairie Schooner and @trickdhat , if you don’t mind my asking, what is the cost to remove the engine on an Ericson 35-3?

If anyone has had an engine repainted, I would be curious to know the cost of that as well. The paint on mine is peeling and some rust has formed.

I’m also getting a fair amount of belt dust, which I’m guessing is from some misalignment?

Thanks!
 
Last edited:

dhill

Member III
I've been crawling all throughout the dark places in the boat over the past couple of weekends to determine where all the piping goes and adding labels. I'll post something separately.

Probably a naive question... There is one hose in the engine compartment, which appears to be coming from the propeller shaft. Does anyone know what this hose is? It leaves the propeller shaft and travels up in to the lazarette and open ends right by the pressurized water pump. Is it for some type of lubrication?

FC420F0E-8EBC-4E5B-ABEA-2816126D2459_1_105_c.jpgCC293981-8454-4356-A7A1-2122659A7657_1_105_c.jpg

Thanks!
 

Loren Beach

O34 - Portland, OR
Senior Moderator
Blogs Author
Regarding belt dust, I recall (mostly) solving that on our former diesel engine by finding a different belt. It's important that the belt not ride too high or low in the grove on the alternator pully. A "top cog" design worked well, and there was an HD Gates (do not recall the #) that seemed to solve the problem. On most engines you can check the alignment with a straightedge, when engine is off. Our former engine also had the wrong size pivot bolt in the alt. bracket, and when I could not seem to find the exact size, I shimmed the old bolt with some thin metal. Ah, the techniques you can learn from reading "Zen and the Art of Motorcycle Maintenance"... !

That hose you reference was installed to bleed air out of your PSS shaft seal, when the boat is launched with the shaft alley initially dry.

Cost? Well, you have several project steps to complete. Everything you choose not to do will cost you about $110. and hour. Preparation takes about a full day, IMO, or two. The actual lift might be about a half day, two guys, and involves a main halyard and a two speed winch. Before anything else, lay down a protective sheet of 'masonite' over the rear part of the cabin sole.

Once it's out, you can spend several days cleaning up old raggedy insulation, and scrubbing every inch of the area. Any wiring or plumbing that is old can be replaced while access is good.
"Cost" will be in your time or your money. There are significant advantages in doing a lot of the work yourself - in money saved and knowledge gained.
When I spent days cleaning up and restoring our engine compartment, I did a lot of little upgrades and improvements that will benefit the boat for the rest of my ownership, and will benefit future owners, too. Maintenance (like my change in fuel filter and location) is much much easier, going forward, after changing the fuel lines.
 
Last edited:

Nick J

Sustaining Member
Moderator
Blogs Author
We pulled it ourselves. It took t 4 hours to disconnect everything and another 4 to pull it out. a professional crew could probably do everything in 2 to 3 hours with the last hour requiring 2 people. The shop we're using to do the bottom work, dripless install, and cutlass replace bills out at $110 per hour. We still need the yard to move it from the cockpit to the back of my truck where I'm going to take it to the shop and have them look over the transmission and paint. I'll let you know what the quote for that work.

The hose in your pic is a vent to let trapped air out. It ensures the unit is lubricated with seawater.
 

Prairie Schooner

Jeff & Donna, E35-3 purchased 7/21
@Prairie Schooner and @trickdhat , if you don’t mind my asking, what is the cost to remove the engine on an Ericson 35-3?

If anyone has had an engine repainted, I would be curious to know the cost of that as well. The paint on mine is peeling and some rust has formed.

I’m also getting a fair amount of belt dust, which I’m guessing is from some misalignment?

Thanks!
Hi Dave,

The short answer is $7500. But we didn't just have the engine pulled. Of that amount, $1500 was parts. We also had a new exhaust riser put in, new water/coolant hoses, replace old copper fuel line with rubber, installation of dripless shaft seal, new mounts installed, service the heat exchanger, everything disconnected then reconnected, alignment, remove and replace coolant, and a two hour sea trial when done. They billed us 7 hours for removing the engine, at $130/hr. I helped the mechanic schlepping gear up the ladder which saved us paying for a second person. Because of ‘supply chain issues’, we probably paid for at least 6 hours of them running around looking for hoses. We were billed about 24 hours to put everything back together. The whole process took almost eight weeks, though that included 4th of July vacation. I’d complain about the time, but to be honest, we were busy with other projects concurrently and wouldn’t have been ready if they had finished a lot sooner.

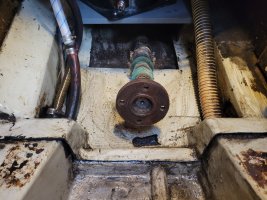
We purchased separately the dripless shaft seal, new coupler, drive saver, new fuel filter, new raw water pump, new raw water strainer, had the starter and alternator checked/cleaned, had the prop shaft refurbished and prop checked. As detailed elsewhere on this site, I did everything outside, including rebedding the strut.

The oil pan was very rusted and I was especially worried about the tube for the dipstick. While the engine was hanging in the saloon I wire brushed that, was satisfied with its stability, and repainted it. I would have liked to repaint the engine. I personally despise Universal gold and would have painted it all Kubota blue. But I digress into my personal issues.

We had a reputable marine diesel company do the work. We were quite pleased with the end result, but felt they were very inefficient and we paid extra for that. All in all they billed us for about 45 hours. I’m sure we paid a premium for parts, too. I could have eventually done the work myself, but there would have been a lot to learn. And it would have meant scrapping our entire 2022 season. There are a bunch of things I would have liked to do while the engine was out. I try not to think about all that.

I hope that included information that was helpful and not too much that wasn’t. If you have any further questions, I’d be glad to reply.

Upside: we got to go sailing and love being out on our boat.

Cheers,
Jeff
 

Loren Beach

O34 - Portland, OR
Senior Moderator
Blogs Author
If it's helpful, here is our blog link, and I have rolled into it some other EY.o engine change-out links.
 

Nick J

Sustaining Member
Moderator
Blogs Author
Thanks again Loren. I've read it a few times, but always pick up something new. BTW, does the oil in your new Beta turn black immediately after an oil change? My Yanmar had under 500 hours on it when I bought the boat and the oil was black after the first oil change. I keep telling myself that just how diesels are, but I can turn down the opportunity to ask...
 

Loren Beach

O34 - Portland, OR
Senior Moderator
Blogs Author
The oil started out clear (sort of), and after three changes is now tan color soon after changing, but not at all black. The former diesel engine had black oil immediately after a change, every time.... (sigh)
 

Christian Williams

E381 - Los Angeles
Senior Moderator
Blogs Author
If anyone has had an engine repainted, I would be curious to know the cost

It's easy enough, if awkward, to touch up, or repaint, a diesel in place. Engine spray paint is commoditized, whatever color you like, including Universal bronze.

The slow work is taping off everything against the spray, which is 90 percent of the job. The other 10 percent is first scrubbing away glop and oil with solvents and detergent, the cost of which is skinned knuckles, a basket of paper towels, and a scowl at dinner time. ("You smell like the bilge of an oil tanker, darling. And you didnt even touch your Brussels sprouts."
 

Nick J

Sustaining Member
Moderator
Blogs Author
I discussed the pan below the stuffing box with the yard yesterday and we decided there wasn't a reason to keep it. I'm glad we did because there's been 40 years of crap accumulating below there. It was almost an inch thick and the drain pipe bypassing the engine pan was almost completely clogged. Here's the before and after. It took me 1.5 hours to get to this point and It's no where near clean. 20221003_182701.jpg
20221003_185917.jpg
 

JSM

Member III
While you have the engine out you may want to check the screw holes in your engine bearers. Ericson used lag bolts and the wood inside the bearers is ...well wood and the holes tend to strip easily when reinstalling the motor mounts making it difficult for the engine to hold an alignment. I found this out when I changed my mounts and discovered that 50% of the lag bolts would not firmly tighten up.
Because of this I have had my engine in the air and or completely out three times now.
I finally remedied the problem by welding two nuts to the bottom of 1/8" steel plates. The plates got lag bolted to the bearers and the motor mounts are held in with machine bolts and lock washers.
The engine now stays put and the motor mounts can be changed/adjusted in the future without fear of stripping out the holes.
 

Nick J

Sustaining Member
Moderator
Blogs Author
Thanks for the heads-up. They were all lag bolts, but they were tight when I pulled them. I briefly looked at the holes and the seemed to be solid fiberglass. Hearing an '87 has wood in the stringers gives me pause. I'll check it out next time I'm down there. Do you have any pics of your engine bed?
 

Loren Beach

O34 - Portland, OR
Senior Moderator
Blogs Author
Data point: my '88 boat has oak under the frp laminate engine 'beds'. And yes, the old lags can loosen up after several decades.
 

bigd14

Contributing Partner
Blogs Author
the old lags can loosen up after several decades.
You can also use hanger bolts (half lag screw half machine screw) and epoxy the lag portion into the stringers where it should not need to be loosened again.
 

Nick J

Sustaining Member
Moderator
Blogs Author
With the strut and everything else going on, I keep forgetting to check the engine bed. I'll put it on the list for next time I'm down there. Your install looks great. I really like the square stock extensions of the frp engine bed. Looks rock solid.

I was able to get the engine home and start doing some maintenance that's difficult to do in place. So far I have the heat exchanger core out for cleaning. The water flow has been good, but I did find some pieces of an old impeller and some small barnacles. I've been replacing the impeller every year and never found a broken one, it must have been there for a while.
20221009_104129.jpg20221009_104125.jpg20221009_103901.jpg
Next up is the cleaning and paint then replacing the mounts.
 

Prairie Schooner

Jeff & Donna, E35-3 purchased 7/21
It's always sumpin'.
We were about a half hour into the ~18 mile transport to our winter storage yard when our engine got Dramatically louder. We noticed a lot of sea water pouring into the bilge from the aft end of the engine. Further examination showed that the pipe from the exhaust manifold to the riser had broken.
exhaust broken 10-10-22 b.jpg
As detailed in post #27 above, we had a new riser put in by the mechanic. That's their new wrap on the pipe. So, Nick, I'm guessing it would be good to give that part (those parts) a good rattle to make sure they're solid. (If this is hijacking your thread, I can move it elsewhere.)
We've maybe run the engine 25 hours since the mechanic put it all back together. Do you think it's reasonable to expect this is something he should have caught?
 

Christian Williams

E381 - Los Angeles
Senior Moderator
Blogs Author
something he should have caught?

Well, golly, I'd be asking him about that right this moment. And not too pleased, either.

The only redress is probably professional pride. I'd love to hear the yard's explanation of why this was beyond the scope of their responsibility.
 
Top