• Untitled Document

    The 2024-2025 Fund Raising Season has Opened!

    EricsonYachts.org has opened the season for raising funds to support the expenses of the site. If you would like to participate, please see the link below for additional information.

    Thanks so much for your continued support of EricsonYachts.org!

    2024-2025 Fund Raising Info

  • Untitled Document

    Join us on January 24th, 7pm EDT

    for the CBEC Virtual Meeting

    EY.o January Zoom Meeting

    All EYO members and followers are welcome to join the fun and get to know the people you've met online!

    See the link below for login credentials and join us!

    January Meeting Info

    (dismiss this notice by hitting 'X', upper right)

Engine Compartment Clean up

Nick J

Contributing Partner
Moderator
Blogs Author
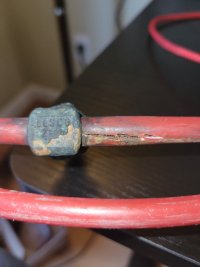
That looks like the same one I found on mine. I think it's actually a better solution than the Morse part because there's a plate between the cable and the bolt or nut so it's not spinning against the outside of the cable. The split in the sheath is what had me thinking this was a repair nstead of a friction control device. 20221013_093537.jpg
 

RCsailfast

E35-3 Illinois
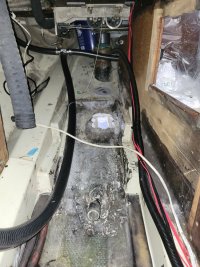
I discussed the pan below the stuffing box with the yard yesterday and we decided there wasn't a reason to keep it. I'm glad we did because there's been 40 years of crap accumulating below there. It was almost an inch thick and the drain pipe bypassing the engine pan was almost completely clogged. Here's the before and after. It took me 1.5 hours to get to this point and It's no where near clean. View attachment 44541
View attachment 44542
While the engine is out take advantage and seal around the tube where it exits from under the engine. After we got our boat the high pressure pump was leaking diesel and it found it’s way into the bilge. Wasn’t fun showing up to the boat and seeing a slick around it. Worse was wet vacuuming the bilge until repairs were made. Had a tough time wrestling under the motor to seal it. Now nuisance leaks, or oil change mishaps stay out of the grid and bilge.
 

Nick J

Contributing Partner
Moderator
Blogs Author
Got some good news from the yard yesterday, the shaft is back from the prop shop with a new coupling, cut to length (it was 2 1/2 to long) so no need to purchase a new shaft. Port Townsend Foundry also called and said the strut was poured Friday morning and was cooling in the sand.

We discussed what to do with the engine bed since it was out. The lag bolts were firmly threaded into the stringers (also verified there is wood on the stringer), but there are three additional sets of holes presumably from the engine installer taking a few practice runs. We decided to grind the stringers to glass, fill in the holes, and add some glass to reinforce. I didn't have the time to do it on my own, so I have them the green light to start this week.

To avoid leaving them with tacky pait, I shifted gears and focused on replacing the hoses and getting the engine ready.
 

Attachments

  • 20221015_130751.jpg
    20221015_130751.jpg
    76.1 KB · Views: 29
  • 20221015_095203.jpg
    20221015_095203.jpg
    168.6 KB · Views: 29
  • 20221015_092054.jpg
    20221015_092054.jpg
    160.4 KB · Views: 29
  • 20221015_124418.jpg
    20221015_124418.jpg
    177.6 KB · Views: 27

Nick J

Contributing Partner
Moderator
Blogs Author
This weekend was a busy one, but not a lot of photos to show for it. I think the main take away for me is if you see something that should be fixed, trust your gut and dig in. I was avoiding replacing the bilge hoses and water lines to the head. I spent so much time working around them that it became impractical to keep them in place. every time I thought I had it cleaned enough, another swipe would expose more dirt. They are also nearing 40 years old and the only thing holding me back was the difficulty with replacing them. They've been spliced 3-4 times and are literally
crumbling as I work around them, so I finally decided to bight the bullet and cut them out. This also lead me to replacing the thru hulls under the sink.

The cockpit drain had a PVC 90 on it that felt sold, but it cracked when I pulled the hose off. When I unscrewed the fitting, I realized I wasn't going to be able to replace the 90 due to how close it is to the plywood. the plywood backing plates are also a bit waterlogged.... I finally placed the order for new TruDesign thru hulls to replace everything under the sink. Had I just committed when I pulled the boat out, I would probably already have the cabinet cleaned out and read to install the new ones.

I was able to start installing new drain hose. I chose Trident 147 Vac XHD bilge hose for this. having the engine and water heater out of the way is nice, but it doesn't guarantee an easy install. There's nothing easy about laying on your side, reaching over your head, struggling to get a hose over a barb with only a few inches to spare. The port side scupper was particularly difficult as the propane tank is in the way. I had one hole to see the connection and one to access the connection. A heat gun was the only thing that made it doable.

Once I was done with the drain hose I focused on cleaning the wood surfaces in the engine compartment to prep for pain. Lots of simple green to get at most of the grime then a scrub with TSP and a rinse with water. Next time I'm down there, I'll focus on sanding and final prep before paint.

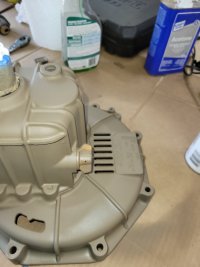
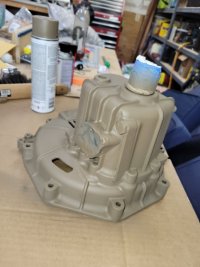
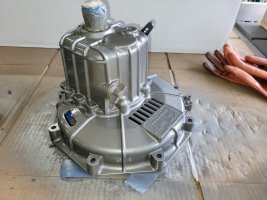
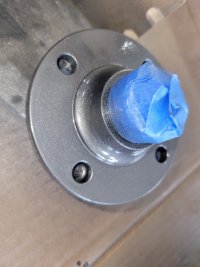
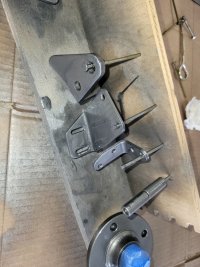
When I was at home, I focused on getting the engine ready for paint. The transmission shop recommended Napa's Zincrom 7222 primer for the aluminum transmission housing and Por-15 rust preventative coating on the steel parts. It's what they use in their shop, so I figured it was a better suggestion than what the internet had to offer. so far, it seems like good stuff to work with. I'm finished with the steel parts and just need to touch up a few areas of the transmission before I'm ready for the Yanmar Gray paint.


20221015_130745.jpg
20221016_180841.jpg


20221016_180819.jpg

I still feel like I'm in the deconstruction phase of this project, but I think I'm starting to see the light at the end of the tunnel (or prop shaft)
 

Frank Langer

1984 Ericson 30+, Nanaimo, BC
This weekend was a busy one, but not a lot of photos to show for it. I think the main take away for me is if you see something that should be fixed, trust your gut and dig in. I was avoiding replacing the bilge hoses and water lines to the head. I spent so much time working around them that it became impractical to keep them in place. every time I thought I had it cleaned enough, another swipe would expose more dirt. They are also nearing 40 years old and the only thing holding me back was the difficulty with replacing them. They've been spliced 3-4 times and are literally
crumbling as I work around them, so I finally decided to bight the bullet and cut them out. This also lead me to replacing the thru hulls under the sink.

The cockpit drain had a PVC 90 on it that felt sold, but it cracked when I pulled the hose off. When I unscrewed the fitting, I realized I wasn't going to be able to replace the 90 due to how close it is to the plywood. the plywood backing plates are also a bit waterlogged.... I finally placed the order for new TruDesign thru hulls to replace everything under the sink. Had I just committed when I pulled the boat out, I would probably already have the cabinet cleaned out and read to install the new ones.

I was able to start installing new drain hose. I chose Trident 147 Vac XHD bilge hose for this. having the engine and water heater out of the way is nice, but it doesn't guarantee an easy install. There's nothing easy about laying on your side, reaching over your head, struggling to get a hose over a barb with only a few inches to spare. The port side scupper was particularly difficult as the propane tank is in the way. I had one hole to see the connection and one to access the connection. A heat gun was the only thing that made it doable.

Once I was done with the drain hose I focused on cleaning the wood surfaces in the engine compartment to prep for pain. Lots of simple green to get at most of the grime then a scrub with TSP and a rinse with water. Next time I'm down there, I'll focus on sanding and final prep before paint.

When I was at home, I focused on getting the engine ready for paint. The transmission shop recommended Napa's Zincrom 7222 primer for the aluminum transmission housing and Por-15 rust preventative coating on the steel parts. It's what they use in their shop, so I figured it was a better suggestion than what the internet had to offer. so far, it seems like good stuff to work with. I'm finished with the steel parts and just need to touch up a few areas of the transmission before I'm ready for the Yanmar Gray paint.


View attachment 44704
View attachment 44705


View attachment 44706

I still feel like I'm in the deconstruction phase of this project, but I think I'm starting to see the light at the end of the tunnel (or prop shaft)
Wow, your work is sure progressing nicely! I really like the TruDesign thru hulls, good choice.
Frank
 

bigd14

Contributing Partner
Blogs Author
Nice job on the project. Getting those old nasty hoses replaced is a critical item!
 

Nick J

Contributing Partner
Moderator
Blogs Author
There wasn't a lot of work done this week. I haven't been able to get down to the boat for a few days. Last time I checked, the yard hadn't done anything either. The past few weeks of slow progress on their part wasn't a concern because of the strut work, but now that it's ready to be picked up the timeline is needing to be accelerated. We discussed reglassing the engine bed stringers and they said they would start on Monday which would have had it done by this weekend and ready for the engine, or more likely a mockup of the engine, to be in place and ready to align the strut next week. With the lack of progress, I'm not sure where that puts the strut work.

Here's a pic of the new drain hose. I can't finish it until the thru hulls are installed, so I'm going to have to get down to the boat today to route the new hose through the strut hole so I don't fill the bilge with rain water (WA's finally getting some rain this weekend!)
20221018_173307.jpg
 

Nick J

Contributing Partner
Moderator
Blogs Author
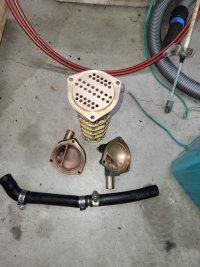
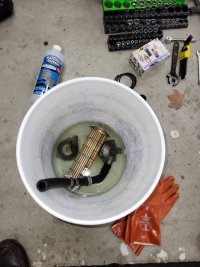
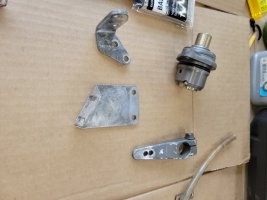
I finally got a coat of paint on the transmission and various engine pieces. I spent the rest of the day flushing the engine and hot water heater, cleaning the hot water heater, and making backing plates for the new thru hulls. Hopefuly I'll be able to get down to the boat tomorrow to install the backing plates

20221029_143945.jpg20221029_143955.jpg20221029_143958.jpg
 

Nick J

Contributing Partner
Moderator
Blogs Author
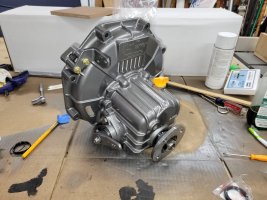
The transmission is so close but I'm stuck on replacing the rear oil seal and setting up the shims on the shifter. I'm going to take it down to the shop tomorrow to see if they can quickly tackle these last two items. 20221101_203312.jpg
 

Nick J

Contributing Partner
Moderator
Blogs Author
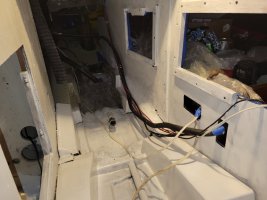
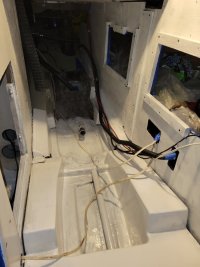
I'm developing a habit for pushing painting projects to the last possible day. The latest example is the bilge paint in the engine compartment. It's forecasted to get below freezing next week in the PNW. Today through Saturday looks marginal at best, but everything depends on getting the paint down so I had to either go without paint, wait for berthed weather, or get it started today. I placed an oil heater in front of the engine compartment and a small space heater in the cockpit locker. This got the ambiant temp above 60 and all the surface temp above 50 which is the lower limit for Total Bilge paint. I've been successful with this setup for a few lockers (with the hull in the water, it's next to impossible to get it above 50 for bilge paint around here). The first coat isn't pretty (trying to keep it thin to help the cure), but it's down. Fingers crossed I can get the second coat down tomorrow20221103_184333.jpg20221103_184322.jpgo
 

Nick J

Contributing Partner
Moderator
Blogs Author
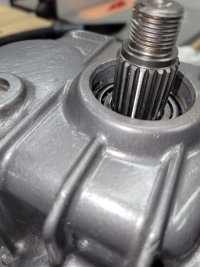
I also made some progress on the transmission. The folks down at Harbor Marine in Everett helped me get the oil seal out. None of the usual methods worked and we almost gave up until the guy who specialized in Kanzaki transmissions helped. His answer was to "pacman" the seal (his words). He took a punch and hammered the edge of the seal in towards the center. It's kind of similar to Mainsail's method of removing stuck cutlass bearings.

Luckily there was just enough seal exposed to work. The old seal did not have plastic on the back of it so it had corroded with the aluminum housing. The shop didn't think it was too bad, so I'm optimistic I can clean it up and install the new one. 20221103_194040.jpg
 

Loren Beach

O34 - Portland, OR
Senior Moderator
Blogs Author
I have a small forced air space heater that I use on the boat when I am aboard to monitor it. Works pretty well. Also for projects where I needed to warm up a surface for glassing I have used a heat lamp -- again only when I was present to watch it.
 

Nick J

Contributing Partner
Moderator
Blogs Author
Same... Until today. I use the oil heater set low when I'm not on board to keep it above freezing. It works great, if not a bit bulky. The space heater has some safety features like turning off if it tips over (this "feature" works annoyingly too well) and an overheat switch, but still not ideal.
 

peaman

Sustaining Member
Last winter, I picked up a "Heat Buddy" propane heater which is approved for indoor use and uses 1# propane cylinders. Haven't needed it yet this year, but it will get a workout before long.
 

peaman

Sustaining Member
Is there much condensation?
I haven't noticed any at all. I haven't used it for comfort heating so much as just warm enough for me to keep working. And I am careful to keep it low and uncrowded to prevent overheating any surfaces from either radiation (in front) or convection (on the overhead). and with the typical low humidity that comes with cold weather in southern New England, condensation has never been a concern.
 

Nick J

Contributing Partner
Moderator
Blogs Author
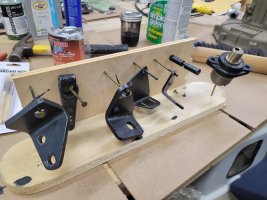
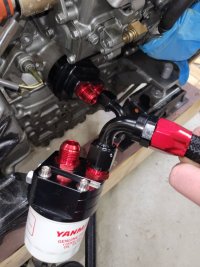
Out of everything going on right now, I think this may be my favorite... an oil filter relocation kit. After all this work, the last thing I want is an oily mess every time I have to change the oil. Still a lot to figure out, but it's off to a good start.
 

Attachments

  • 20221104_180824.jpg
    20221104_180824.jpg
    122.8 KB · Views: 30

Prairie Schooner

Jeff & Donna, E35-3 purchased 7/21
Out of everything going on right now, I think this may be my favorite... an oil filter relocation kit. After all this work, the last thing I want is an oily mess every time I have to change the oil. Still a lot to figure out, but it's off to a good start.
Sa-weeeet.
 

Nick J

Contributing Partner
Moderator
Blogs Author
Well, I pushed the paint a little too much by applying the second coat too early. It was OK on the plywood, but it crackled on the stringers. I've had this happen once before when I did the same thing. It isn't pretty, but to keep everything on track, I'm just going to go with it. At least it is curing so I'm not going to be left with a sticky mess.

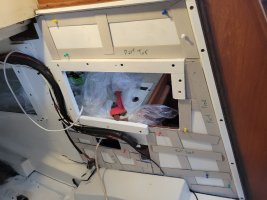
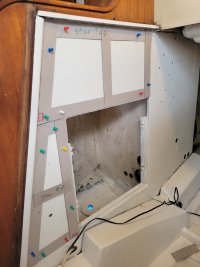
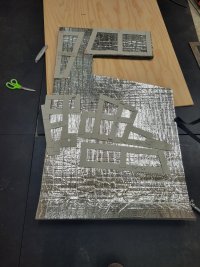
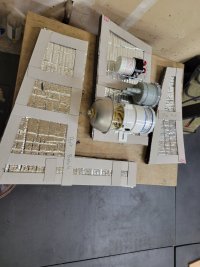
I made templates today for the sound insulation, started cutting them out and played with the filter layout. First try at templating with craft paper didn't go well. The second attempt with drywall shims push pins, and hot glue worked much better. 20221106_134909.jpg20221106_123641.jpg20221106_165448.jpg20221106_172803.jpg
 
Top