• Untitled Document

    The 2024-2025 Fund Raising Season has Opened!

    EricsonYachts.org has opened the season for raising funds to support the expenses of the site. If you would like to participate, please see the link below for additional information.

    Thanks so much for your continued support of EricsonYachts.org!

    2024-2025 Fund Raising Info

  • Untitled Document

    Join us on January 24th, 7pm EDT

    for the CBEC Virtual Meeting

    EY.o January Zoom Meeting

    All EYO members and followers are welcome to join the fun and get to know the people you've met online!

    See the link below for login credentials and join us!

    January Meeting Info

    (dismiss this notice by hitting 'X', upper right)

Water in the boat rant

Kenneth K

1985 32-3, Puget Sound
Blogs Author
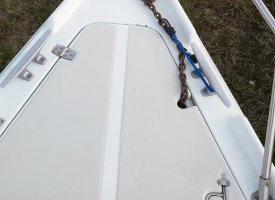
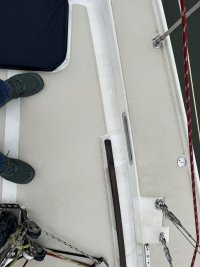
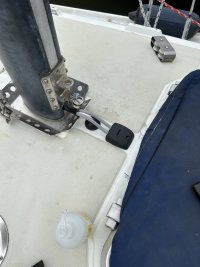
I noticed a similar void at the edge of the cabin top balsa core on the 25+. The material wasn't beveled and the fiberglass of the bottom skin couldn't contour around the 90 degree edge. This created a triangular shaped void along the edge of the core. Any water that got in this area was free to travel the length of the void. It looks like that's what's happening on your boat in pic 3. Hopefully you can find the source further up hill. Maybe the anchor locker lid latch hole, a spinnaker down hull block, or one of the other stanchion bases.
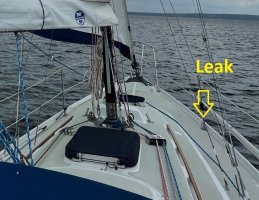
Thanks for the "confirmation," I'm suspecting that is what's going on. The only likely culprits are the anchor locker pan, the two starboard bow-pulpit stanchions, or the cleat, if that's the case. Did you make a repair on your 25+?

IMG_6820.jpg
 

Nick J

Contributing Partner
Moderator
Blogs Author
Yes, hopefully your leak and the core it damaged Isn't as extensive as mine:


On the port side, I beveled the core before installing and the new bottom skin contoured well enough to avoid creating the same void. On the Starboard side, I left the original lip of the bottom skin and just filled it with thickened epoxy before wedging the new core in. Both methods seemed to work well.

It looks like you will probably be OK with sealing up the source of the leak and installing new core around the stanchion base. Still seeing the color of the original balsa through the bottom skin is a good sign.

If I had to bet where the water was coming from on your boat, I'd put my money on the anchor locker latch hole. There's a small mention of it on @Hagar2sail's blog here: https://ericsonyachts.org/ie/ubs/anchor-locker-lid-repair.878/
 

Christian Williams

E381 - Los Angeles
Senior Moderator
Blogs Author
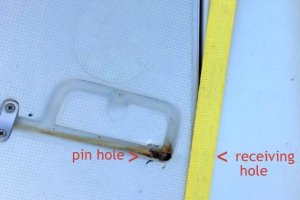
For the record (this has come up many times before), the latch Trickd refers to is a famous source of water entry to the lid and deck core. Ericson drilled for the pin and into the deck, but didn't seal the holes. The solutions are various. I just packed the existing holes with epoxy putty, filling the void, and then re-drilled them.

anchor latch issue.JPG
 

Kenneth K

1985 32-3, Puget Sound
Blogs Author
For the record (this has come up many times before), the latch Trickd refers to is a famous source of water entry to the lid and deck core. Ericson drilled for the pin and into the deck, but didn't seal the holes.
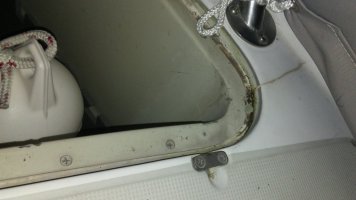
Interesting differences. On the 32-3, the pin doesn't extend into the deck, but under a metal latch, with a molded depression for the pin:20170125_180054.jpg 20160406_191918.jpg
 

Loren Beach

O34 - Portland, OR
Senior Moderator
Blogs Author
Beware... those screws go thru the laminate and into the balsa. Also the ones that hold the hinges on. Many years ago I found some slight moisture around the hinge screws and epoxy-filled those little holes. Our whole anchor locker lid is solid, but only because the carve-out for the slide bolt and the screw holes were all epoxy-filled and re-drilled. Note Christian's comments about this.
 

bigd14

Contributing Partner
Blogs Author
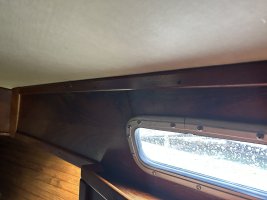
Argh, more wailing and gnashing of teeth, another new leak has been found! This one is over the starboard forward portlight opposite the head and is damaging the veneer.

After ripping most of the headliner out I have concluded that it must be seeping out of the core. Not good! This may either be from the mast step area or where the handrail is attached to the pylon. Strangely, there are no fasteners visible below this pylon which means that any water making its way into the boat is getting trapped in the core and then draining diffusely out below. It would have wick back uphill from the pylon area though… Has anyone removed the handrails on this model and can tell me how it’s fastened?

6E84009D-8A5B-45E5-986A-E2E081331613.jpeg


AED0D7E4-8ED8-4B0F-B1FA-AA2066077086.jpeg
 

Kenneth K

1985 32-3, Puget Sound
Blogs Author
Strangely, there are no fasteners visible below this pylon which means that any water making its way into the boat is getting trapped in the core and then draining diffusely out below.

Ah, that sucks. Sorry to hear that.

In an area like that, where the core "ends" at a fiberglass edge or corner, there may be a void along the whole edge that lets water migrate all along that edge. I think that's what I have going on with my stanchion leak. See posts 19-21 above.
 

bigd14

Contributing Partner
Blogs Author
Yeah thanks Ken, good point. I suppose water could be coming in from the hatch fasteners and moving into that channel. I hadn’t considered the hatch fasteners as they felt and looked dry underneath, but I’ll revisit. Really only three options, hatch, mast or handrail pylon. Of the three, the hatch hinges and the handrails have not been rebedded since I have owned the boat. Negligence on my part…
 

bigd14

Contributing Partner
Blogs Author
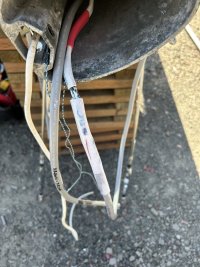
I had a mast-related water problem from water traveling down the INSIDE of the outer jacket of the tri-plex deck/steaming combo-light wire. Took forever to troubleshoot until I watched the drips coming from inside of the outer wrap, where it was cutback to expose the 3 inner wires under the headliner.
I took this to heart when re-doing the mast wiring.

My solution was to create an interruption in the flow of water inside the wire casing. I did this by splicing the standard mast wire to bilge wire (so it would fit nicely through a deck gland). Then I enclosed the heat shrink butt splices in a piece of hose filled with
295 sealant that fits tightly over the bilge hose.

IMG_1946.jpeg

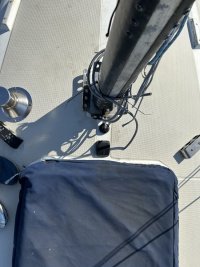
The wiring now exits the mast through a hole drilled in the wire chase cover and will pass through the deck in two Scanstrut deck glands. The single is for the VHF and the double to aft is for the other wiring. The holes in the core under the deck glands are epoxied watertight. Any water getting in will be through the glands which are easily replaced without unstepping the mast. Leaks will be immediately obvious and will not get into the core.
IMG_1992.jpeg
 
Last edited:

mjsouleman

Sustaining Member
Moderator
Argh, more wailing and gnashing of teeth, another new leak has been found! This one is over the starboard forward portlight opposite the head and is damaging the veneer.

After ripping most of the headliner out I have concluded that it must be seeping out of the core. Not good! This may either be from the mast step area or where the handrail is attached to the pylon. Strangely, there are no fasteners visible below this pylon which means that any water making its way into the boat is getting trapped in the core and then draining diffusely out below. It would have wick back uphill from the pylon area though… Has anyone removed the handrails on this model and can tell me how it’s fastened?

View attachment 46102


View attachment 46101
If you open any of the hand rails, you will find wet wood (ply?) I opened up all my hand rails and removed the wet wood and filled with epoxy.
 

bigd14

Contributing Partner
Blogs Author
If you open any of the hand rails, you will find wet wood (ply?) I opened up all my hand rails and removed the wet wood and filled with epoxy.
Yeah we took the handrails off and found wet core too. I’m not going to replace any of it but I will epoxy fill and use butyl tape to prevent more leaks. The handrails are held on with wood screws. At least now I know not to trust them to hold me in any meaningful way (just like the lifelines).
 

bigd14

Contributing Partner
Blogs Author
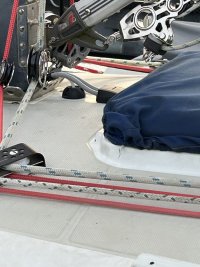
Here is the almost-final mast wiring re-route. I will eventually wrap the exposed cables with a chafe-resistant covering of some kind to fully complete the job. I’m pretty please with how this turned out, the wires are tucked nicely under the vang and I don’t think they’ll get snagged by anything or stepped on.
IMG_2023.jpeg
IMG_2021.jpeg
 
Top