significant water ingress to the bilges - 32-3

Prairie Schooner

Jeff & Donna, E35-3 purchased 7/21
When we purchased our boat the surveyor recommended installing one. He described its value primarily as a deterrent to rope getting caught in the space between the skeg and top of the rudder, as Captain Pete describes. To that end, I'd think it should be a good deal closer to the rudder. But we haven't put one on yet. If things go to pattern, we'll probably close that gate after some cows get out.
 

Dave G.

1984 E30+ (SOLD)
Oh, it's for the rudder...doh ! I was thinking prop fouling prevention. That makes more sense now. Not sure I would penetrate the hull to install one though. Maybe epoxy something to the bottom would work ?
 

peaman

Sustaining Member
The way @nquigley’s is installed, I would think a snagged line would very likely end up hung on the rudder shaft anyway. A more effective solution would be to have something very close to the rudder itself: close enough that the line could not get up on top of the rudder.

Personally, I don’t really see a need for anything. But if I did, I would consider a metal (stainless or bronze) or heavy fiberglass triangle with a flange on top for bolting into (and maybe not through-bolted) the bottom of the skeg. The triangle would be placed maybe 1/4” forward of the leading edge of the rudder. Removable for rudder work. A metal one could have a sharpened leading edge with the idea of cutting through a smaller line.
 

Christian Williams

E381 - Los Angeles
Senior Moderator
Blogs Author
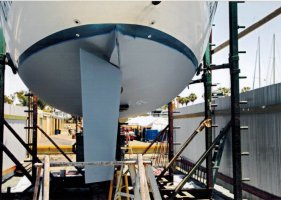
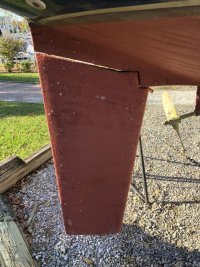
Here's a 32-3 rudder. Not much gap. Also, my 381 rudder. Even less gap.

Line caught there is not a problem I have had.

Since rudders typically float, even less gap when in the water.

E32-3  rudder gap.JPG...E381 rudder gap .jpg

True, the leading edge opens when a balanced rudder is turned, but I don't see how any preventer fitting could protect against that.

Bottom job barrier coat 2015.jpg
 
Last edited:

Kenneth K

1985 32-3, Puget Sound
Blogs Author
If it has a hex head on the top of it (inside the hull) can you try tightening it?
 

peaman

Sustaining Member
True, the leading edge opens when a balanced rudder is turned, but I don't see how any preventer fitting could protect against that.
Even worse, a preventer fitting could cause a jam, whereas a line looped on the rudder shaft might not otherwise impede rotation.
 

Bolo

Contributing Partner
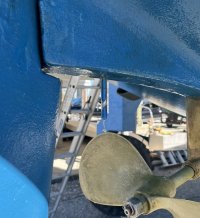
Picture of my rope stopper is attached - a little hard to make out ... hanging down just forward of the rudder.

View attachment 51570
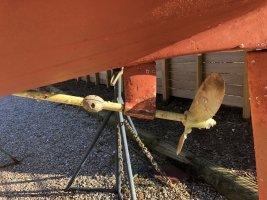
Just catching up on the posts for this thread but now that I've looked at everything...this is the strangest thing I've seen on an Ericson hull. I can't see any purpose for it other than a water entry point which is a problem not a purpose. I think it's been written here already but I'd like to repeat, take that thing off your hull and epoxy the hole ASAP. It serves no purpose IMO. Seems to me that an errant dock line, jib sheet or crab pot line would get caught in the prop first before it ever got to your "rope stopper". Here's are shots of my E32-3 hull at the rudder that I took after last years haul out.
IMG_1564.jpeg

IMG_1563.jpeg
 

nquigley

Sustaining Member
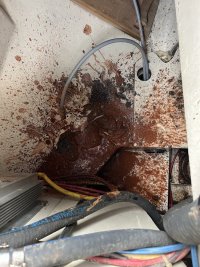
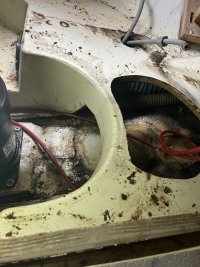
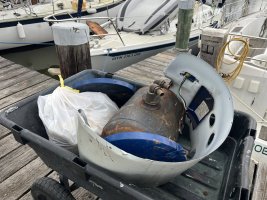
I have decided that I will have to pull the boat out to fix this problem. Probably, as Peaman suggested, I will remove the thing and do a thorough job filling the hole. In preparation for hauling out, I decided to remove the Ratitan R-6 water heater, and it’s support platform, to give enough access to that area inside the boat.
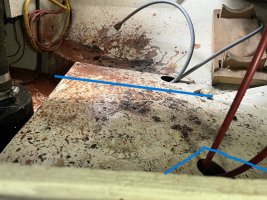
It was a heck of a process, and was only possible by using tinsnips to cut away the thin metal shell from the unit and to remove the top and bottom pans. The base of the cast-iron heating unit was 12 inches in diameter, but, as we know, the cockpit locker needs to be widened a little in order to get that thing out. There was an awful lot of rusty water inside the unit, making the area look like something from a horror film after it was out.
today, I’m going to clean up the area where the leak is to make absolutely certain that it is the only contributor to my bilge water accumulation.
 

Attachments

  • IMG_9470.jpeg
    IMG_9470.jpeg
    236.4 KB · Views: 15
  • IMG_9471.jpeg
    IMG_9471.jpeg
    351.8 KB · Views: 16
  • IMG_9472.jpeg
    IMG_9472.jpeg
    169.3 KB · Views: 17
  • IMG_9474.jpeg
    IMG_9474.jpeg
    287.6 KB · Views: 15

Kenneth K

1985 32-3, Puget Sound
Blogs Author
In preparation for hauling out, I decided to remove the Ratitan R-6 water heater, and it’s support platform.
Yeah, what a mess!

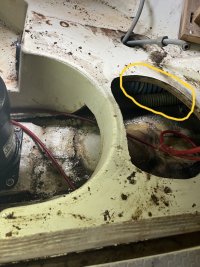
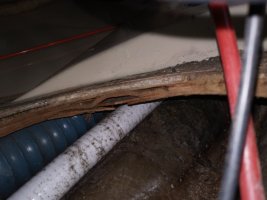
When I removed the support platform, I found a lot of TAFG delamination around that circular cutout:
IMG_9472.jpeg 20210519_221011.jpg
I think the platform trapped water against the TAFG surface, which would then soak into the wood. When I re-installed the platform, I put 1/2" spacers beneath the screws so it wouldn't trap water.

I also cut the sides of the platform down a bit. It just needs to be wide enough to hold the heater--it doesn't need so much overlap on the TAFG. And it seemed dumb to thread cables and hoses through those two holes.

IMG_9471.jpeg
 

Loren Beach

O34 - Portland, OR
Senior Moderator
Blogs Author
Some discouraging news, that. Good news is that you can reformat wiring, plumbing, and add/change some glasswork to make it all a lot better.
(I have moved our boat's hot water tank location and rerouted a lot of hoses, over the years. Everything's much easier to get at nowadays.)
 

nquigley

Sustaining Member
Now that the heater is out, and after I fix my water leak back there, I’m going to reinstall the heater support. Now I’m looking for clever ideas for how to use that space. :) It won’t be for frequent access but maybe I can make use of the newfound space - which almost never happens on my boat.
 

Bolo

Contributing Partner
I have decided that I will have to pull the boat out to fix this problem. Probably, as Peaman suggested, I will remove the thing and do a thorough job filling the hole. In preparation for hauling out, I decided to remove the Ratitan R-6 water heater, and it’s support platform, to give enough access to that area inside the boat.
It was a heck of a process, and was only possible by using tinsnips to cut away the thin metal shell from the unit and to remove the top and bottom pans. The base of the cast-iron heating unit was 12 inches in diameter, but, as we know, the cockpit locker needs to be widened a little in order to get that thing out. There was an awful lot of rusty water inside the unit, making the area look like something from a horror film after it was out.
today, I’m going to clean up the area where the leak is to make absolutely certain that it is the only contributor to my bilge water accumulation.
Wow! Quite a mess. Looks like you butchered an animal down there! I hate to tell you this now but I was able to remove my Raritan water heater whole, on my E32-3, by just cutting a piece of the starboard locker out and making it a replicable piece with some screws for next time. It still was a job getting it out of that hole.
 

Bolo

Contributing Partner
With full access to the offending part, it’s clearly where water is coming in - about a cup per minute!
I’m planing to pull her out on Thursday.
You're doing the right thing getting it out of the water and fixing it right. That kind of leak is not something that should be dong halfway.
 

nquigley

Sustaining Member
Finally, success!
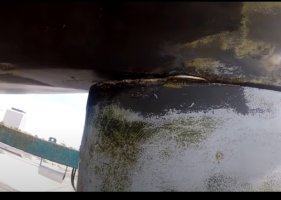
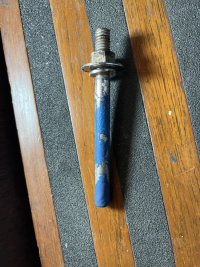
Sure, enough, when the boat was hauled out, there was a steady trickle of water running down that pin and it was very wobbly. The original caulk had hardened and lost some of its contact with the hull, and the nut was a little bit loose also. I filled the hole with fast-setting thickened epoxy, and then added a piece of fiberglass cloth above and below the filled hole. Then I laid in a couple of strips of cloth inside for good measure.
The hull was only about a half inch thick or less where the pin was installed, so any sideways force on the pin would cause it to deflect a little and probably more overtime. If the pin was lying in an inch or two of fiberglass, that would not happen. Altogether, this pin was a poor design and installation, … just waiting for a leak like this to happen. You can see water streaming down and off the pin right after it was hauled out (from a pool inside that overflowed into the bilges.

IMG_9505.jpegIMG_9489.jpeg
 

Christian Williams

E381 - Los Angeles
Senior Moderator
Blogs Author
I would have expected your marina in Mobile, after bottom paint and cutlass bearing replacement, to have noticed a wobbly and nonstandard pin sticking out of the hull.

But these things happen, and have happened to me--despite watching the crew, talking to them, and my usual barrage of questions.

Any haulout is like an update to an operating system. If something is to go wrong, that's when it will.
 
Top