Guest viewing is limited

3D Printer Boat Projects

Nick J

Contributing Partner
Moderator
Blogs Author
@tenders had a great idea to start a thread on boat projects that used 3D printers. The idea started on the mast step material conversation here: https://ericsonyachts.org/ie/threads/mast-step-material.22068/page-2

I purchased my Bambu Labs P1S to help out on my rerig project. So far I've used it to:
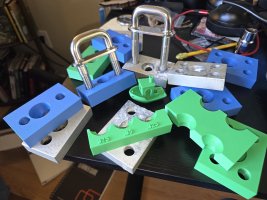
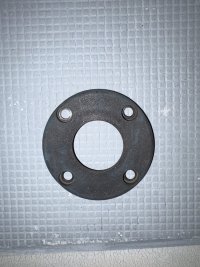
  • Protype the aluminum chain plate backing blocks to make sure I got the socket geometry correct before sending them off to be machined
20250403_141731.jpg
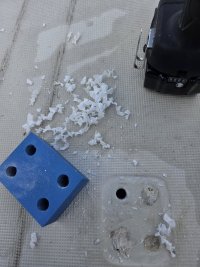
  • Drill guide for the chain plate U-Bolt deck holes (used the same file as the backing blocks)
20250518_104436.jpg
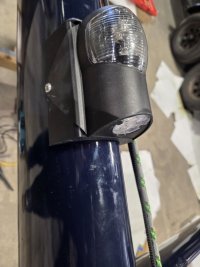
  • Create a filler piece to mount the Marine Beam deck / steaming light (used UV resistant ASA)

20250701_114156.jpg

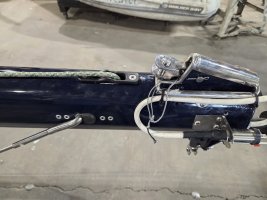
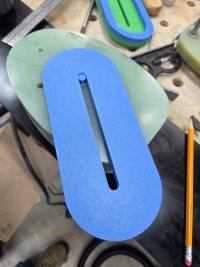
  • Router template for Harken Exit block hole
20250702_164705.jpg
  • mast step drain with Pin to locate the slot

20250701_194900.jpg
20250701_142154.jpg
 

tenders

Innocent Bystander
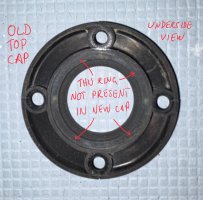
I just got a 3D printer and am still very much a novice, but my first project is a replacement for the top cap of my new-to-me but otherwise very-old Lewmar 40 self-sailing winches, vintage late 1970s - photo 1. The caps that came with my winches are functional but split along the edges - not a great design but who am I to really say if they’re still working after all this time - photo 2.

Replacements are not really available. Defender thought they’re selling them - they aren’t, photo 3, they’re for a newer version of the Lewmar 40 winch. The guy from winchspares.com doesn’t even have them, but he helpfully sent me the Lewmar drawing of the part and suggested I find somebody to model and 3D print them. Turns out, some clown in the UK is offering 3D printed versions on eBay for $50 apiece plus $20 shipping…and that is was the tipping point for me to buy this printer. It’s an Elegoo Centauri Carbon, a new model that is disrupting the 3D printer market because it is very capable and very inexpensive - $300.

I created the 3D model using a website tool called TinkerCAD, which has a reputation for being a very capable toy. To me it is reminiscent of 3D PowerPoint, and can confirm it is much less intimidating than the other standalone 3D modeling programs out there. The library of how-to videos on YouTube is astonishing.

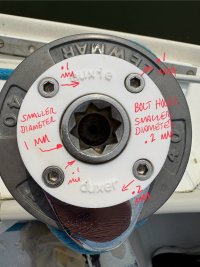
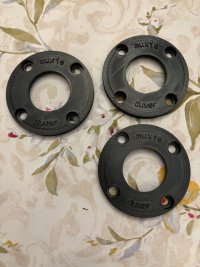
From the drawing, to the model, to the print, I made the prototypes using simple PLA filament, which is easy to print but not UV resistant (photo 4). They were very close to fitting perfectly, but required some tiny adjustments. I printed the revision in ASA, which is fussier to coax out of the machine but is strong and UV-resistant - that’s photo 5. I’ll have to see if the change in materials affected the fit - I suspect it did - but with a little fuss-budgeting I’m feeling pretty confident this is solvable.

This of course suggests all manner of other printable boat items. Hard-to-find castings capping the rail at the bow and stern endpoints can be easily fabricated. So can every manner of faceplate, label, instrument cover, mounting pad (ie, for the compass), and plug. I’m wondering if a hybrid winch cover couldn’t be made that is plastic on the top, accommodates the self-tailing arm, and is sewn to more typical Sunbrella on the sides which would be more water-resistant and long-lasting than the traditional all-Sunbrella design.

Also:
* Replacement interior woodwork, for example the contoured countertop edges, could be easily printed out of brown filament, or other filament that contains actual wood - a sin to carpenters and purists, but I am neither of those and have several feet of this in poor condition
* Honeycomb core material for the next deck core repair, instead of Divynicell foam? My printer would be more than capable of pumping out 10” x 10” squares of this stuff, and if it’s in compression there’s little doubt in my mind that it would be at least as dimensionally stable as the original balsa was

 

Attachments

  • IMG_5862.jpeg
    IMG_5862.jpeg
    79.6 KB · Views: 13
  • IMG_5883.jpeg
    IMG_5883.jpeg
    154.5 KB · Views: 12
  • IMG_5880.jpeg
    IMG_5880.jpeg
    144.5 KB · Views: 12
  • IMG_7368.jpeg
    IMG_7368.jpeg
    131 KB · Views: 13
  • IMG_7375.jpeg
    IMG_7375.jpeg
    241.3 KB · Views: 13
Last edited:

AK67

Member III
Congrats on the work around and thanks for the detailed report. I just had to source a striper ring for set of Lewmar Evo 30's that I found. This would have been a fun solution as well.
 

BlueCanoe

Member II
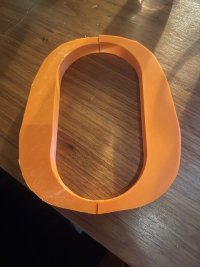
I 3D printed the bushings to go between the mast and the deck, actually haven't installed them yet but I think I may have to do some sanding, the measurements are from a carbon trace. Printed from 100% infilled ASA and they feel like they are denser than oak.
 

Attachments

  • IMG_5439.jpg
    IMG_5439.jpg
    55.4 KB · Views: 8

tenders

Innocent Bystander
Those mast partners bushings are cool. Orange is, of course, the fastest color. Is there a lip on the edge that keeps them on the deck or do they jam inside the hole? How heavy are they?
 

BlueCanoe

Member II
Those mast partners bushings are cool. Orange is, of course, the fastest color. Is there a lip on the edge that keeps them on the deck or do they jam inside the hole? How heavy are they?
They probably weigh a half pound each. They didn't float in the sink when I washed them. There is actually a lip built into the deck interface. The plan is that they will jam in the hole and fit very tight, I think I might need to do some finish sanding
 

tenders

Innocent Bystander
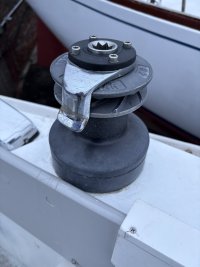
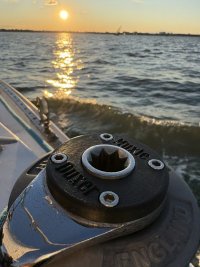
Photo 1 shows the final installation of my first-generation Lewmar 40 winch top caps, part number 15000138, made as I mentioned from UV-resistant material called ASA.

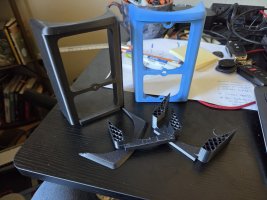
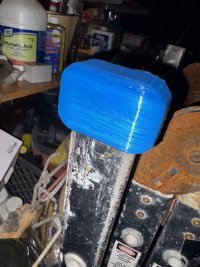
Photo 2 is one of four replacement end caps for my folding ladder, used to access the boat on the cradle in the winter. This took 30 seconds to measure, 10 minutes to design in TinkerCAD, and about 6 hours to print each cap. The material is a rubberlike, flexible filament called TPU. Still working out some bugs in making these print smoothly and consistently on my printer, but even this rough output is good enough for this purpose.
 

Attachments

  • Final Installation.JPG
    Final Installation.JPG
    128.1 KB · Views: 12
  • IMG_7610.JPG
    IMG_7610.JPG
    143.5 KB · Views: 12
Top