Block Replacement

Ed Valente

Member II
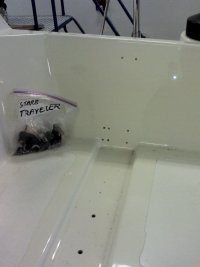
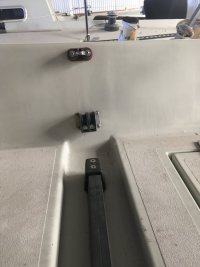
Have any of the “911ers” out there replaced your starboard traveler block?
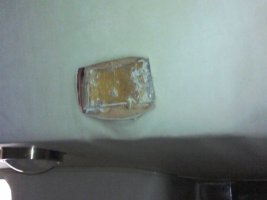
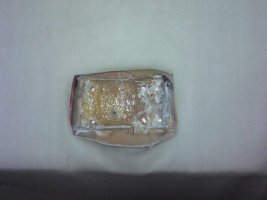
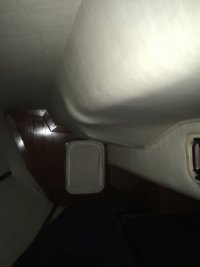
I need to remove mine. However, It appears I am unable to do so without damaging the headliner. I don’t suppose Ericson glassed in the nuts.
Any insight would be appreciated.

Ed
 

Attachments

  • 397013DF-94FC-4FC9-8006-D110B378F15D.jpeg
    397013DF-94FC-4FC9-8006-D110B378F15D.jpeg
    108.1 KB · Views: 14
  • 027BCC37-8590-4342-8191-320321486415.jpeg
    027BCC37-8590-4342-8191-320321486415.jpeg
    38.8 KB · Views: 13

G Kiba

Sustaining Member
Good question. I suspect that the vinyl strip forming the seam between the vertical and top is stapled to the wood underneath holds the liner. Please post if/when you figure it out.
 

Loren Beach

O34 - Portland, OR
Senior Moderator
Blogs Author
Looks like the same attractive-but-complicated aft "head liner" as our 34. I am about to put the starboard traveler sheave assembly and cleat back. I did have to cut a neat (to my eye...) square hole in the vinyl surface to access the nuts that were hidden. The plan is to cover it with a piece of color-matched vinyl on a plate or maybe a piece of formica.
EY had party covered the nuts with some plywood that is against the inside of the cockpit combing. It was a bit fussy to get at, and I do not regret having to cut a new access; it needs one anyway.
 
Last edited:

Ed Valente

Member II
Thanks Loren. Point well taken about the need for future access. Please share pics of your eventual cosmetic resolution.
Ed
 

Loren Beach

O34 - Portland, OR
Senior Moderator
Blogs Author
We are about to install our new traveler and the associated control blocks on each inside combing face. Here are some pix today of the front and backside (starboard) showing where I cut away the vinyl (and also trimmed up the plywood backer that was there to get better access to the nuts and washers. I would guess that these parts were bolted on before the deck was dropped onto the hull, and before the interior padded liner vinyl assembly was installed over it. The factory guys had let some poly resin & mush that was part of the plywood attachment ooze around a couple of the nuts. I used a (knockoff brand) "Multimaster" tool to increase the access to the fastenings.

Tech note: dim lighting and my flip phone cam are not a good combo!

Ed, your stock double block and cam cleat looks identical to our O-34. We will add another block and some added purchase when this upgrade is done.
You might have the same stock Harken traveler, as well....
 

Attachments

  • Traveler Controls mounting.jpg
    Traveler Controls mounting.jpg
    72.3 KB · Views: 12
  • Starb trav. blocks, thru headliner.jpg
    Starb trav. blocks, thru headliner.jpg
    120.5 KB · Views: 12
  • Traveler block, backside.jpg
    Traveler block, backside.jpg
    109.8 KB · Views: 12
Last edited:

Slick470

Member III
Ed, I haven't replaced that block yet, but I have removed the cam cleat above it to replace the worn our springs. It's been a few years but if I recall, I was able to wiggle my arm through the headliner and get a wrench on the nuts by feel. It wasn't comfortable but doable. I wonder if the same could be done with the block.
 

67rway

Member II
We're a few months into use of a windward sheeting traveler system. It's been a huge improvement, particularly sailing/racing short-handed as we have been for awhile now.

I'll probably remove(uggh)/plug/gelcoat over the old traveler control line blocks at some point; both upper and lower.

Curious.... I presume the pic is of the lower block. Did you have to cut the upholstery (then add the cover plate mentioned) for the upper too, or could you reach it from the lower hole?
 
Top