You are using an out of date browser. It may not display this or other websites correctly.
You should upgrade or use an alternative browser.
You should upgrade or use an alternative browser.
tenders
Innocent Bystander
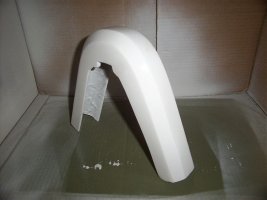
You may be in luck. I bought a bow cap a few years ago from Pacific Seacraft for my E32 back in the days when they still sold Ericson replacement parts. It took me a season to get moving on the project, only to learn that whatever they sold me wasn't the right part for my 32 -- the angle of the V was too broad, and the arms are too short. It's for a smaller boat. But by that time PS got out of the Ericson parts business and declined any further help.
It was $80 (this one's white-gelcoated fiberglass although the original was cast aluminum) but I bet we can make a deal if it's the right part for you.
Can you send me a picture of your broken pieces? Or some measurements? I'll do the same.
(Still haven't fixed my own bow cap.)
It was $80 (this one's white-gelcoated fiberglass although the original was cast aluminum) but I bet we can make a deal if it's the right part for you.
Can you send me a picture of your broken pieces? Or some measurements? I'll do the same.
(Still haven't fixed my own bow cap.)
Last edited:
Mike Thomas
Member II
I had the unpleasant experience of having my bow cap smashed last year on the racecourse. He must have been distracted at the helm reading his rulebook trying to refresh his understanding of Rule 10. Needles to say the bow fitting didn’t make it.
I could not order one from PSC.
I was luckily enough to have a little more than half of the original left on the bow so I made a half mold and manufactured one from fiberglass myself. It only took a weekend and fits better than the original. Making it myself allowed for it to be fitted to the bow and can be attached with 4200. I will use screws to hold the rub rail ends in place. The new “fitted” bow cap will seal the whole assembly once its caulked in place.
I took some pictures of the process if you’d like to see them.
If you want to borrow the mold you are welcome to it.
Contact me back channel if your interested.
Mike Thomas
Miket64@optonline.
76-E-29
Mike Thomas
Member II
Bow Cap
All
Attached are some pics. I only had to do the bow cap but I'm sure the process would work for end caps.
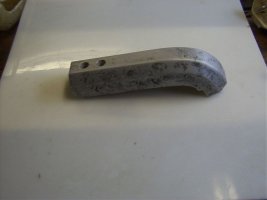
DCP003 is what I had left of the original bow cap. I cleaned it up and coated it with melted Gulf Wax but I'm sure that any type of mold release will do.
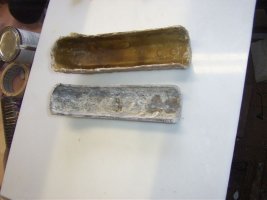
DCP004 shows the mold. After the wax coat I laid 6-8 layers of glass and resin over the wax. I did this like you would do paper mache. I cut the glass into small pieces and worked in small batches. I only mixed 1-2 oz of resin at a time and worked with a small acid brush (soldering flux brush .29 at Home Depot). This allowed me to hold the contours without getting wrinkles in the mold.
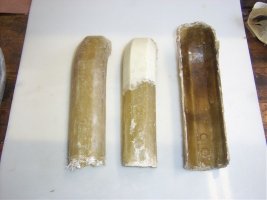
DCP007 shows the mold and the two halves that I made with the mold. I waxed the inside of the mold and built the halves using the same "paper mache" method. To speed the curing process, I mixed the resin very rich with hardener and used a heat gun in-between layers. You'll notice that one of the pieces has some white on it. That is because I tried using a micro balloon thickener in the resin to bulk it up but I was not happy with the results.
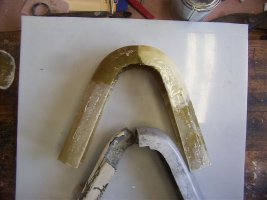
DCP0011 Then I fitted both halves together checking them on the boat as I went along to insure a good fit. Once the fit was good I glassed the two halves together
DCP0016 & 19, Once the halves were assembled I added some body filler to the inside of the arch on the top and bottom. After shaping that extra filler the new cap fits very snug to the bow and head stay tab.
The fit is so close that 3M 4200 or similar will hold it in place.
Finish with filler where needed, a few coats of paint and viola...
All in all it was a pretty easy project and about the only choice I had. It seems to have worked out pretty well. I will not get it mounted until the spring but I'm very happy with it
I hope that helps.
If anyone would like more details, just let me know.
Mike T
E-29
Attachments
Mike Thomas
Member II
E-29 Bow Cap
Francois
Let us know how it comes out.
Mike
Francois
Let us know how it comes out.
Mike

