• Untitled Document

    Join us on November 22nd, 7pm EDT

    for the CBEC Virtual Meeting

    Adventures & Follies

    All EYO members and followers are welcome to join the fun and get to know the people you've met online!

    See the link below for login credentials and join us!

    November Meeting Info

    (dismiss this notice by hitting 'X', upper right)

Ericson 41 Florida - Norway

sveinutne

Member III
I just asked a collage of mind about this drying of the rudder. If the foam is polyurethane, the foam does not have connecting structures, so it can not be dried out by vacuum or blowing air, but this also mean water should not penetrate inside the foam. But it could be if the foam has broken loose from the fiberglass, there could be cracks with water. He recommended opening the rudder and replacing it with new foam, or just heat it gently and let the outside dry and put on fiberglass.
 

sveinutne

Member III
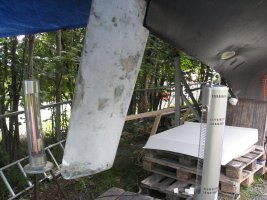
If you look close you can see one IR-heater on 1000 Watt on each side of the rudder.
I guess in the USA you could just put it in the sun and get the same effect,
but here the sun is not so strong. How long I should let it dry like this I do not know,
so maybe I only let it stay on for 8 hours, and then put on filler before I give it a
layer of fiberglass.
 

Attachments

  • rudder and heat.jpg
    rudder and heat.jpg
    111.2 KB · Views: 62

Emerald

Moderator
I'd be tempted to leave it as long as you could, maybe even a week. Do you have an infrared type thermometer where you can measure the surface temperature of the fiberglass? Most epoxy resins start having heat issues around 120-125 F (that's about 49-51 C). I honestly can't remember the exact number for polyester resins, but I believe about 150 F (65 C) is not great, and by 180 F (82 C) you're pretty unhappy, and yes, your deck can get up to these temperatures in intense sunlight :esad: Our boats were built with polyester resins.

Also, what is the humidity in the air where you are? I wonder if it would be worth hanging some plastic from the sides of the hull to make a tent to make it very dry with a vent at the top for moisture to escape. Of course, you must be very careful of heaters and fire and clearances to everything.

A final thought, maybe it might be worth drilling some holes into the sides scattered about. Nothing crazy, but some decent size, maybe 1-1.5 cm. Let the water that comes out guide you as to how close together, and when all done, you could fill these with thickened epoxy. and then you are covering it all with a layer of glass. Of course, if you can't get the core dry, the epoxy won't make good adhesion, and you could have a real mess on your hands :cool:
 

sveinutne

Member III
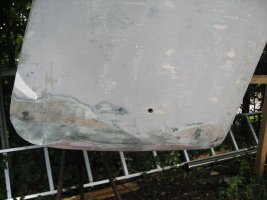
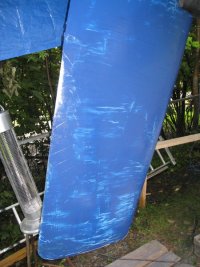
Maybe I was crying wolf for no reason. After 8 hours at 50-55 degrees, the rudder was feeling dry,
and I drilled a 10 mm hole about 15-20 cm from the bottom, and what came out was dry.
So now blue filler has been put on, and tomorrow I can sand it down and put on glass.
 

Attachments

  • hole.jpg
    hole.jpg
    78.2 KB · Views: 43
  • rudder with filler.jpg
    rudder with filler.jpg
    63.9 KB · Views: 44

Emerald

Moderator
Drill a few more higher up - when I did mine, I thought I was dry until I got half way up, and boy was it wet. Remember this part of the project - got to the bottom picture where the rudder is fully split, and you can see how the water was all the way up to where the rudder necked down. This coincided with the uppermost transom bolts. I had gone through thinking it was dry to only go higher probing and suddenly release water trapped above:

http://home.comcast.net/~independence31/rudder/step3.html
 

sveinutne

Member III
I might drill some holes higher up to be sure, but the spots that made me dry the rudder
in the first place was located only 10 – 20 cm from the bottom. Also I have looked at your
rudder project, and I hope I do not need to go that way. It looks like a lot of work, and
if I can avoid doing this I can live with some moister trapped in the rudder as long as the
glass is solid and waterproof.
 

Emerald

Moderator
Here's the problem though. If you have saturation like I did, the foam core has lost bonding strength to the fiberglass shell, and this means the lamination strength of the shell and core is lost. I know of someone who had his Ericson rudder split on him underway, and from what we can tell, it was due to a water soaked core and delamination. So, I'd even say go for having Foss build you a new one if needed. Think of it terms of being in a 45 knot blow in steep seas, and suddenly even Foss is cheap :egrin:
 

sveinutne

Member III
David,
What I think has happen is that the rudder got some small holes in the glass, and some water has penetrated into the foam, but only very local around each hole, and did not go very far into the foam. It has been on dry land for a year now, and some of the water has gone back out, and the water did leave some marks that made me feel suspicious. After the heating and drying, I hope most of the water has gone, and that only some spots have been weakened. With an extra layer of fiberglass the rudder should get some added strength, but I have no intention of taking her out in a 45 knots wind.
I will keep an eye on the rudder when I take here out of the water, and maybe use some instrument to measure the water inside. Building inspectors use an ohm meter or something to measure the moisture in wood. It would be nice if there is a way to measure the moisture in the rudder without punching holes in it.
 

sveinutne

Member III
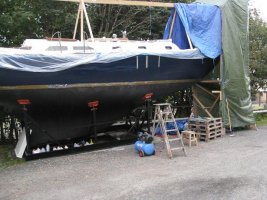
Sean Engle asked if he and his wife could come and have a look at the yacht when they visit Trondheim. I wish I could have shown them more, but what I have learned from this project is that everything is taking much more time then planed. Normally the weather would be too cold now for outdoor painting, but the weather forecast for Tuesday is 18 degrees and no wind; Just what I have been waiting for. So after the picture was taken this Sunday, the right side was sanded down, and some more plaster was put on where needed. I have also put on plaster, so the steel plates holding the mast is no longer breaking in the water.
On Monday after work I plan to sand down the plaster, and clean the right side with acetone, and mask and prepare for painting on Tuesday. On Wednesday Sean and his wife might come and have a look. I wish they could come today instead, because after it is painted, all the small imperfection will be visible.
 

Attachments

  • ericson 097-small.jpg
    ericson 097-small.jpg
    140.5 KB · Views: 79
Last edited:

Sven

Seglare
I like the christmas lights :xmas_grin

At least I assume that's what's next to the ladder.


-Sven
 

sveinutne

Member III
Yes it is Christmas lights, it was shining all last winter, and I will soon turn it on again. It is just as a warning for drivers in the dark, so they see the boat before they hit it. But I must remember to remove it before I spray paint tomorrow.
 

sveinutne

Member III
Put the second layer of paint on the right side today, and tomorrow after work I hope to put on a layer of clear paint. Now it looks much better then what it did after the first layer. I was working on it from I got home from work till dark, and the same might happen tomorrow, but on Saturday I hope I can take a picture of it.
 

sveinutne

Member III
Sean Engle and Meeta made a stop in Trondheim, and had time to look at my Ericson. We got a week with seldom good weather, so I decided to use the week to paint the right side. On Tuesday the first layer of paint was put on, and Sean and Meeta came on Wednesday, so they had to look at the boat with a lot of plastic all over. In the picture you can see Sean and Meeta taste my wifes apple cake with ice-cream and some coffee.
---
Hmmm? I thought Sean looked better in real life.
 

Attachments

  • Brad-Pitt-Angelina-Jolie_1.jpg
    Brad-Pitt-Angelina-Jolie_1.jpg
    31.8 KB · Views: 45
  • angelina-cake.jpg
    angelina-cake.jpg
    22.1 KB · Views: 53
Last edited:

sveinutne

Member III
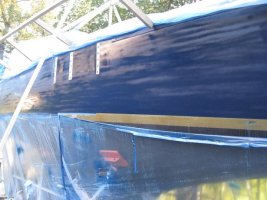
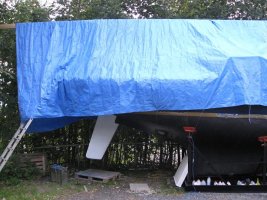
All the painting with the air brush was done under plastic. Shadows from the leaves and branches from nearby trees made it difficult to see if the paint was correct. After two layers of paint and one layer of clear coat, the plastic could finally be taken off. What a disappointment. I think this paint job needs to be done over again. So now it is back under wrap again waiting for the rain. I made several errors, so I will see if I can do it more correct on the left side, and if it will be much better than the right side, then the right side will be redone.
 

Attachments

  • ericson 136-s.JPG
    ericson 136-s.JPG
    53.3 KB · Views: 51
  • ericson 146-s.JPG
    ericson 146-s.JPG
    70.9 KB · Views: 55
  • ericson 148-s.JPG
    ericson 148-s.JPG
    70.9 KB · Views: 76
Last edited:

sveinutne

Member III
Maybe it was good for the painter association that not everyone can do this by just picking up an air brush. The right tool is important, I think I used wrong type for my use, and I am lacking the skills needed to get it right. The air brush I used had to suck the paint up from a can under the brush. This hardtop is hard to suck up, so I only got it up when I adjusted the spray till a narrow beam. The second air bush I picked up today got a separate can where the paint is forced to the gun under power. I tested it on the cradle, so now it got a black layer of paint. This brush has no problem getting the paint, but it is difficult to adjust the spray. The pressure in the paint container falls very quickly when I start spraying, and when it falls below 2 bar it starts to spit paint. Why the air pressure will fall I do not know. The compressor should deliver 15-20 cfm, and the pait brush only takes 11 cfm. Maybe I need to use thicker tubing between the compressor and the can.<O:p</O:p
 

Rocinante33

Contributing Partner
Sveine,

Have you thinned the paint? Most sprayers require a very thin mix of paint. I do not have much experience with them, though, so I hope someone else will give you some input, too.
 

sveinutne

Member III
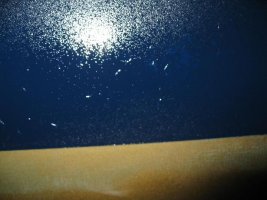
I did so many mistakes during my paint operation, that I thought I should wright a warning to others so they too might learn from this. First I would like to blame it on the weather. In early September we got a weather forecast with 3-5 days of blue sky and 18 degrees. This is a rear event so late in the year, happening maybe every 5 year. I was not ready for the paintjob, but rushed the last part of sanding so I would be able to paint while the weather permitted it. Also I had to take some shortcuts to get ready in time. The top grove for the golden line was not ready, and the top 10 cm above this golden line needed more filling and sanding, so I decide to paint beloved the golden line and take the golden line and above at a later time. Also I was told to put on a layer of paint without filling in, to get a protective layer that would fill all the micro holes the filling leaves behind. Also to start with an even color in the bottom will make it easier to get a more even color on the top. This foundation paint would be put on with a brush or rolled on, and later sanded down with a very find paper 370 or 600. All this and the last smoothing of the hull were bypassed to be able to paint in time, but the result speaks for itself. Now I tell myself that I have put on a protective layer of paint that will preserve the hull from rain and moister during the winter, and then I can do it right in the spring.
So my advice to others: Do not rush a paint job. The work you put in before painting is maybe 80% of the work, and if the foundation is no good, the result will be no good.
 

Attachments

  • ericson 139-s.JPG
    ericson 139-s.JPG
    47.5 KB · Views: 46

sveinutne

Member III
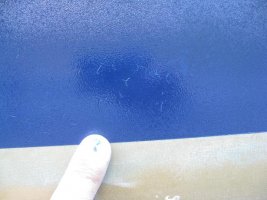
I have several places where there are some very fine hear line cracks. I was told that I needed to sand it all the way down till the cracks were gone and then build it up again. I did not take that advice on the smallest cracks. I guess I did not really believe him, but thought that three layer of paint surly would cover these micro thin cracks, but it did not. So now I have a question. Is it possible to get some chemical I can put on this fresh paint that will make it fill this cracks if a rub it or something? Or do I really need to sand it all the way down?
 

Attachments

  • ericson 142-s.JPG
    ericson 142-s.JPG
    52.1 KB · Views: 47

sveinutne

Member III
Svein,

Have you thinned the paint? Most sprayers require a very thin mix of paint. I do not have much experience with them, though, so I hope someone else will give you some input, too.

Hi Keith
Thanks for your advice. Yes I tried to us 10% of thinner in the second layer of paint. This maybe made it easier to get sucked into the spray gun, but it also made the paint sag and form droplets that almost started to go down the side of the boat. With a more experienced person using the spray gun it might have worked.
 
Top