You are using an out of date browser. It may not display this or other websites correctly.
You should upgrade or use an alternative browser.
You should upgrade or use an alternative browser.
Re-bedding a Lewmar hatch
- Thread starter goldenstate
- Start date
-
- Tags
- lewmar
Auto-correct got me from “Re-bedding” to Rendering, apologies.
Doing my own survey of Interweb articles:

 www.boatus.com
 www.cruisingworld.com

 www.sailrite.com
The hatch is not under any sort of stress like a chain-plate or winch or anchor gypsy, and it is screwed down with numerous SS screws.
Thus, I have little need for adhesion from the sealant, so at this point I think I will buy a tube of 3M 4000UV sealant and use that.

BoatUS Expert Advice
BoatUS Magazine, the largest boating magazine in the US, provides boating skills, DIY maintenance, safety and news from top experts.

Rebedding Sailboat Deck Hardware | Cruising World
A look at different types of bedding compounds for sailboat deck hardware, how to prepare the surfaces and install the gear.

Bedding Deck Hardware: Silicone vs. Butyl Tape
When installing hardware on the deck of your boat or when you're adding new portholes, hatches or windows, it's important to properly bed the hardware to ensure that water can't get into your screw and bolt holes and cause rot and other problems.
Rebedding Deck Hardware - Cruisers & Sailing Forums
About to start doing some refits and maintenance to a new to me 07 Beneteau Oceanis 40. One of the first things that need work is some of the deck hardwear, thus i need a bit of advice . First, Is it
www.cruisersforum.com
The hatch is not under any sort of stress like a chain-plate or winch or anchor gypsy, and it is screwed down with numerous SS screws.
Thus, I have little need for adhesion from the sealant, so at this point I think I will buy a tube of 3M 4000UV sealant and use that.
I like butyl tape and used it where you are contemplating and for all deck hardware bedding. I have never had any leaks where I have used it, except one portlight were I did not apply enough butyl in a gap, and once identified and corrected has not leaked since. Easily removable and can clean up with mineral spirits. Use the stuff that Maine Sail sells, its by far the best. https://shop.marinehowto.com/products/bed-it-tape
@bigd14 and @Slick470 did you encounter any problems with fasteners twisting the butyl tape during installation?
Did you ever apply multiple layers of tape?
The corners of my hatch failed before the sides and I think it is related to the deck convexity. I wonder if an additional layer of tape would be helpful/necessary in those areas.
Thanks in advance.
Did you ever apply multiple layers of tape?
The corners of my hatch failed before the sides and I think it is related to the deck convexity. I wonder if an additional layer of tape would be helpful/necessary in those areas.
Thanks in advance.
markvone
Sustaining Member
I use MaineSail’s butyl tape for all deck sealing. I’ve done one of the hatches so far with no leaks. For the fixed portlights I had to use several layers in a few places to fill the gap where the hull curves and the portlight wouldn’t bend enough to conform. Don’t limit yourself to just one layer of butyl.
FWIW, I would never use an adhesive to seal a gap that’s held together with mechanical fasteners.
Mark
FWIW, I would never use an adhesive to seal a gap that’s held together with mechanical fasteners.
Mark
Slick470
Member III
I did multiple layers. I didn't have issues with twisting for the small fasteners, but the large ones that hold the hinges I had to be careful with. Ours don't go through the deck and thread into a threaded aluminum plate in the deck so I had to twist those to get them tightened. Because of that, I'm sure some of the butyl moved around, but because of the multiple layers and wider contact faces in that area it still created a nice tight seal. At least I haven't seen any new leaks.
That said, I'd like to re-do it and put in new bolts that go all the way through as I can see a bit of flexing with the current arrangement. On the other hand, I don't want to redo it, because it's a lot of work and I have other projects...
That said, I'd like to re-do it and put in new bolts that go all the way through as I can see a bit of flexing with the current arrangement. On the other hand, I don't want to redo it, because it's a lot of work and I have other projects...
Sika 291
The trick to hatches is to not have them twisted.... or warped when bedding.
A series of strings taped to the edges going across the hatch frame is a quick and easy way to see if you are warping the frame.
Guy

The trick to hatches is to not have them twisted.... or warped when bedding.
A series of strings taped to the edges going across the hatch frame is a quick and easy way to see if you are warping the frame.
Guy
I have had some situations where the screws have twisted the butyl but it is so ductile that I have not worried about it. I countersink the hole the screw is going into a bit and use a good amount of butyl around the head of the screw (or fitting) and extend it into the screw threads about 1/4-1/2 inch. It helps if installed during warm weather or use a heat gun to help it flow.
Caulk for this job. Butyl is great for small stuff but it oozes.
It definitely oozes. And it is quite annoying when a squish of sun-heated butyl gets on your shoe and is then spread unnoticed all over the boat! I have solved most of the ooze issues by tightening the fittings down a couple times over an hour or so and waiting for the oozing to stop and only then removing the excess (if you do it right it leaves a pretty clean line). I think the ooze factor is one reason it works so well, so I don’t mind the occasional cleanup where some slight oozing occurs when the weather gets hot. But it’s certainly a consideration.
I used butyl tape. Several layers. Tighten screws over several days time. Remove squeeze where excessive amount got applied. No oozing after that. Maybe because the tape was from Maine Sail. As for adhesion, I had to remove the hatch later and had to use halyard and winch to pull it off.
View attachment 35279
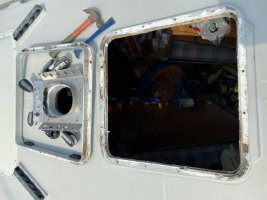
I am preparing to re bed this Lewmar hatch after cleaning out the old gunk.
Should I use butyl tape or 4200?
Something else?
Ideas welcome.
I bought some used Lewmar Ocean 60 hatches to replace the original super hatches. I was originally going to replace the acrylic, but I found the ocean hatches at a cost that made sense to replace the whole thing. A major bonus is being able to source spares. The downside is they are the flanged version and they will not fit in my opening. I was originally going to cut the flange, but this pic shows an ocean flanged hatch and what looks like an opening that has been enlarged. Has anyone fit a flanged ocean series hatch to an Ericson 32 35, or 38?
When I get the flange figured out, I'm planning on through bolting with butyl tape.
Interesting. Both of our Lewmar 'Ocean' hatches, the 70 and the 20, are flanged. I believe that this strengthens the frame, but do not an engineering background to cite. And I might have the terminology wrong -- ours does have the inside vertical spigot.
Your boat must use the faux teak inside trim to cover the visible edge below the hatch frame.
FWIW, our headliner is stapled upward to the inside structure edge, and then the hatch flange drops over the staples and so provides a smooth visual transition to the headliner.
One "solution" might be to enlarge the open slightly to allow the re-stapling of the headliner and then drop the flange down just like the Olson's.
Maybe. Perhaps.
Last edited:
I did not know what type of Lewmar hatches my boat has, but it is of the same generation as Loren's so I assume if everyone says they are Lewmar Ocean series, that's what they are.
The hatch-hole cut in my 32-200 hull is definitely factory-spec. I have the same headliner wrapping-up-beneath-the-flange that Loren describes.
It is a PITA trying to get the headliner re-seated under the flange without tearing the weak, caulk-encrusted, attached-with-rusty staples 30 year old leatherette.
The stapled-up-leatherette also allows water to enter the hull, then run along the inside of the headliner, like a circus tent-top, to a wide range of locations in the boat.
West Marine apparently offers the Ocean hatch in flanged and non-flanged versions:

 www.westmarine.com
The hatch-hole cut in my 32-200 hull is definitely factory-spec. I have the same headliner wrapping-up-beneath-the-flange that Loren describes.
It is a PITA trying to get the headliner re-seated under the flange without tearing the weak, caulk-encrusted, attached-with-rusty staples 30 year old leatherette.
The stapled-up-leatherette also allows water to enter the hull, then run along the inside of the headliner, like a circus tent-top, to a wide range of locations in the boat.
West Marine apparently offers the Ocean hatch in flanged and non-flanged versions:

Ocean Series Hatches | West Marine
Check out our Ocean Series Hatches and more from West Marine!
Since the vertical part of the flange covers the leatherette I am puzzled as to how water could get to it. Unless... water is getting under the flange from failed sealant on the outside. If so, pull the hatch and re-bed.
The remaining sealant *will* have a strong grip, and I find that a heat gun applied to the outside edge, and a multitude of thin-blade "putty blades" will do the separation. (We went thru this drill a few months ago as we got started on our re-fit.)
The remaining sealant *will* have a strong grip, and I find that a heat gun applied to the outside edge, and a multitude of thin-blade "putty blades" will do the separation. (We went thru this drill a few months ago as we got started on our re-fit.)
There's a blog post I'm working on and you've just given away the plot.Unless... water is getting under the flange from failed sealant on the outside. If so, pull the hatch and re-bed.
I looked at the picture again... I think I was wrong. Yours doesn't have the funny friction hinges on the Ocean hatch, so it's probably the original super hatch with a flange. Mine is a different configuration. The hatch opening was molded into the top of the deck so I see gelcoat below the flat frame. The headliner is stapled to furring strips and there's wood trim covering them. To fill the gap between the edge of the fiberglass and the wood trim, there's a T molding. Looks like a good design, but probably more complicated to fiberglass than simply cutting the opening out after the deck is separated from the mold. When I saw your picture, I was wondering if someone along the way cut the opening to fit a new Ocean series Flange hatch.
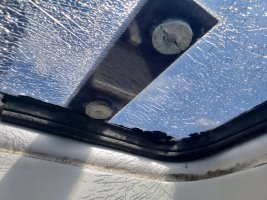

FWIW, I replaced both of our hatches with the mid 90's 'Ocean' version with the new hinge assembly. My original hatches were flange-type also,
The originals did have the (IMHO) worthless roll-stop hinge scheme.
The originals did have the (IMHO) worthless roll-stop hinge scheme.

