YS pedestal disassembly, any tricks ?

Sven

Seglare
We're about to tackle the pedestal on Senta II; replacing the pedestal guard, replacing the cables (later) and removing the ancient instruments.

Any tricks or pitfalls we should be aware of before we start hacking away ? For example, "don't unscrew the blibber because it will fall into the donk and can't be replaced since it is made out of tooexpensivitis". :egrin:

Thanks,


-Sven
 

treilley

Sustaining Partner
Fairly straightforward Sven. Start with removing the compass and work you way down. You may run into some seized machine screws though. See my website for some photos.
 

Sven

Seglare
Thanks Tim,

I'll take a look.

Glyn also suggested taping a plastic sheet under the pedestal to catch any dropped goodies.


-Sven
 

D & DM Cahill

Member II
YS pedestal disassembly, any tricks ?

It should be obvious but just in case, don't forget to run good messenger lines which will come in handy when bringing the shift and throttle cables back up the pedestal. When we changed our pedestal, the hardest part, other than breaking the old bolts loose, was reconnecting the cables in the limited space at the top. Dave
 

Glyn Judson

Moderator
Moderator
YS Pedestal removal.

Sven, Thanks anyhow, I have Datamarine. I tired emailing you back channel twice but they both kicked back at me. Once in answer to your email and the other from my email list. Confused?? Glyn
 

Sven

Seglare
Sven, Thanks anyhow, I have Datamarine. I tired emailing you back channel twice but they both kicked back at me. Once in answer to your email and the other from my email list. Confused?? Glyn

Something strange going on with my e-mail being forwarded through google, don't take it personally :esad:


-Sven
 

mherrcat

Contributing Partner
There is a YS Pedestal reconstruction project listed in the "People & Projects" section...
 

KanH

Member II
One piece of advice, take notes and/or photograph your disassembly steps for the later reassembly. My YS pedestal had a number of bolts of different lengths which had an exact sequence of order when reassembling. What is obvious in November may not be so when it all had to go back together. Also, I needed to entirely remove my pedestal from the cockpit for repair. When I reattached the steering cable-chain in what seemed like a real no brainer process, it resulted in me, for a short period of time prior to going in the water, turning my wheel into a tiller. My cable-chains needed to be crossed under the cockpit soul before coming up over the steering gear. it is never fur have to redo anything twice if you can avoid it.
 

ref_123

Member III
Tired metal

This summer one of the aluminum tangs holding the transmission shifting cable inside the piedestal broke on us. Long story short - we ended up machining new tangs from SS. So, check for tired metal while you are at it...

Funny enough, the cable itself was fine, although I ended up changing both cables - just in case...

Regards,
Stan
 

Sven

Seglare
Thanks for the additional suggestions.

The big hurdle was overcome on Sunday when I finally realized the adjustment knob on the binnacle was actually a spring-loaded pin that holds the compass in place. I didn't want to unscrew anything having to do with the compass as I wasn't sure which screws might set the deviation so it was a relief to finally have an aha moment. Now I can lift the compass out of the way and have at the nuts and bolts below.

The objective is to remove the wing-shaped plate that holds the instruments and the binnacle guard posts and replace it with a 1" thick starboard plate that will attach to the new 1.25" SS binnacle guard posts. Servicing the innards of the binnacle (cables) will be part of the overall project.


-Sven
 

Sven

Seglare
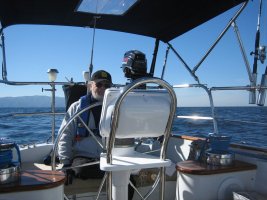
Here's a picture of the new setup.

We're really happy with it. We can now get past the winches and wheel much easier and we have a clear view forward over the chartplotter/radar/AIS screen when sitting down.


-Sven
 

Attachments

  • IMG_5702.jpg
    IMG_5702.jpg
    95.4 KB · Views: 83
Top