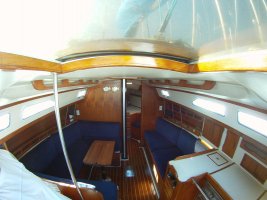
Retired from newspapers and television, currently sailing Thelonious II, a 1984 Ericson 381.
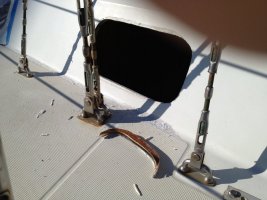
The opening ports on Thelonious were by Bomar. They were mechanically sound, but the lenses looked like Lebowski had dropped a bowling ball on them. In addition to cracks and crazes, they were fogged. Bomar lenses, unfortunately, cannot be changed out.
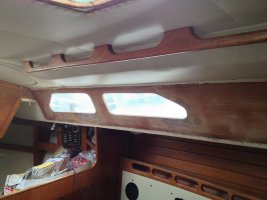
No replacement unit fits exactly into the Bomar opening, but the Lewmar Number 1 is close--only an inch or two longer. There are many threads here on enlarging the hole in the cabin, and although sawing up your boat sounds daunting, it’s a simple job. Make a cardboard pattern of the replacement, draw it on the cabin with a pencil, and cut it out with a jigsaw. It’s easier to cut from the inside, where the surface is flat. You’ll probably make a neater hole than the factory guys did. Here’s the enlarged opening:

To bed the new ports I used gray butyl tape from Maine Sail’s Compass Marine. Wrap the mating edge with the sticky butyl and press it into place from the outside. Then screw down the inner ring to pull it flush with the cabin. I wound up buying shorter stainless machine screws than those supplied by Lewmar, since the Lewmar screws left incomplete “squeezing” of the cabin house/portlight/inner ring sandwich. Shorter screws let the mating surfaces come closer together.
[Note: I came to believe caulk is better than butyl for this job. It fills gaps, provides a little adhesion, and doesn't ooze out over time. Butyl remains my choice for deck fittings]
The opening ports hadn’t leaked, but the four fixed ports were a different story. At first glance, the veneer at the corners showed minor discoloration of the teak veneer. Frankly, I intended to ignore it-- a boat is a boat, not a candy apple. But after removing the top battens that hide the headliner staples, I found areas of teak that were spongy or delaminated. Hmmmm, leaks that live. Is it just the 27-year-old old bedding, or is it the rubber seal holding the glass? Test with hose. Congratulations, sir, your wisdom teeth are fine but your jaw has come out.
Removing the fixed portlights with screwdriver and putty knife took five minutes each-- that’s how brittle and leaky the old bedding was. The raw edge of the veneer was black and crumbly where it met the fiberglass of the cutout. Why so little visible veneer damage? Because the leaks ran between the veneer and the fiberglass, rotting it from the back side. I had read on the forum how to seal the edge of the veneer so that couldn’t happen again, and how to drill a bunch of 1/8 inch holes in the spongy parts and inject CPES. Having never used the famous Smith Company Clear Penetrating Epoxy Sealer before, I telephoned for guidance and asked the guy who answered the phone to direct me to someone knowledgeable.
“I’M STEVE SMITH,” the guy said in upper case.
Ah, the owner. “Well, my plan is to drill holes, penetrate the whole area with CPES, and then clamp it flat until it cures.”
“CPES IS NOT GLUE,” Steve said.
“It isn’t? OK, I was wondering about wax paper as a release agent—“
“IT WILL EAT WAX PAPER. WAX PAPER IS NO GOOD. WHY DOES EVERYBODY THINK CPES IS EPOXY?”
Well, there was a question I couldn’t answer. But I did sense that either somebody had stepped on Steve’s toe the moment before I called, or that the fact that CPES is a sealer and not a bonding agent is knowledge insufficiently widespread. But this was a case of gruff knowing what it was talking about. He instructed me to complete the CPES sealing job first, then cover it with epoxy and clamp using plastic wrap, not that easily digestible wax paper. What I learned: CPES does not stick things together and eats wax paper; also, it’s expensive and smells bad. I didn’t tell Steve about those last two.
With the edges and delaminates sealed, I coated everything with West System and clamped it down with Saran wrap plastered over anything flat I could find.

The veneer was now sound, but needed cosmetic help.

I decided to cover it all with a very thin pressure-sensitive teak veneer product from Rockler-- which would be the first chapter in my new book “Personal Shortcuts in Boat Repair”. However, after cutting a big pattern of the cabin wall and transferring it to a roll of veneer, application proved impossible. That’s because you can’t adjust the position of 8 feet of floppy sticky-back veneer. Not even by one inch.

An hour into the job I was an insect in flypaper. At about that time I recalled reading somewhere why this plan wouldn’t work--for the very reason I had just discovered. I stood there pondering the receipt of this knowledge. Why would your own brain wait until that moment to remember what it already knew? Is it your own brain calling you stupid? Is it bored? Angry at Plato for identifying the brain-body dichotomy? Just watching you flail around for the fun of it? I told myself in a stern tone that a smarter brain would have reminded me that the idea wouldn’t work before ordering $94 worth of sticky veneer. No reply. Not a word.
I went ahead and re-bedded the fixed lights with Life-Caulk. Turned out to be as easy as the butyl tape. I found the best technique was to lay a heavy bead into the 90° corner of the exterior flange, so it oozes into the cutout some and onto the exterior cabin some. Painters tape around the outside makes cleanup simple. No chance for leaks now behind the veneer, because the raw edge is sealed forever by Mr. Smith and Mr. Epoxy.
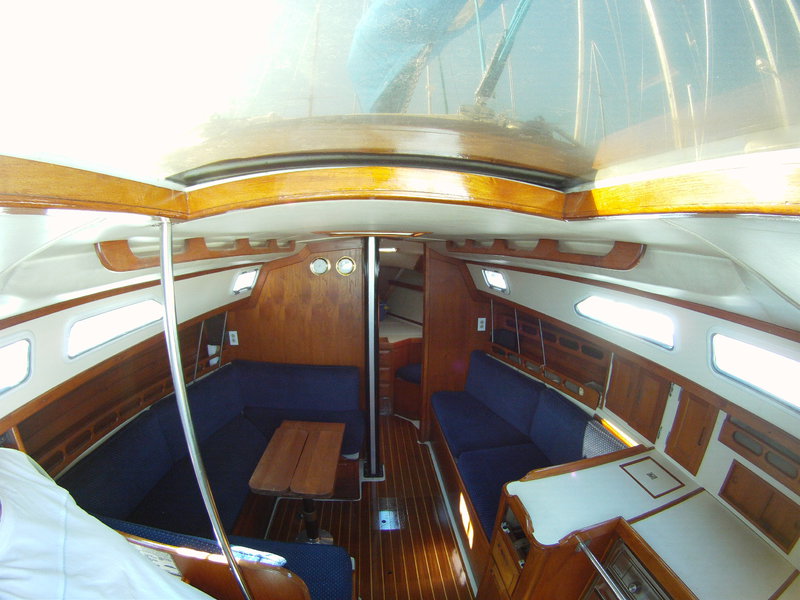
As for the un-re-veneered teak-- I painted it. Hey, there was too much teak anyhow, looked like a bloody peat bog down there. Interlux Hatteras Off-White is a very good match for the tone of the Ericson headliner, and the result looks so factory natural that now all you fellows with teak around the portlights are going to be asked by the next prospective buyer, “Why’d you go and put teak on there? Isn’t that supposed to be painted Hatteras Off-White?” That is, if they can even see your teak under the curtains. I may have painted my teak--but curtains? On a boat? Fine, to each his own. Capt. Jack Aubrey or Capt. Jack Sparrow. Up to you.
This all took a couple of weeks. Of course, I work alone (not by choice-- four grown kids thousands of miles away and an otherwise helpful spouse who watches boat repairs from a distance in high heels). I will say that none of it was beyond my personal abilities, in which a quarter-inch is a very close tolerance. However, cutting, sanding, mixing epoxy, rolling and tipping and multiple varnish coats belowdecks does make a horrific mess of a formerly snug cabin, and I did occasionally wonder into my dust mask, what have you done?

No replacement unit fits exactly into the Bomar opening, but the Lewmar Number 1 is close--only an inch or two longer. There are many threads here on enlarging the hole in the cabin, and although sawing up your boat sounds daunting, it’s a simple job. Make a cardboard pattern of the replacement, draw it on the cabin with a pencil, and cut it out with a jigsaw. It’s easier to cut from the inside, where the surface is flat. You’ll probably make a neater hole than the factory guys did. Here’s the enlarged opening:

To bed the new ports I used gray butyl tape from Maine Sail’s Compass Marine. Wrap the mating edge with the sticky butyl and press it into place from the outside. Then screw down the inner ring to pull it flush with the cabin. I wound up buying shorter stainless machine screws than those supplied by Lewmar, since the Lewmar screws left incomplete “squeezing” of the cabin house/portlight/inner ring sandwich. Shorter screws let the mating surfaces come closer together.
[Note: I came to believe caulk is better than butyl for this job. It fills gaps, provides a little adhesion, and doesn't ooze out over time. Butyl remains my choice for deck fittings]
The opening ports hadn’t leaked, but the four fixed ports were a different story. At first glance, the veneer at the corners showed minor discoloration of the teak veneer. Frankly, I intended to ignore it-- a boat is a boat, not a candy apple. But after removing the top battens that hide the headliner staples, I found areas of teak that were spongy or delaminated. Hmmmm, leaks that live. Is it just the 27-year-old old bedding, or is it the rubber seal holding the glass? Test with hose. Congratulations, sir, your wisdom teeth are fine but your jaw has come out.
Removing the fixed portlights with screwdriver and putty knife took five minutes each-- that’s how brittle and leaky the old bedding was. The raw edge of the veneer was black and crumbly where it met the fiberglass of the cutout. Why so little visible veneer damage? Because the leaks ran between the veneer and the fiberglass, rotting it from the back side. I had read on the forum how to seal the edge of the veneer so that couldn’t happen again, and how to drill a bunch of 1/8 inch holes in the spongy parts and inject CPES. Having never used the famous Smith Company Clear Penetrating Epoxy Sealer before, I telephoned for guidance and asked the guy who answered the phone to direct me to someone knowledgeable.
“I’M STEVE SMITH,” the guy said in upper case.
Ah, the owner. “Well, my plan is to drill holes, penetrate the whole area with CPES, and then clamp it flat until it cures.”
“CPES IS NOT GLUE,” Steve said.
“It isn’t? OK, I was wondering about wax paper as a release agent—“
“IT WILL EAT WAX PAPER. WAX PAPER IS NO GOOD. WHY DOES EVERYBODY THINK CPES IS EPOXY?”
Well, there was a question I couldn’t answer. But I did sense that either somebody had stepped on Steve’s toe the moment before I called, or that the fact that CPES is a sealer and not a bonding agent is knowledge insufficiently widespread. But this was a case of gruff knowing what it was talking about. He instructed me to complete the CPES sealing job first, then cover it with epoxy and clamp using plastic wrap, not that easily digestible wax paper. What I learned: CPES does not stick things together and eats wax paper; also, it’s expensive and smells bad. I didn’t tell Steve about those last two.
With the edges and delaminates sealed, I coated everything with West System and clamped it down with Saran wrap plastered over anything flat I could find.

The veneer was now sound, but needed cosmetic help.

I decided to cover it all with a very thin pressure-sensitive teak veneer product from Rockler-- which would be the first chapter in my new book “Personal Shortcuts in Boat Repair”. However, after cutting a big pattern of the cabin wall and transferring it to a roll of veneer, application proved impossible. That’s because you can’t adjust the position of 8 feet of floppy sticky-back veneer. Not even by one inch.
An hour into the job I was an insect in flypaper. At about that time I recalled reading somewhere why this plan wouldn’t work--for the very reason I had just discovered. I stood there pondering the receipt of this knowledge. Why would your own brain wait until that moment to remember what it already knew? Is it your own brain calling you stupid? Is it bored? Angry at Plato for identifying the brain-body dichotomy? Just watching you flail around for the fun of it? I told myself in a stern tone that a smarter brain would have reminded me that the idea wouldn’t work before ordering $94 worth of sticky veneer. No reply. Not a word.
I went ahead and re-bedded the fixed lights with Life-Caulk. Turned out to be as easy as the butyl tape. I found the best technique was to lay a heavy bead into the 90° corner of the exterior flange, so it oozes into the cutout some and onto the exterior cabin some. Painters tape around the outside makes cleanup simple. No chance for leaks now behind the veneer, because the raw edge is sealed forever by Mr. Smith and Mr. Epoxy.
As for the un-re-veneered teak-- I painted it. Hey, there was too much teak anyhow, looked like a bloody peat bog down there. Interlux Hatteras Off-White is a very good match for the tone of the Ericson headliner, and the result looks so factory natural that now all you fellows with teak around the portlights are going to be asked by the next prospective buyer, “Why’d you go and put teak on there? Isn’t that supposed to be painted Hatteras Off-White?” That is, if they can even see your teak under the curtains. I may have painted my teak--but curtains? On a boat? Fine, to each his own. Capt. Jack Aubrey or Capt. Jack Sparrow. Up to you.
This all took a couple of weeks. Of course, I work alone (not by choice-- four grown kids thousands of miles away and an otherwise helpful spouse who watches boat repairs from a distance in high heels). I will say that none of it was beyond my personal abilities, in which a quarter-inch is a very close tolerance. However, cutting, sanding, mixing epoxy, rolling and tipping and multiple varnish coats belowdecks does make a horrific mess of a formerly snug cabin, and I did occasionally wonder into my dust mask, what have you done?


