• Untitled Document

    The 2024-2025 Fund Raising Season has Opened!

    EricsonYachts.org has opened the season for raising funds to support the expenses of the site. If you would like to participate, please see the link below for additional information.

    Thanks so much for your continued support of EricsonYachts.org!

    2024-2025 Fund Raising Info

Removal of fuel tank in 32-3

Loren Beach

O34 - Portland, OR
Senior Moderator
Blogs Author
New Tank Fabrication
A tank builder up in Bellingham build my new custom aluminum diesel tank, to my drawings. They did a great job and on budget.

Link to my methods: https://ericsonyachts.org/ie/threads/diesel-tank-replacement.6303/
 
Last edited:

Prairie Schooner

Jeff & Donna, E35-3 purchased 7/21
I need to remove my fuel tank to check on a possible fuel leak into the bilge. I know of at least three members here who have been there, done that, so I know it is generally do-able. I thought that if I could disconnect the fill and vent lines at the aft end of the tank, I should be able to shift the tank aft and outboard to get out from under the quarter berth construction, but there are two issues with that: 1) the length of 1-1/2" fill hose is too short, and the nipple too long, to be able to disconnect it without cutting it, and 2) the fuel hoses, battery cables and significant other wiring passing over the fuel tank and into the engine compartment greatly restrict any movement at the forward end.

So my questions are:
a) how can the very stubborn fuel fill hose be disconnected from the rear of the tank prior to moving the tank?
b) If I need to remove wiring at the forward inboard corner of the tank in order to remove the tank, are there suggestions for improving the wiring routing when the wiring is put back into place?

I did see this thread with some great pictures and commentary from Tin Kicker, Kenneth K, and nquigley, so thanks for that good info.
Did you find a leak in your tank? If so, did you repair or replace it? If repaired by someone else, is there a local resource you'd recommend?
Thanks,
Jeff
 

vanilladuck

E32-3 / San Francisco
Blogs Author
A tank builder up in Bellingham build my new custom aluminum diesel tank, to my drawings. They did a great job and on budget.
Spoke with @Charlie B. the other day and he used Coastline for his O34 diesel tank as well. Sounded really satisfied.
 

peaman

Sustaining Member
Did you find a leak in your tank?
I removed the tank and suspended it in my basement for the purpose of cleaning and examination. There was a bit of pitting on the exterior, but the interior looked near pristine, so I figure it's good. Before reinstalling, I lined the hull with the corrugated polypropylene sheet as suggested by Tin Kicker, and I planted an oil-absorbent pad near the lowest point for on-going monitoring. The cause of the suspected fuel in the bilge, in that one incident, is still a mystery.
 

vanilladuck

E32-3 / San Francisco
Blogs Author
I'm finally getting around to installing the new diesel tank from Coastline. However, removing the old hoses is proving to be the most difficult part of the project. I wound up cutting the old hoses to remove the old tank and I thought it would be good to replace them. Why not, right?

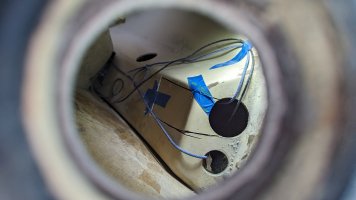
Until I realized, through a series of moments tugging, wrenching and inspecting with a diopter camera snake, there are tie-wraps on the existing hoses which cannot be accessed. The builder apparently tie-wrapped these hoses in place and then dropped the fiberglass "inner shell" into the boat. The hoses start at the deck fill and then drop into the inner shell molding where they stay inconveniently hidden until they make a left turn and reappear in the fuel tank bay under the aft quarter berth.

At least two of the tie-wraps are 6-8 inches from any nearby cutout. I already cut the area of fiber glass between the fill and vent hoses in the after quarter berth.

I'm trying to set aside my frustration and determine how to proceed. Some options:
  1. Find a small skinny saw blade and try to cut the ties
  2. Use the snake camera to approximate the position of the tie-wraps and drill a hole to access and cut the ties
  3. .... just learn to sail the boat in/out of the dock or repower with electric ;P
Seriously though, anyone else run into this or have suggestions?
 

Tin Kicker

Sustaining Member
Moderator
Seems to me I cut the fill and vent hoses at the tank, then once the tank was out undid the deck screws for the fill port and pulled them up thru the deck as a set. You can pull them up a bit to get to the tie-wraps.

Just make sure to tie a string to the tank end of the old fill hose before pulling it up thru the deck so you can pull the new one back in place. If not you're going to need some skinny small person to go forward from beneath the left rear cockpit seat and feed it through.
 

peaman

Sustaining Member
"Good judgement comes from experience, etc..."

I was lucky enough to see a problem with replacing that hose, as much as I wanted to, back when I pulled my tank out.

Are you sure there is no way to join the hose with a new section? Coastline could probably provide a short section of the same tube that they installed on your tank. I know you don't want any extra joints, but desperate times, and all.

I kind of like your idea of estimating the location of tie wraps and then cutting an opening for that. I assume your liner is like mine in that the part concealing the hose is basically cosmetic only, so perforations should not be a problem.
 

Tin Kicker

Sustaining Member
Moderator
"Good judgement comes from experience, etc..."

I was lucky enough to see a problem with replacing that hose, as much as I wanted to, back when I pulled my tank out.

Are you sure there is no way to join the hose with a new section? Coastline could probably provide a short section of the same tube that they installed on your tank. I know you don't want any extra joints, but desperate times, and all.

I kind of like your idea of estimating the location of tie wraps and then cutting an opening for that. I assume your liner is like mine in that the part concealing the hose is basically cosmetic only, so perforations should not be a problem.
Thinking it through first and working it from the deck end it really was not that bad a job once the tank was out.
iirc The hose was only about 5-6 ft long.
 

vanilladuck

E32-3 / San Francisco
Blogs Author
So the tie wraps are only joining the fill and vent hoses, and were not secured to anything else (except maybe the ground wire)?
Different on Rumour: the tie wraps are screwed into fiberglass or wood, depending on where they are. So they are holding the hoses hostage. I haven't been able to contact their representatives to see if they have any demands.

But hey, here am I cutting open some fiberglass last night before dinner:


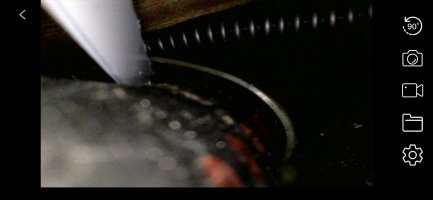
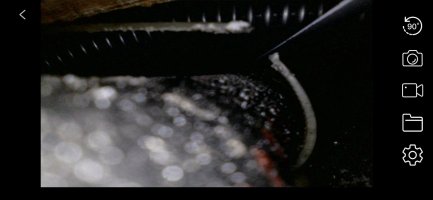
And just now I was able to cut one of the zip-ties through that hole with a bare hack saw blade:

Screenshot_20231213-135331.jpg Screenshot_20231213-135703.jpg

I think there's one more up above closer to the deck fitting. I'll try drilling a hole to access it...

PS - well played @peaman with replaying the quote in my signature :D
 

Loren Beach

O34 - Portland, OR
Senior Moderator
Blogs Author
Strictly IMHO, those old hose runs may have been arbitrary in their attachment points. EY had to have install "rules" that a new employee could follow when he jumped from hull to hull to run systems.
I had some tight places under the aft cabin berth where the OEM bilge hoses were routed. In some areas I created some better access, and also ground away the openings where the hoses passed thru.
Also, you can always calculate about where the hose may possibly chafe once pulled into place, and double-armor those sections with a split piece of hose material before pulling it into the abyss. After all, chafe is the problem you want to avoid going forward, and tying the hose in place is just one way to address this.
 

Kenneth K

1985 32-3, Puget Sound
Blogs Author
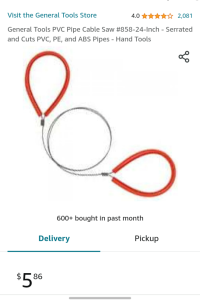
Any chance of sliding wire saw down along the hose, catching it on the zip-tie and sawing it off? At least you don't have to worry about collateral damage to the old hose.

Wire saw:
Screenshot_20231213-214029~2.png

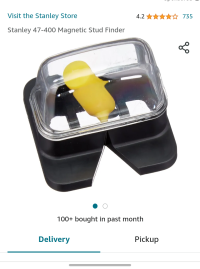
If you have to cut or drill holes to get access to screwed-in zip ties, perhaps an old fashioned magnetic stud finder could help you locate the hidden screws.
Screenshot_20231213-215514~2.png

Also, try climbing down into the area below the raise-able port-side cockpit seat. I had to get in there to remove all of my stern-rail stanchion bases. I remember, once miserably cramped and contorted down there, that much of the fuel filler hose was visible from that angle.
 
Last edited:

vanilladuck

E32-3 / San Francisco
Blogs Author
Great suggestions!

Update:
After I put a 2" hole saw through the shell and cut the last ziptie, I painstakingly removed both fill and vent hoses. The vent hose went pretty easy, but I had to work the fill hose back and forth for hours (plus a lot of cursing). I had drilled a small hole in the end of each hose and tied a pullstring, so I have two of those to help work the new hoses into place. Will see how far I get tomorrow and post some pictures...
 

vanilladuck

E32-3 / San Francisco
Blogs Author
Has it been a week? Good grief, I've been working on this project every day. Sometimes with help. Sometimes in the rain. Sometimes I just sit among the mess of wires, tools, parts and mess in the cabin and drink beer.

I got the 1.5" fill hose pulled into place. But, then I couldn't position the hose under the deck fill fitting -- it was too stiff and the hole from the top of inner fiberglass shell was too far outboard to allow alignment. I pulled the hose completely out and left a pull string in place. At home that evening I thought about how to make this work.

Decided to cut some of the shell away to allow the hose to move inboard. Here's a photo looking straight down from the deck fitting hole:

PXL_20231217_235648176.MP.jpg

I borrowed a multi-tool from a fellow mariner and made the cuts. You can also see the hole below that I cut to access the zip-ties.

Now, I could wedge the hose upwards against the deck fill hole in the combing and use a small box to push the hose over into nearly vertical alignment.

GX010037_1703204171020.jpg

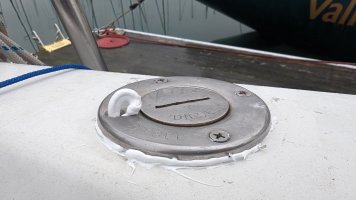
Once in place, I returned to the cockpit and gently dropped the barbed deck fitting into the hole and, before it went flush, injected sealant on top of the existing gasket (still in good condition) and in the screw holes. How do you know if you used enough sealant?

PXL_20231218_190553506.MP.jpg

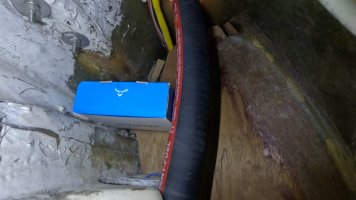
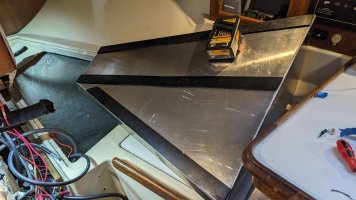
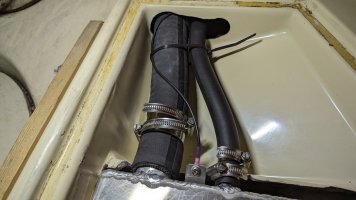
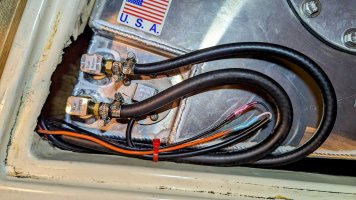
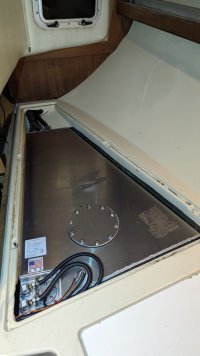
With a sigh of relief I spent the next couple days wrestling with the vent hose, measuring, cutting, repositioning supply and return line fittings, adhering neoprene strips to the underside of the tank with 5200. The final product:

PXL_20231221_001721636.MP.jpg PXL_20231221_020511568.MP.jpg PXL_20231221_040041351.MP~2.jpg

PXL_20231221_040526191.MP.jpg

I've done quite a few things to this boat over the last three years. This is by far the toughest project yet. Glad it's done.

Also appreciate all the advice and suggestions here. Cutting the shell was key (thanks @Loren Beach). I'll probably be diving back down into the aft lazarette to secure the hoses somehow to avoid chafe.
 
Last edited:
Top