• Untitled Document

    The 2024-2025 Fund Raising Season has Opened!

    EricsonYachts.org has opened the season for raising funds to support the expenses of the site. If you would like to participate, please see the link below for additional information.

    Thanks so much for your continued support of EricsonYachts.org!

    2024-2025 Fund Raising Info

Typical new boat owner head/toilet questions

dxulander

Member II
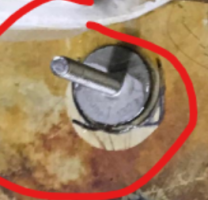
The last time I installed a new head, the bolt pattern was just different enough that I did have to fill the old holes with thickened epoxy and drill new holes for the lag bolts for the new head. The difficult part was getting the epoxy to stay in the old hole and not drip/sag thru. Luckily EY put a piece of plywood under that FRP base and there was enough thickness there. I finally pushed a little foam "plug" carefully down to the bottom of the hole(s), and then could pour in a bit of epoxy to seal it. Then, fill it up to the top.
Apropos of Whatever, it's nice to hear that the formerly-despised Jabsco head is now more competitive with the higher quality Raritan PH2. :)
Best of luck in this project. It's pretty safe to say that no owner enjoys this part of boat ownership one bit! It's just something we gotta do.
Final questions (but can't promise this), and definitely let me know if I'm over-thinking this:

"Filling the old holes" was that purely for cosmetic purposes?
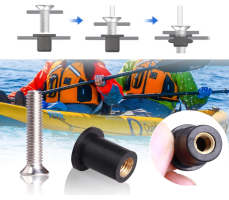
"Drill new holes for the lag bolts", did you just screw your lag bolts directly into the fiberglass (to secure the toilet base) or did you use some kind of mounting medium (example below):
1717270697371.png

Basically the design decision on the mounting bolts: drill new holes or not for the new bolt pattern:
1. Drill new holes: what's the best way to secure the bolt to fiberglass
2. Don't drill new holes: use these flat mounts w/ adhesives (this is from the bilge as I didn't want to drill any holes)
1717270925792.png
 

dxulander

Member II
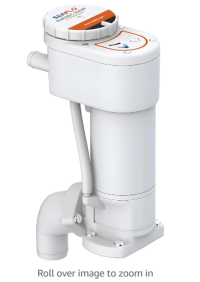
Btw, the goal is to buy the manual twist and lock toilet, but then replace the pump assembly w/ this electric conversion. Apparently this electric conversion is known to have reliability issues so should it break (probably not a matter if, but when), undo 6 bolts and we have a manual handle back-up. Goal is to test and get data on the convenience/creature-comfort trade off w/ reliability of these kits.
1717271462870.png
 

Loren Beach

O34 - Portland, OR
Senior Moderator
Blogs Author
"Filling the old holes" was that purely for cosmetic purposes?
"Drill new holes for the lag bolts", did you just screw your lag bolts directly into the fiberglass (to secure the toilet base) or did you use some kind of mounting medium (example below):
I believe it's best to fill the old holes, as you do not want some future water (or something worse) spill to get down into base and cause rot.
FWIW, West System epoxy combined with their regular filler cures out to a very close color match to the "beige" color of the gel coat on the interior molding in our head compartment. Yours also, perhaps?

Note that boat has about a half inch of plywood bonded to the underside of the flat part of the head compartment where the toilet mounts. Plenty of strength for the lags to grip.

Also, when doing the final install, and are ready to tighten those bolts down, first put some sealant around each hole just to ensure that water does not get in around the threads.
And, just one more thing... if you are going to install a toilet with the larger"elongated" "household sized" bowl, consider that the base bolt pattern will extend forward about 1.5 inches. It's a nice upgrade, IMHO, but does change the mounting pattern.
 

Prairie Schooner

Jeff & Donna, E35-3 purchased 7/21
Going through same process of ripping out old Raritan PHII and replace it w/ a Jabsco Twist n Lock. The base bolt patterns are different, did you have to drill new bolts into the fiberglass to fit the new toilet, aka how did you account for the change in mounting position? Thanks.
- Check everything carefully before you drill the holes. Lid opening, parts replacing, handle pumping, etc. I thought I was going to be really smart and give myself some more knee room by drilling new holes to rotate the original toilet. Carefully checked handle clearance. Checked knee clearance to be sure I was making a noticeable improvement. Filled the old holes. Drilled new ones and mounted it. The lid will not open all the way, it bangs against the bulkhead. I've come to the conclusion the holes it was mounted in are the Only place where all the geometry will work. Except moderately long legs. I'll be moving it back this year.

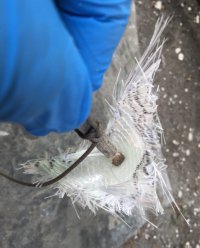
- This little technique is probably overkill for your application, but I'll drop it here anyway. This was for an overhead recessed rectangular cavity where I'd broken through one corner.
epoxy patch blind 1.jpg epoxy patch blind 2.jpg

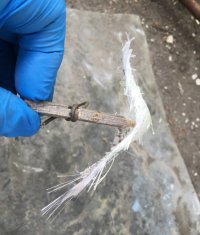
I made a little depression in some fiberglass, put a drop of epoxy in it with a stick narrowed strategically so it would break off easily. I was careful not to saturate the entire piece. Once hard, I put some filled epoxy in the hole, juiced up my cup part, and inserted it. It expands back open like an umbrella. I then tied a string to a point opposite which held it until cured. I broke off the stick, ground out the remaining wood, and filled it with epoxy. FWIW

Jeff
 
Top