Buying (maybe) an E32-2 with a wobbly rudder

skipper007

Member II
Buying (maybe) an E32-2 with a wobbly rudder (And the ensuing tale of repair)

Hello world....
First post. Not yet an owner, but have contract on a 1974 E32-2 in San Fran bay. Boat is in overall good shape, but I've found significant slop in the rudder. Survey will be scheduled within 2 weeks.

I'm debating doing the rudder myself (price concession already exists). I've read every rudder post on this site, but have some very specific quesitons. If anyone can help email me - tisbond@comcast.net

The current owner has never tightened the packing. He busted a steering cable and replaced it, but didn't tighten it well. The deck mount end, where the tiller attaches, is extermely loose. From what I've read > 1/4" of play requires attention. The play on the rudder as is probably > 1/2" if not 3/4". You can grab the shaft and watch everything dance.

My questions are:
  • Is there a bushing, a bearing or nothing at the bottom of the rudder post where the shaft exits the hull? I’ve read about people filling the post with epoxy, or using a torch to get the lower bushing out to replace it. Looks like a delron replacement is right, if it has one or needs one. What is on the E32-2?
  • Is the packing assembly attached to a bearing or bushing or is it separate from the rudder post. Edson sells a combo bearing and packing which has to be glassed into the top of the rudder post.
  • What is the inside diameter of the rudder post? <O:p</O:p
  • What is the exact shaft diameter. I believe it is like 2 3/8” or 2 3/4” but I’m not sure.
  • Is it possible or likely that the fiberglass of the rudder post is damaged?
Thanks, and I'll keep ya'll up to date.....
Skip<O:p</O:p
 
Last edited:

wurzner

Member III
My questions are:
Is there a bushing, a bearing or nothing at the bottom of the rudder post where the shaft exits the hull? Yes


Is the packing assembly attached to a bearing or bushing or is it separate from the rudder post. Separate


What is the inside diameter of the rudder post? 2 3/8 based on memory (own a 38 now)
.
Is it possible or likely that the fiberglass of the rudder post is damaged? Unlikely. I would say packing and bearing would take care of it unless the post is out of round.

Good luck
shaun
 

skipper007

Member II
Lower bushing

Shaun,
Thanks for the response, but I guess I don't know to what you said YES in the first question. It was an either/or question.....

I've been corrected on my terminology. When I say rudder post - I mean rudder trunk.

My main question at this point is:
Are there 2 bushings within the rudder trunk? One lower at bottom of hull and one upper at packing? Does removal require heating?

I re-read all posts last night and through ChrisS and Jorge have found that their absolutely is a rudder bushing at the top of the rudder trunk. Not clear if either replaced the lower (maybe it doesn't exist). It does exist on the E32-3, just not sure on the E32-2.

Has anyone tried the Edson Stuffing box/bearing rudder assembly? Edson part #697-2.375 for about $190. Would require glassing in to support it.

Thanks,
Skip
 

Loren Beach

O34 - Portland, OR
Senior Moderator
Blogs Author
Use and Wear

My main question at this point is:
Are there 2 bushings within the rudder trunk? One lower at bottom of hull and one upper at packing? Does removal require heating?

I re-read all posts last night and through ChrisS and Jorge have found that their absolutely is a rudder bushing at the top of the rudder trunk. Not clear if either replaced the lower (maybe it doesn't exist). It does exist on the E32-3, just not sure on the E32-2.

Has anyone tried the Edson Stuffing box/bearing rudder assembly? Edson part #697-2.375 for about $190. Would require glassing in to support it.
Thanks,
Skip

One caveat: heating a fiberglass rudder tube will not ease removal of a worn-out bushing, and will harm the fiberglass. FWIW, the stuffing box assembly on my '88 is glassed in to the top of the tube and does not incorporate a bearing/bushing.
As to the wear, this is the kind of maintenance item that sneaks up on an owner over many years, because the change in play is so gradual. Either a friend / mechanic is aboard one day and points it out... or the new owner finds it immediately (as does his surveyor).
The steering "stuff", whether transom or spade rudder gets worn a bit every (!) trip away from the dock, power or sailing... :rolleyes:

Other Ericson 32-2 owners will have more specific model info.

Best,
Loren
 

wurzner

Member III
Hmm...noticed it was an either / or question. There is a bearing on the bottom, but I did not think there was one on top. Most of the way up is where the packing box is and I did not think there was a bearing at that location, but the other folks obviously worked that area more than I did. I know there is one on the bottom that most folks were having replaced with a delrin bearing...the old one was brass if memory serves me correctly.

shaun
 

skipper007

Member II
Survey and haul scheduled

I guess we'll find out.....Scheduled a survey 12/13 and will get a repair quote at the same time. I hope the price concession I already received for the work covers the repair......

Spoke to the surveryor, he said "the old ericson's didn't use any bushings, just a packing at the top" then he made noises like cutting the rudder trunk out and redoing the glass, adding bearings/bushings and the like. Sounds like a potentially big project.

Guess I know what I want from Santa....
Skip
 

Phil MacFarlane

Member III
I have an E35 MkII. I’m not sure it’s the same as a 32-2 but it probably is.
My rudder was very wobbly also, so much so it was becoming a hazard as it would tend to get jammed in one position and not want to turn anymore.

During my last haul out last Fall I pulled the rudder. The rudder post tube is a fiberglass tube which is one with the hull maybe 8 or 10 inches tall. At the top of this tube is a bronze packing flange. This is a two part flange with the bottom part being one with the fiberglass tube and the top part being just a flat round ring. The bottom part has a recess in it for one loop of packing material and the underside of the top ring is simply flat. There are 4 bronze bolts that bolt the top down to the bottom thereby squeezing the packing material into place.
At the bottom of the rudder post tube there was a piece of bronze pipe about 3 or 4 inches long. This was the bearing for the rudder. Inside the fiberglass tube there was a space between the top of the bronze pipe and the packing flange that was just a void. There was nothing there except the fiberglass which was not even close to touching the rudder stock. I would not consider the packing flange at the top to be a bearing although I’m sure it helped. So, the bearing system from 1971 was, the stainless steal rudder post turning inside a bronze pipe. And like the venerable Atomic four, it worked for many many years but was now worn out.
I cut the bronze pipe from the inside and caved it in onto itself like you do with a cutlass bearing. It came out without to much trouble. Then to my surprise there was a piece of gray PVC electrical conduit acting as a filler between the outside of the bronze pipe and the inside of the fiberglass tube. I cut this out just like I cut out the bronze pipe. Then I was left with the inside of the fiberglass tube which was much larger than the outside of the rudder post.
I had already decided before the haul out that I was going to try the West Systems Epoxy Graphite rudder bearing. I sanded down the inside of the fiberglass tube and cleaned it very carefully. I waxed the stainless rudder post with mold release wax, several coats. I mixed up a batch of epoxy graphite per West instructions and smeared as much as I could into the fiberglass tube with a paint stirring stick. Then I slid the rudder into place. I had drilled several holes in the fiberglass tube from the inside of the boat that I could reach with a caulking gun. I mixed up some more epoxy graphite and filled several caulking gun tubes with the mixture and injected it through the holes I had previously drilled.
I let this set up for several hours fearing the whole time that I would never be able to get the rudder out of the boat again and would never be able to turn it.
When I first went to remove the rudder it was locked in place. (See fear above) One good whack on the top of the rudder post in the cockpit with an eight pound hammer and it broke free.
Now for the problem I did not expect…
It turns out that pipe, even the stainless pipe they used to make our rudders is not round!
I had used this pipe as a male mold for my new bearing. So now my bearing was not round. I could slide the rudder up and down and out of the hull but I could not rotate it!
After many hours of measuring and grinding the rudder post and sanding the inside of the new epoxy graphite bearing I ended up with a bearing I am very happy with. There is absolutely no play, it moves smooth as silk and the bearing surface is now the full length of the fiberglass tube.
I did this all myself and it hardly cost anything but my time. I wouldn’t want to think what the yard would have charged for the same job. It was not hard to do but if I was doing it again I would try to make sure the rudder post was round before using it as a mold.
You are in the Bay Area and so am I. If you would like me to drop by at the yard when you haul out I would be happy to just let me know.

Good luck

Phil

P.S. Make sure the yard sets the boat down high enough that you will be able to drop the rudder out.
 
Last edited:

S Ellis

Member I
try this!

I tend to agree with the surveyor. My 32 is a 1969. I had slop in my rudder when I first got it. I was a looking at all the options as you are to take the excess play out of the steering. I solved the problem by dropping the rudder a few inches out of the tube[while hauled out!] and then pushing it back up into position while my assistant managed to slide a circular shim of plastic[ made from a bleach bottle I believe] around the top of the shaft. That took all the play out of the rudder! It appeared that all the play was in the very top of the shaft. That was 3 yrs ago, and the steering is still tight! Give it a try....even if the plastic wears out every few years it's a cheap fix!! Good luck! Steve
 

rwthomas1

Sustaining Partner
S Ellis had a great idea and it should work very well however you may want to look into a more high tech solution than a bleach bottle. PTFE or UHMW polyethylene plastic may be a better choice for shim stock. Very slick under load so should make a nice smooth bearing. www.mcmaster.com has this sort of stuff if you do some searching. RT
 

skipper007

Member II
My current plan

Thanks everyone for all of the suggestions.

Phil, your write up is phenomenal. I can completely picture your setup and solution. Thanks for the time you spent, and your offer to visit.

The shim concepts using either plastic, bronze, or other plastics seems like a good quick & inexpensive solution, but one that may require constant monitoring and re-shimming.

I've read many of the West system graphite/epoxy concepts. The write ups basically have 3 approaches. Approach 1 - your approach - is to make a full length rudder bearing out of the graphite filled epoxy using the rudder shaft as a mold. Approach 2 - is to use the graphite and epoxy to in-fill and secure Delrin bearings at the bottom, and possibly top of the rudder tube. Approach 3 - seen on a Pearson write up (dan.pfeiffer.net) is to use the graphite/epoxy to make the rudder shaft round by running a bearing up and down it to fair out the epoxy. I wouldn’t have thought that the stainless steel shafts ala Ericson would have needed this approach developed by folks with Aluminum shafts ala Pearson, but given Phil’s discussion, it may in fact be necessary.

My biggest fear of using Approach 1 is how could you ever do another subsequent repair? The first time is a charm - lots of good bonding surface from the inside of the tube for the epoxy. But if it ever gets worn again, you'd have to chip out the entire length to get a reasonable fill and adhesion again. Or just apply an additional layer of very marginal thickness onto a very poor adhesion surface.

Approach #2 seems like a pretty good approach. If you used Delrin and pushed bearings in from the top (packing side) and bottom (hull side) and then locked them into place with the epoxy, you would have the option of replacing them in the future when needed

Approach #3 just seems wrong. I hope that my rudder shaft is true round and not egg shaped like Phil's or worn like the Pearson Aluminum shafts. If it is out of round, maybe I'll pick up one of the better designed rudders (and shafts) from Foss foam. I got a quote from Don (great discussion with him) for around $1500 delivered. A custom fab job would be way more expensive

Has anyone else seen their stainless shaft being out of round? What causes it?

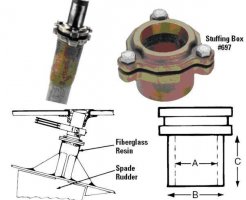
My current plan is to go nominally with Approach #2, but with a backup of having on hand one of the Edson combo packing and bearing assemblies (Part # 697) for the top bearing. West Marine can special order it, have it in ~ 2 weeks, and will take it back with no restocking fee. My thinking is if Edson has a COTS (commercial off the shelf) which will work, with only glass work to attach, it would be cheaper than getting a yard to custom fab a Delrin bearing and do the back and forth dance to get it to fit. The bottom bearing, however, leaves me with no choice and it will likely be the Delrin custom machined to fit and epoxied in place. Of course this plan will be adjusted once I meet with the "experts" at KKMI in Richmond.

Has anyone used the Edson packing/bearing assemblies in this application?
What is the general concensus on using/adding grease fittings?


Unfortunately, with 3 kids and 2 careers in my house, my do-it-yourself time is at a premium (and the wallet is shallow). The quickest, moderately priced, best (from an engineering perspective) solution is where I'll end up.

Thanks again for all the advice, I’ll let you know how it goes, much will be revealed once we get the boat out and drop the rudder.
Skip
 

Attachments

  • Edson 697 Stuffing box bearing.jpg
    Edson 697 Stuffing box bearing.jpg
    36.7 KB · Views: 513
Last edited:

Phil MacFarlane

Member III
Hi Skip,

I usually don’t talk so much but I don’t have my boat right now as two friends are sailing her up the coast for me. So I have nothing better to do but gab here.

As to future repairs. I hope I’m good to go but yes I may have to chip it all out some day. I had thought though that I would be able to grind it out if need be.

Your plan sounds like a good one. It will be interesting to here what KKMI wants to do.

The rudder I have came from Don at Foss Foam. It is the second rudder he’s made for this boat. Actually, I guess it’s the third because I think he made the 1971 original?
Anyway, I think if you asked Don if the pipe were perfectly round he would tell you it is not. I think he told us he uses stainless pipe that has a seam running the length of the pipe.

It may be worth getting a bigger rudder for the E-32. I know it makes a huge improvement on the 35 II’s. And $1500.00 is cheap. That’s what I paid just less than two years ago for my second one from Don. The first one about four years ago the same rudder was $1100.00.

Last note. The first rudder I bought from Don was demolished when I was sailing at about 7 knots on SF Bay. I was alone, it was a Friday and it was sunny and the breeze had just come up. I was at the mast adding tension to the main halyard. My back was to the sea ahead. There was a huge crash the boat raised up there was another crash the boat fell down a bit and there was a third crash! Then behind the boat up floated a huge piece of an old pier. It was much bigger that Sail a Vie, maybe 50” long 18x18 thick and had huge iron bolts sticking out hear and there. I had hit it dead center.

The fiberglass rudder tube on my Ericson and every other old Ericson I’ve seen, in my opinion was too wimpy. With all the load on the rudder I just never thought that tube was substantial enough. So when I went to the bigger rudder I made the tube wall about twice as thick and then added gussets that look just like the ones in the drawings you posted.

When I hit that lumber it bent the rudder shaft and jammed the rudder into the hull. Smashing the top of the rudder against the hull and left me with no steering.
I think if I hadn’t beefed up that tube and the area around it I would have holed the boat.
So every one should take a look and see if they feel good about what’s back there. Glass, resin and foam of wood are cheap compared to what could happen. You can beef that thing up in a weekend and sleep better at night.


Anyway, good luck Skip keep us posted.

Phil
 

skipper007

Member II
Check Your Rudder Stop.

Yesterday my partner and I closed on the 1974 E32-2 with the wobbly rudder. Our original repair quesstimate was off. PO and I split the difference, so I spent less $$ (now) and have committed more time. Problem is with every part of the rudder/quadrant assembly.
  • Rudder stop is missing (the source of the problem)
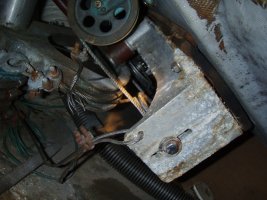
  • Sieve box mount to the bottom of cabin sole has cracked & worn Aluminum sieves
  • Cabin sole is full of water where the fiberglass cracked due to load
  • FRP board with cable guides is split and working up & down
  • Rudder has damage where it hit hull (using the hull as a stop)
  • Alignment of sieves is bad
  • Cable is loose and frayed
I intend to dismantle everything, add Delron and/or bronze bushings, new packing and reassemble. I hope the quadrant comes out easy......

And remember ALL damage was caused by NO rudder stop. So make sure you've got a good one, that works.
 

jthistle

Member II
some pics?

I'm in the middle of the same project and am rebuilding the rudder stops. How are you planning to refab yours? I Just started removing rotten plywood that holds the idler sheaves in place. I'll post some pics when I get back to the boat - I'd love to see your setup. Too cold for epoxy up here but no problem Grinding and cutting.

Good Luck

Jason
1972 E35-2 #268
 

skipper007

Member II
Tiring Weekend with the Rudder & Steering

Sunday night.....what a weekend.
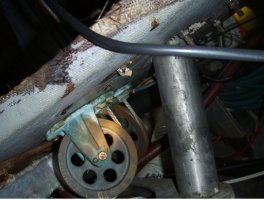
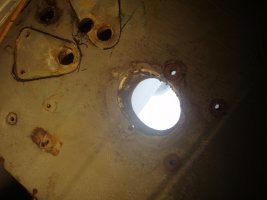
MacGyver and I dropped the rudder out - no problems - quadrant turned out to be bronze. Also to our suprise we found a bronze bushing in the rudder post AND copper foil like material as an additional bushing in the packing gland. The Sheave box under the cabin sole was hard to get down, had to cut everything to drop it.
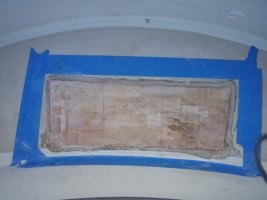
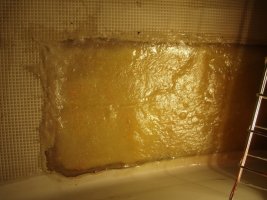
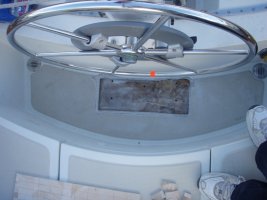
MacGyver recored (3/8” balsa) and fiberglassed the cabin sole.

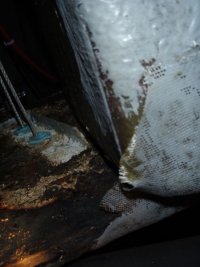
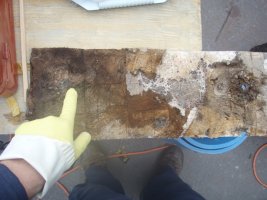
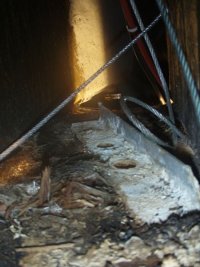
Big discovery was that the plywood installed as a backing plate between the forward and aft cockpit washtubs is completely wet and rotten. It was nicely glassed under the cockpit wells to hold it up, but there was NO glass on the top to keep water from intruding. There is about 7.5” between the cockpit wells where the Idlers are mounted to Fiberglass covered Mush; a fiberglass/wet splinters/aluminum angle iron sandwich. YUCK.

Questions and Opinions needed:

Do we sweat it out and try and grind the entire 20” x 30” fiberglassed plywood out from under the cockpit wells? Or can we just flow epoxy into the wet wood and let it harden and then add a G-10 fiberglass board backing plate to the Sheaves etc..?<O:p</O:p
<O:p</O:p

Our E32 has the quadrant AFT of the wheel – is that normal or was it flipped fore/aft?

<O:pThe tiller attachment to the shaft has a grease Zorx nipple. How would the grease be held without some backing plate/bushing or sleeve at the bottom?</O:p
<O:p</O:p
 

Attachments

  • Cables Between Bathtubs (small).jpg
    Cables Between Bathtubs (small).jpg
    37 KB · Views: 101
  • Cockpit Sole Split (Small).JPG
    Cockpit Sole Split (Small).JPG
    186.7 KB · Views: 105
  • End of Rudder Shaft (small).jpg
    End of Rudder Shaft (small).jpg
    20.5 KB · Views: 125

skipper007

Member II
More Pix

Idlers mounted on 20x30 plywood totally rotten, but nicely mounted

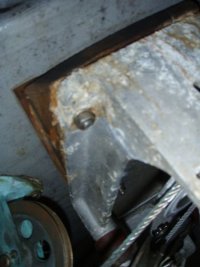
The rudder stop was useless - PO had installed cable to stop it, but one was broken. Now the rudder skin is broken - stop was hull.

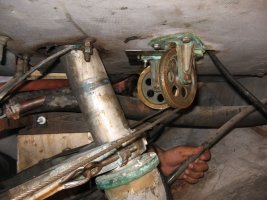
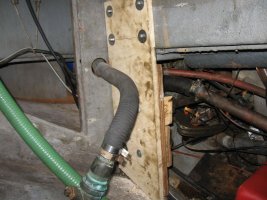
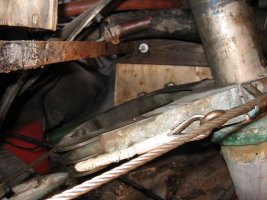
Last pic is useful for reassembly. Notice the wood board between cabin sole bottom and sheave box? I thought it was a backing plate, but it is actually a standoff. Guess I'll have to do it again (but hopefully neater).
 

Attachments

  • Idlers & Rotten wood (small).JPG
    Idlers & Rotten wood (small).JPG
    154.5 KB · Views: 89
  • Missing Rudder stop and quadrant (small).JPG
    Missing Rudder stop and quadrant (small).JPG
    154.1 KB · Views: 166
  • Cable slack with idler, sheave and quadrant (small).jpg
    Cable slack with idler, sheave and quadrant (small).jpg
    32.8 KB · Views: 120

skipper007

Member II
And more pix

Posting photos.....
 

Attachments

  • Icky Core (small).JPG
    Icky Core (small).JPG
    146.8 KB · Views: 60
  • New core (small).JPG
    New core (small).JPG
    119.1 KB · Views: 59
  • New glass (small).JPG
    New glass (small).JPG
    149.1 KB · Views: 66
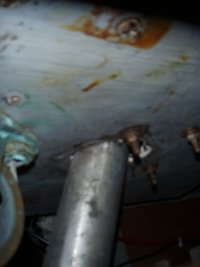
  • Bottom of Cabin sole - shaft and idlers marked (small).JPG
    Bottom of Cabin sole - shaft and idlers marked (small).JPG
    136.9 KB · Views: 62
  • Ready for recoring (small).JPG
    Ready for recoring (small).JPG
    131.9 KB · Views: 65

skipper007

Member II
And the Rotten plywood holding the Idlers.....

Ok - I'm off to bed now.
Enjoy the photos - Offer opinions - laugh at our lack of skill......
We've never done it before - but we aren't afraid........
Skip
(and MacGyver, partners in crime.....)
 

Attachments

  • Rotten Plywood.jpg
    Rotten Plywood.jpg
    43.3 KB · Views: 100

jthistle

Member II
Two Crews....

Two Crews doing exactly the same thing project on opposite ends of the continent at the same time. Great pics. Thanks for the inspiration.

We spent alot of time trying to get the rotten wood out and we're committed to it. Going to require alot of upside-down grinding. we're Going to put close to the same thing back there. Only neater and water proof. We might end-up going down throught the cockpit sole as you did. We have removed the and the tiller head and need to drop the rudder. I'm a bit intimidated with lining everything up again. Here's a pre-destruction picture. Good luck - keep posting.

jason
1972 E 35-2 #268
 

Attachments

  • Ches in the bilge.jpg
    Ches in the bilge.jpg
    92.3 KB · Views: 84
  • IMG_1939.jpg
    IMG_1939.jpg
    94.7 KB · Views: 80
Last edited:

skipper007

Member II
Your quadrant is forward of the rudder! Ours is aft. Can you send me pix of your sheave assembly under the cockpit? Do you still have the A4? I thought ours was switched because of the diesel tank.

Good luck - Wear a respirator - That stuff is nasty.

Send more pix.
Skip
 

jthistle

Member II
More pics - pre-destruction

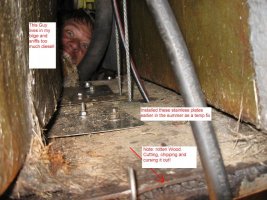
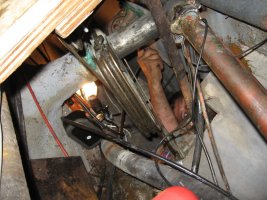
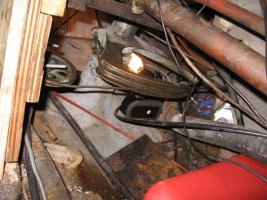
Hey Skip.... seems we're in this together. Here are some pics taken a while ago when we made a temporary fix to get us through the summer.

I'm taking everything out...cleaning it up and putting it back over the winter. (exhaust, scupper hoses, valves, steering, fueltank/hoses) Short, cold days means that its going to take some time. The quadrant is foward on the shaft - but other than that the setup looks the same. I also had no rudder-stop. Wondering how to design another one. There are options...cable/post/blocks - any input or pics from others might help.

Hope these pics help you out. I found the yacht specialties manual helpfull as well as the edson manual. Good luck ... keep us all posted and I'll do the same when I get back to the boat.

cheers
Jason
 

Attachments

  • IMG_1931.jpg
    IMG_1931.jpg
    89.9 KB · Views: 82
  • IMG_1933.jpg
    IMG_1933.jpg
    107.2 KB · Views: 81
  • IMG_1934.jpg
    IMG_1934.jpg
    110.7 KB · Views: 82
  • IMG_1940.jpg
    IMG_1940.jpg
    84.7 KB · Views: 73
Top