• Untitled Document

    Join us on March 29rd, 7pm EST

    for the CBEC Virtual Meeting

    All EYO members and followers are welcome to join the fun and get to know the guest speaker!

    See the link below for login credentials and join us!

    March Meeting Info

    (dismiss this notice by hitting 'X', upper right)

E32-2 restoration thread

cdh4088

Member II
I recently put out a feeler post on FB looking for a fixer upper to patch up and enjoy with my family, something trailerable and cheap on a small budget. I was offered this 1978 E-32 tall rig for $1000 on a trailer and I wasnt interested at first, as it is much more boat than I was shopping for. But then I learned that it is less than a mile from my home. I live in rural Missouri, unsurprisingly there aren't a lot of boats to choose from nearby, so I bought it and have started refitting it.


KIMG0660.JPG
The good:
The outside of the hull appears to be in good shape, no cracking, damage or keel damage. Hull is unpainted with shiny original gelcoat. All cushions are brand new and well made. Lots of new hardware and small parts are included, including wood for needed repairs, new fuel tank, etc, and it has been stored indoors for several years. Standing rigging, mast and boom are in great shape. The mast step and deck around it appear solid. At a glance, everything appears to be there. Atomic 4 was running when last checked. Its sitting on a custom trailer.

The bad:

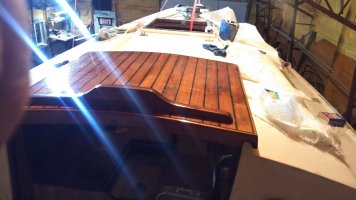
The previous owner took most of the boat apart for a refit. Several soft spots on the sides of the deck have already been cored but not finished up, most of the interior is apart. The forward bulkheads will need to be replaced due to chainplate leakage, Hatches and ports are not great. All of the boats small parts and hardware are in boxes or bags, unknown if anything is missing. All plumbing and usual old boat things will have to be updated or replaced. One set of sails, in ok shape.

I do not have the money to buy a similar boat in good condition, or hire out professional help, so its a DIY project.

My goal is to get it sailing in a year, with a total investment of $5K, not counting my labor hours.
This forum is a wealth of knowledge on these boats, I figured why not start a refit thread, hopefully I can get some good advice and ideas along the way.
Its going to be a lot of work.


Anyone know the specifics of the tall rig vs standard on the 32? Taller mast? or are the stays just mounted higher up?
 

Loren Beach

O34 - Portland, OR
Senior Moderator
Blogs Author
FWIW, your boat benefited from being one of the last built by EY in an approx ten year production run. I wonder if this one had a teak or mahogany interior?
There are threads here about re-coring that can help you. I have some material in my blog about epoxy-sealing deck fastenings where they penetrate the core so that in the future there will never be core damage again.
Welcome to the group!
:egrin:
 

cdh4088

Member II
I can't tell the difference between mahogany or teak by looking at it, so Im not sure.


The first order of business was to repair and replace bulkheads where the chainplates had been leaking. both on the port side, and the forward starboard ones. I figured this would be the least fun part of the whole job and to just get it over with straight away.
There was a previous patch attempt on the main port bulkhead, but it did not look trustworthy:
Front bulk1.JPG

I cut half of it out and made a template
front bulk2.JPG

Scarfed in a new piece with an 8" overlap joint, epoxy and tabbing. The 3/4" sheet of marine plywood was $152!
front bulk 3.JPG

Then comes the mahogany veneer. I chose mahogany because it was $60 per roll, vs $400 for genuine teak. It will look close enough once I stain it:
front bulk4.JPG
I did have a few wrinkles that I will try to iron out later after everything settles for a few weeks.

Front port bulkhead is more of the same:
vbulkl1.JPG
Vbulkl2.JPG

The starboard bulkhead I replaced entirely:
vbulkr1.JPG
vbulkr2.JPG

And thats it for the bulkheads. I spent $312 in materials and around 35 hrs. in labor. It was almost as much fun as I thought it would be. Grinding those overlap joints while getting caked in dust, and sweating over a hot iron to apply the veneers gave me some appreciation for the guys that do this professionally. I can see why they charge so much for the work, too.
I will try to get better pictures later, the LED shop light I have isnt very photogenic.

I have a dumb question about the head. the seat faces to the rear of the boat and there isnt enough legroom to sit down without turning sideways, since I have to pull it out and rebuild it anyway is there any reason I shouldn't remount it at a 45 degree angle?
Should I purchase a whole new unit? or is a rebuild kit and a new seat just fine?
 

Loren Beach

O34 - Portland, OR
Senior Moderator
Blogs Author
I found this photo in an ad on YW, 1975 model. I can see why you might want to re-orient it. But first let some other owners weigh in on how the stock head layout works for them.
 

Attachments

  • 1975 E-32-2.jpeg
    1975 E-32-2.jpeg
    79.8 KB · Views: 26

bigd14

Contributing Partner
Blogs Author
Wow, that is an ambitious project. Nice job so far with the bulkheads.

You might finds some useful reference on this website. https://plasticclassicforum.com/forum/ Its not super active right now but there is documentation of all sorts of boat projects, including my E27 refit under projects.

Also you might reference this website: https://lackeysailing.com/projects/ Tim Lackey is a master yacht restorer in Maine. I have referenced his projects extensively when preparing for my own. Good luck with the project and keep us updated!
 

kapnkd

kapnkd
I can't tell the difference between mahogany or teak by looking at it, so Im not sure.


The first order of business was to repair and replace bulkheads where the chainplates had been leaking. both on the port side, and the forward starboard ones. I figured this would be the least fun part of the whole job and to just get it over with straight away.
There was a previous patch attempt on the main port bulkhead, but it did not look trustworthy:
View attachment 39614

I cut half of it out and made a template
View attachment 39615

Scarfed in a new piece with an 8" overlap joint, epoxy and tabbing. The 3/4" sheet of marine plywood was $152!
View attachment 39616

Then comes the mahogany veneer. I chose mahogany because it was $60 per roll, vs $400 for genuine teak. It will look close enough once I stain it:
View attachment 39617
I did have a few wrinkles that I will try to iron out later after everything settles for a few weeks.

Front port bulkhead is more of the same:
View attachment 39618
View attachment 39619

The starboard bulkhead I replaced entirely:
View attachment 39620
View attachment 39621

And thats it for the bulkheads. I spent $312 in materials and around 35 hrs. in labor. It was almost as much fun as I thought it would be. Grinding those overlap joints while getting caked in dust, and sweating over a hot iron to apply the veneers gave me some appreciation for the guys that do this professionally. I can see why they charge so much for the work, too.
I will try to get better pictures later, the LED shop light I have isnt very photogenic.

I have a dumb question about the head. the seat faces to the rear of the boat and there isnt enough legroom to sit down without turning sideways, since I have to pull it out and rebuild it anyway is there any reason I shouldn't remount it at a 45 degree angle?
Should I purchase a whole new unit? or is a rebuild kit and a new seat just fine?
There are no dumb questions...
We’re several years ahead of you with the refit of our ‘73 E32-2 that included replacing all bulkheads with veneered marine ply and also replacing and redesigning a lot of cabinetry (especially the head).

Sounds like our head is facing the opposite of yours but regardless - is still a tight fit to sit on the throne...especially with my weight gains as I aged! There is a slight angle to ours and follows the lines of the raised floor section. (Photos taken about midway through the project.)
0E960DE5-8E8E-43BE-AC8B-3125681936C6.jpeg

We also added a piece of 1/2” PlasDeck under the head to get it up higher for comfort and to get the bowl slightly more above the waterline in case someone doesn’t properly close the water inlet valve.
70B3E5D9-A761-42A1-88F4-A323DB7ACCDE.jpeg
(Overflowing multiple times had ruined the bottom of the original cabinet over time.) it was replaced with marine ply and the bottom edge was coated with coats of epoxy and up the sides about 3”.
98B3494E-F79D-4B37-B80B-C2157FC57D5A.jpeg
There originally was a cabinet above the sink with sliding doors that we opted to eliminate in favor of more efficient and accessible storage by creating an open bin and shelf.
324C0056-0A33-447F-AD81-61BE8060DC0C.jpeg
(The Teak & Holly looking material on the inner hull is a nylon weave with a soft rubber backing used normally as flooring for pontoon boats.)

Hope this gives you some thoughts and ideas for your project!
 
Last edited:

kapnkd

kapnkd
There are no dumb questions...
We’re several years ahead of you with the refit of our ‘73 E32-2 that included replacing all bulkheads with veneered marine ply and also replacing and redesigning a lot of cabinetry (especially the head).

Sounds like our head is facing the opposite of yours but regardless - is still a tight fit to sit on the throne...especially with my weight gains as I aged! There is a slight angle to ours and follows the lines of the raised floor section. (Photos taken about midway through the project.)
View attachment 39632

We also added a piece of 1/2” PlasDeck under the head to get it up higher for comfort and to get the bowl slightly more above the waterline in case someone doesn’t properly close the water inlet valve.
View attachment 39635
(Overflowing multiple times had ruined the bottom of the original cabinet over time.) it was replaced with marine ply and the bottom edge was coated with coats of epoxy and up the sides about 3”.
View attachment 39633
There originally was a cabinet above the sink with sliding doors that we opted to eliminate in favor of more efficient and accessible storage by creating an open bin and shelf.
View attachment 39634
(The Teak & Holly looking material on the inner hull is a nylon weave with a soft rubber backing used normally as flooring for pontoon boats.)

Hope this gives you some thoughts and ideas for your project!
Whoops! Read your post wrong at first, our head “faces” the same direction...my bad!

If the boat can be faulted, the cramped head is it.

There was a second configuration offered on the 32-2 back then with the head compartment being on both sides and the head facing East/West instead of North/South if memory serves me correctly. (not the best way to position it.) This cut down the hanging locker area considerably though.
 

cdh4088

Member II
324C0056-0A33-447F-AD81-61BE8060DC0C.jpeg
(The Teak & Holly looking material on the inner hull is a nylon weave with a soft rubber backing used normally as flooring for pontoon boats.)

I will be borrowing this idea, that flooring product looks fantastic. How is it applied? what is is called?
 

kapnkd

kapnkd
324C0056-0A33-447F-AD81-61BE8060DC0C.jpeg
(The Teak & Holly looking material on the inner hull is a nylon weave with a soft rubber backing used normally as flooring for pontoon boats.)

I will be borrowing this idea, that flooring product looks fantastic. How is it applied? what is is called?

It’s called “PlasDeck” from a company located in Ohio, close to Akron & Cleveland. They offer an excellent variety of products from (flexible) interior flooring to PlasTeak woods (hand rails and lumber) to exterior trim products as well. I and many of my club members have found working with “Sue” to be extremely knowledgeable, friendly and efficient in providing the exact products for our needs. Check out “PlasDeck. Com”

I previously had a real veneered woodTeak & Holly interior sole - but it was a REAL pain to conform to our curved sole! Worse yet, it sucked up dirt like a magnet and was a pain to keep refreshing the finish!

The PlasDeck comes in rolled sheets and is easily cut to fit patterns made for the areas you wish to cover.

...A bit of history - Our ‘73 originally came with (the then “IN THING”) ...Shag Carpeting!!

It lasted about 3 swimming cruises before the galley area looked like matted KRAP! That’s when I replaced it with the Teak & Holly - but really struggled to get it to simply bend to the curves of the sole!!

The PlasDeck goes in with a special glue and is set in place with a special roller to squeeze out all air bubbles. Once it sets, it’s THERE!! I chose to create patterns with East/West trim pieces to break compartment areas for a more custom look throughout.
72F4F6EA-C9FA-4EA8-8826-93C79D398A9D.jpeg7BAFF982-A71E-43E7-BBE7-85C08AE99138.jpeg06926EAA-EC18-4E93-87B8-D57C3D3DDBCB.jpegD6F1F10B-016C-4C2A-BCA7-8B508AE71512.jpegA5ECAA32-1D67-4E49-A56B-142D3D9A9379.jpeg

...I’m/we are more than happy/willing to help you along the way with our “Been there DONE it” knuckle bustling experiences and advice as you progress in your own projects wherever we can. ...Please contact us for any and all questions! ...Remember!! There are - NO DUMB QUESTIONS!! ;-))) (My son is also an automotive engineer with two masters degrees and has been playing/working/fixing boats as his hobby-love since age 14!!!)
...Fair Winds!
 
Last edited:

cdh4088

Member II
Ive been busy messing with the boat.
KIMG0713.JPG

I removed and resealed all of the port lights with a seal kit I bought from Catalina Direct. apparently, they have the same type of frames and glass as these. It was a chore, hopefully they will leak no more.

KIMG0746.JPG

The settee backboard and the shelf had some rot in the corner from the port leakage, but is otherwise in great shape. I couldnt stomach the cost of a whole new piece, so I borrowed a piece from a discarded bulkhead. :
KIMG0750.JPG

The repair is noticeable, but is hidden under cushions anyway:
KIMG0786.JPG

And then I plucked the engine out, thanfully there are several steel ceiling rafters above the boat so it wasnt too bad to do.
KIMG0778.JPG

I took it to work and stripped it down. all of the internals are in great shape and I can get away with a ring and gasket job, the stock bores cleaned up within spec. I will definitely upgrade to an electronic ignition and add an oil filter while I am at it.:
KIMG0782.JPG

Now I am working on this mess:
KIMG0784.JPG

All of the thru-hulls are loose and wobbly in the hull, the wood backing plates have started to rot. Can I use G10 material instead of wood for those? Also what type of shutoff valves should I buy?

While the engine and fuel tank are out, I will tackle the rudder mess. The old rudder has split and started falling apart, there is a new rudder provided with the boat. Thats the good news, the bad news is that the lower bushing is SHOT and I will have to make a new one. , the back of the hull and the face of the old rudder have worn away because of this. Also the upper post mount is loose in the cockpit floor, so I plan to add a support plate underneath, but I have a few questions:

KIMG0787.JPG
Are there supposed to be some kind of load bearing shims or spacers at the top or bottom? What would they look like and what material are they made from?

Also what size packing should I buy for the rudder shaft and prop shaft seal glands? Its hard to tell by looking at them.

Also, the top rudder post cap/tiller mount has a crack in it, where can I buy one?:
KIMG0788.JPG

Thanks in advance for the help.
 

Loren Beach

O34 - Portland, OR
Senior Moderator
Blogs Author
All of the thru-hulls are loose and wobbly in the hull, the wood backing plates have started to rot. Can I use G10 material instead of wood for those? Also what type of shutoff valves should I buy?
Different viewers will have opinions on parts that they have worked with. I like the ForeSpar Marelon seacocks. For backing plates I do like G10 -- around 1/4" thickness should be fine. Just bed them in thickened epoxy.
 

kapnkd

kapnkd
I’ve previously posted, with photos, what we did to eliminate our rudder post wobbles using West System, then reinforcing the uppermost section with an aluminum plate to which the bearing plate attaches to the cockpit sole. We also strengthened the turning blocks for the quadrant blocks/pulleys.

You’re doing a great overall job so far!!! IMPRESSIVE!!!
 

cdh4088

Member II
I’ve previously posted, with photos, what we did to eliminate our rudder post wobbles using West System, then reinforcing the uppermost section with an aluminum plate to which the bearing plate attaches to the cockpit sole. We also strengthened the turning blocks for the quadrant blocks/pulleys.

You’re doing a great overall job so far!!! IMPRESSIVE!!!
Yes, I will replicate the plate you made in your post, I have a small amount of wood rot in that area, but only at the holes, the cockpit floor isnt soft and the thicker support wood underneath in in good shape.
What were your quadrant blocks and pulleys made of? the ones in my boat are big machined bronze pulleys and the whole quadrant is made of a solid metal frame, It looks heavy duty to me. Is that different than the earlier models?

Also, will the lower rudder bushing drive out? or is it formed into the fiberglass of the hull? Looks like a chore.
 

Christian Williams

E381 - Los Angeles
Senior Moderator
Blogs Author
Welcome and congrats on a big project.

The forum works better if you post individual topics for discussion. That way the topic--rudder bearings, bulkhead replacement, keel bolts, toilet plumbing, etc--is searchable by others. It keeps all the relevant information in one place. The forum has 20 years of hard- earned experience about our boats, and great effort has been made to allow searchers to find them and add new information such as yours.

The best way to do this is to first search using Google or similar for your topic, adding the search phrase "ericson yacht forum". That brings up all the discussions already here. Pick the best thread and post to it. Often the question is answered, or at least narrowed down, The new post revives the thread and everyone gets a notice of your new posting.

If you're inclined to keep a running log of progress on your project--a great idea for people who like to write-- that's what blogs are for. Apply to Sean, the site owner, if you'd like to start your own. The blogs are not intended for Q and A, however. They are stAnd-alone commentaries on cruises, projects, and anything else that occurs to you.

The blogs are Currently organized by topic, although confusingly. You can scroll through owner blogs here. Some of us add a recurrrent link to our blog in the signature line under each post.
 

cdh4088

Member II
Welcome and congrats on a big project.

The forum works better if you post individual topics for discussion. That way the topic--rudder bearings, bulkhead replacement, keel bolts, toilet plumbing, etc--is searchable by others. It keeps all the relevant information in one place. The forum has 20 years of hard- earned experience about our boats, and great effort has been made to allow searchers to find them and add new information such as yours.

The best way to do this is to first search using Google or similar for your topic, adding the search phrase "ericson yacht forum". That brings up all the discussions already here. Pick the best thread and post to it. Often the question is answered, or at least narrowed down, The new post revives the thread and everyone gets a notice of your new posting.

If you're inclined to keep a running log of progress on your project--a great idea for people who like to write-- that's what blogs are for. Apply to Sean, the site owner, if you'd like to start your own. The blogs are not intended for Q and A, however. They are stAnd-alone commentaries on cruises, projects, and anything else that occurs to you.

The blogs are Currently organized by topic, although confusingly. You can scroll through owner blogs here. Some of us add a recurrrent link to our blog in the signature line under each post.
Mr Williams, I have greatly enjoyed your sailing videos on youtube. In fact, you are partly to blame for rekindling my interest in sailing after many years of not having a boat.

I will make topics or add to existing ones for the individual major repairs instead of one big thread to help keep the forum tidy.
 

kapnkd

kapnkd
Yes, I will replicate the plate you made in your post, I have a small amount of wood rot in that area, but only at the holes, the cockpit floor isnt soft and the thicker support wood underneath in in good shape.
What were your quadrant blocks and pulleys made of? the ones in my boat are big machined bronze pulleys and the whole quadrant is made of a solid metal frame, It looks heavy duty to me. Is that different than the earlier models?

Also, will the lower rudder bushing drive out? or is it formed into the fiberglass of the hull? Looks like a chore.

1. Bronze pulleys and a metal support frame for ours as well.

2. The lower rudder bushing tube is integral with the fiberglass on ours and cannot be removed without major effort and being a nightmare to realign and reinstall again. It’s easier to hone it back to true round, lay in the recommended West System filler and hone that down to the proper/tighter tolerance.

3. Sounds like you can simply oversize the upper plate’s four bolt holes in the cockpit glass them in and then re-drill the holes to size before adding the aluminum plate. The aluminum plate will definitely help spread the lateral side load forces on the rudder and keep the four bolts from wallowing out the holes again.
 

cdh4088

Member II
Project update:
I have completed the engine rebuild:

KIMG0916.JPG

The internals were in good shape, I was able to cut the valves and seats with shop equipment. Rebuild of the water pump and carb, transmission was in great shape. Put it all back together an ran it for two hours in our dyno bay. Its ready to be plugged back in. This was the easiest part of the project for me, Ive been maintaining and rebuilding caterpillar engines for eighteen years now. Engines are what I do for a living. Obviously, CAT yellow is the only engine paint choice. I did go with the indigo optical ignition kit, I love old engines and vehicles, but I draw the line at points, especially in boats.
 

cdh4088

Member II
I also found some and fixed some awful deck rot around the cockpit cubby holes. This is a potential trouble spot for all of our old boats I would think, as the cubby holes are at a downward slope, not glassed in, nor do they have any sort of drainage: KIMG0810.JPG
That entire are of the rear deck is a solid sheet of plywood, or in my case, crumbly dust. I managed to scoop it all out without cutting the top off.
The new piece was cut into three sections to be slid in and glassed: KIMG0818.JPG
I then glassed the top back in and added much needed drain holes.

My advice to anyone with a seventies vintage boat is to glass those areas in and add drainage holes to avoid this eventual rot spot.
 

cdh4088

Member II
I also test fitted my entry hatch I purchased from Kapnkd, It fits perfectly, and is likely better than anything I can make on my own: The old hatch was nonexistant. Thank you Kapnkd! Old boats are a lot of work, I still intend to splash this year.
kimg0814-jpg.41884
 

Attachments

  • KIMG0814.JPG
    KIMG0814.JPG
    229.8 KB · Views: 457
Last edited:

goldenstate

Sustaining Member
Blogs Author
Project update:
I have completed the engine rebuild:

The internals were in good shape, I was able to cut the valves and seats with shop equipment. Rebuild of the water pump and carb, transmission was in great shape. Put it all back together an ran it for two hours in our dyno bay. Its ready to be plugged back in. This was the easiest part of the project for me, Ive been maintaining and rebuilding caterpillar engines for eighteen years now. Engines are what I do for a living. Obviously, CAT yellow is the only engine paint choice. I did go with the indigo optical ignition kit, I love old engines and vehicles, but I draw the line at points, especially in boats.

This is awesome. I love to see people who have deep knowledge in an area take on a restoration project like this. I only understand the internal workings of my engine on a theoretical basis, never having torn an engine apart.

I hope you have a good time sailing the boat when you are through with everything.

Good work! Keep going!!
 
Top