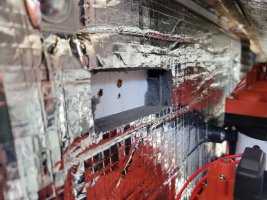
If I may make a suggestion, seal around all the outside edges of the new foam with that $$ mylar silver tape. They sell it along with the foil topped foam at the industrial supply place I bought ours from, This way the new foam will not have any exposed foam edges degraded with engine compartment fumes like the factory foam was.
You are using an out of date browser. It may not display this or other websites correctly.
You should upgrade or use an alternative browser.
You should upgrade or use an alternative browser.
Engine Compartment Clean up
- Thread starter Nick J
- Start date
peaman
Sustaining Member
At any hobby supply shop or in some hardware stores, you can usually find basswood panels, maybe 1/16" thick, used for model building. I found it to be ideal for a template, as it is inexpensive, easy to cut and glue, and rigid. Common white or yellow glue worked perfectly. I used it to made a perfect replacement for the formica top in my head.First try at templating with craft paper didn't go well. The second attempt with drywall shims push pins, and hot glue worked much better.
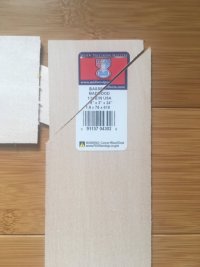
I bought a sheet of 1/8th plywood for a cajon project and now have a lifetime supply of template material. I ripped it into 1-2 inch wide strips and use a hot glue gun. In the heat of the templating battle you can break a piece simply by scoring it with a knife and bending (or just bending). Perfect material for the application, and it doesn't self-destruct upon removal. One could probably find quarter sheets of it at a local hardware store.
I'm slowly starting to put it back together. The paint saga continues when I found out the adhesive reacts with the paint and pulls it off the plywood. I'm going to install the rest of the panels just using the clips. I'm a bit gutted to see this knowing it's probably due to me installing it in cold weather. However, I don't want to hold up getting the boat back in the water. Putting everything together knowing I'm probably going to have to pull it apart at some point and repaint is a pretty crappy feeling especially with all the work that's gone into it up to this point. On a positive side, it is looking pretty good.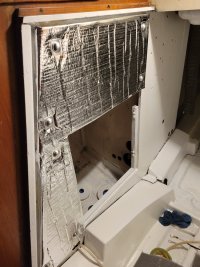

RCsailfast
E35-3 Illinois
I reinsulated the front engine cover last winter and noticed it made a difference. Keep up the good work, it’s amazing to see how much you have accomplished so far.
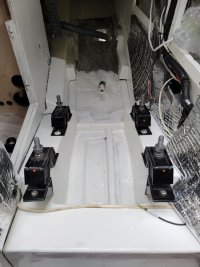
Made some good progress this week. The yard installed the engine mounts and I got the thru hulls installed and the layout of the water system done. Tomorrow's going to be filled with finishing the insulation, installing the water system, and putting the seacocks on the thru hulls. If all goes well, the engine is going back in on Sunday.
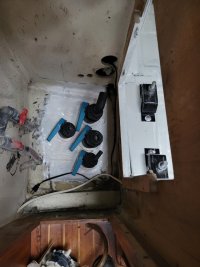
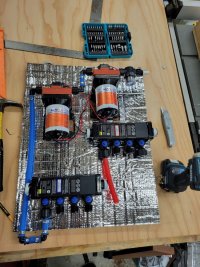


Just a manifold. Left is cold and right is hot. This will allow us to isolate a problem instead of turning off the pump when we're not using it. Should also clean up the plumbing behind the engineSolenoid controlled hot/cold water manifolds?
Today was a good day. After last night's bilge hose struggle, the engine compartment was ready...ish. I would love more time to finish up the water plumbing and replace the electric bilge pump hoses, but the engine needs to go in so the yard can install the strut and I don't want to delay that project any longer.
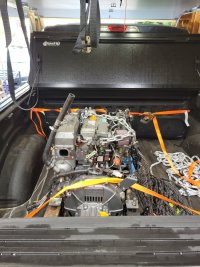
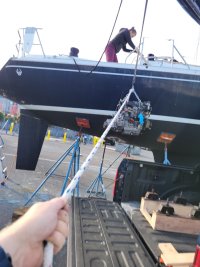
All things considered, it went in really well. The engine template lined up the mounts well enough to allow the engine to drop right into place without any adjustments. Hopefully it won't take much to get everything aligned. Even all the issues I've had with painting seemed to fade away once the engine was back in place. Now the fun part, installing all the bits and pieces I've been planning to make maintaining this engine easier.
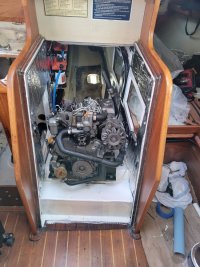
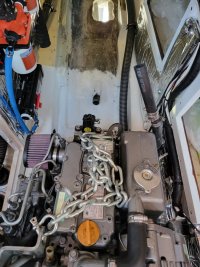
And a reminder of why we went through all this in the first place:
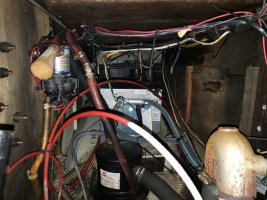
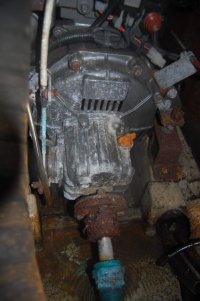

All things considered, it went in really well. The engine template lined up the mounts well enough to allow the engine to drop right into place without any adjustments. Hopefully it won't take much to get everything aligned. Even all the issues I've had with painting seemed to fade away once the engine was back in place. Now the fun part, installing all the bits and pieces I've been planning to make maintaining this engine easier.


And a reminder of why we went through all this in the first place:


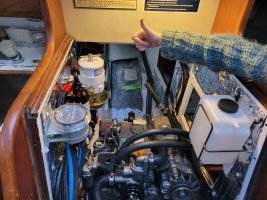
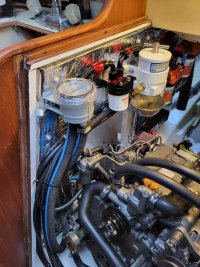
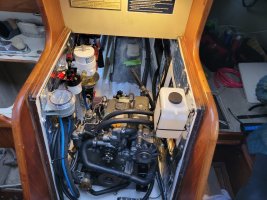
I Started installing some system stuff today with the fuel filter, remote oil filter, coolant resavoir, engine ground, and ground buss. I'm trying to avoid compressing the insulation by cutting it out, installing spacer blocks, and taping over to seal it all back up:
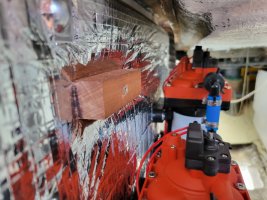
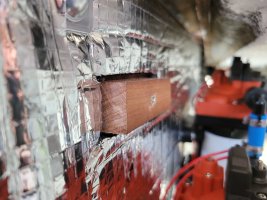
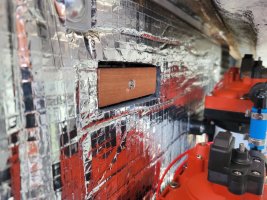
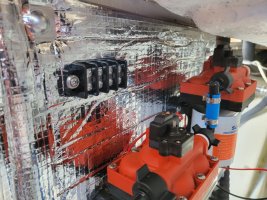
It's extremely time consuming and I'm starting to question its usefulness, but it does result in a good looking install.
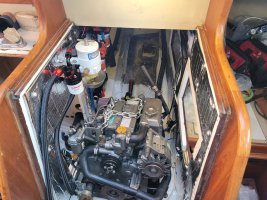
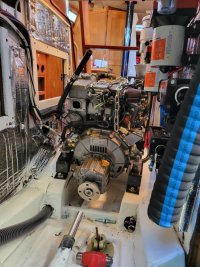
We did run into a small hiccup though. After the strut was potted, the yard wanted to see if the shaft could come out without dropping the rudder and we found out it could not. They pulled the shaft forward at the start of the project so we don't know if it was always that way. It's kind of a bummer since the shaft log is already off center line, but I think it's more important to have it centered in the shaft log.


It's extremely time consuming and I'm starting to question its usefulness, but it does result in a good looking install.


We did run into a small hiccup though. After the strut was potted, the yard wanted to see if the shaft could come out without dropping the rudder and we found out it could not. They pulled the shaft forward at the start of the project so we don't know if it was always that way. It's kind of a bummer since the shaft log is already off center line, but I think it's more important to have it centered in the shaft log.
Attachments
There was a time when, operating on hubris, I thought that my engine compartment work was rather well done. I am humbled by your workmanship!Getting further along little by little. Today was the raw water, oil filter, fuel system, and a stay on the how water heater.
(If your viking longship had a dragon for a figurehead, it would probably be animated! )

Thanks Loren! That means a lot coming from the owner of Fresh Air. Cheers.There was a time when, operating on hubris, I thought that my engine compartment work was rather well done. I am humbled by your workmanship!
(If your viking longship had a dragon for a figurehead, it would probably be animated! )
Pete the Cat
Sustaining Member
When the Yanmar representative came to do the warranty inspection on my installation, he commented that he wished that the boat yards did as orderly and clean job as mine. And mine looks crude compared to yours. Beautiful job all the way around. And the added benefit is that you are very familiar with what is there and how it is put together.
dhill
Member III
Tremendous job @trickdhat - very inspiring! Are you connecting things just to the insulation or do the screws go through to the wood behind the insulation?
Thanks!
Thanks!
Thanks! I tried to show what I've been doing above in post 91. The steps are:Tremendous job @trickdhat - very inspiring! Are you connecting things just to the insulation or do the screws go through to the wood behind the insulation?
Thanks!
- screw a backing block through the insulation to the plywood
- Cut the insulation around the block
- Remove the block and the insulation below it
- Reinstall the block and seal with the foil tape
- Install the equipment
dhill
Member III
Thanks, super helpful and much appreciated! I have a similar rat’s nest in my engine room... you are doing what I have thinking about doing, including painting the engine room white for better visibility. The sharing of your experience is tremendously motivating!Thanks! I tried to show what I've been doing above in post 91. The steps are:
- screw a backing block through the insulation to the plywood
- Cut the insulation around the block
- Remove the block and the insulation below it
- Reinstall the block and seal with the foil tape
- Install the equipment
Thanks again!
Attachments
Last edited:
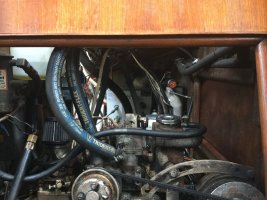
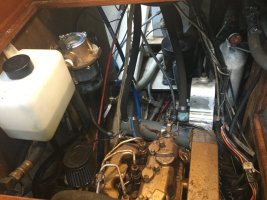
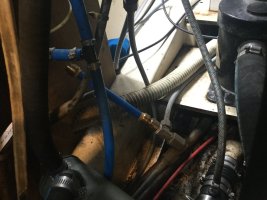
That definitely looks like a good candidate for a cleanup. Looking closer at your pics shows there's been some good work to update the water system, various hoses, and moving some equipment to a more maintenance friendly locations.
The one piece of advice I'd offer to anyone going down this path is to carefully plan everything out to ensure you have most everything you need on hand and the environment is good to paint (temp and humidity). The strut replacement project has really masked a lot of my mistakes in planning this out. At first I was just going to paint and install insulation, but I added the hoses, then thru hulls, then..... If I just would have looked at everything before hand and went for it, I would have saved weeks of time. In my case, it didn't affect the timeline because the strut work is still going on (fingers crossed they will finish up the fiberglass and fairing work this week).
It is actually a very doable DIY project. Removing the engine was surprisingly easy and each individual step was straight forward. You just have to put a plan together and go through each step. I'm not done yet, but I would say it's been worth it and I'm actually looking forward to maintaining the engine after this work is done. Before, I would put off the routine maintenance until the last possible minute. There's been many trips over the last few years where I was at the boat late the night before struggling through an oil change, fuel filter replacement, or stuffing box adjustment. Hopefully this will make all those tasks much more tolerable.

