Hatch install
Tom,
A little history... when acquired, our boat had a warped foreward hatch frame. (Appeared that someone had opened it all the way and then sat on it.)

Anyhoo... it would not seal due to this, and the lens was no longer sealed in the frame, either.
I straightened the frame with big clamps and long oak 2X2's, but I could see that with the lens being scratched, the hinges having long ago lost their "roll stop" abilites, and the lens having detatched from the frame on two sides, that replacement was in order. Then I found that Lewmar USA was selling their dealer return hatches out of their headquarters in Connecticut.
With a phone call, VISA #, and some whining about my project boat, I got a new hatch with a near-invisible scratch on the spigot... for about $300. This beat the then-retail-discount price new of $550.
Taking the old hatch out required removing all the fastenings from the top flange, and went well. Getting that flange loose was quite (!) another matter. Ultimately it took about 8 putty knives driven under the edge and a lot of warmth from a heat gun to soften what turned out to be, judging from color differences, at least two different sealants...
With the hatch out, I could access and remove several hundred little staples that had invisibly held up the fabric headliner, behind the sides of the spigot, all around. Close fit, BTW.
Under that I found rather low-density wood, maybe pine, about 1 X 1, set against the edge of the hatch opening, in polyester mush.
I chisled out this weak wood and replaced it with some wider oak pieces set in thickened epoxy. The whole flange was a lot stronger when I got 'er done.
Set new hatch in place, and noted that most of the holes were a smidge off of the orignial ones. Epoxied in the old holes and re-drilled during the dry fit phase.
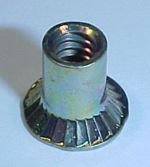
About those original thru-bolts for the hinges (remember, that's the door we came in...) the factory had set them into ss nuts, sucked into the surface of the original inner wood pieces across the back, and then stapled the headliner over it. Tidy.
Problem: you could only do a "factory" install of the headliner for our boat if all those little staples were driven in before the hatch was dropped into place and they would be covered by the cast-in spigot.
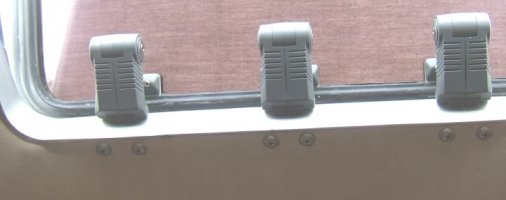
New plan: since the headliner is tight against the new hidden oak reinforecments, I dropped the hatch into place and thru-drilled for the long hinge bolts. Then the barrel nuts (finally, we are back to discussing them...) were tapped into place from the inside and the carefully-shortened SS bolts were dropped down into place for a trial tensioning. Those nuts are almost totally flush against the vinyl surface.
After a last bolting and test-tightening of all screws, blue 3M tape put all around the flange to catch sealant overflow, and the hatch removed one last time.
We laid in plenty of good caulk, squished down the new hatch and torqued home all screws and those bolts. All holes were daubed with caulk as well.
Messy, but all is secure for 12 years since.
Not particularly "fun" work, but very satisfying.
Good luck on your project,
Loren
'88 Olson 34