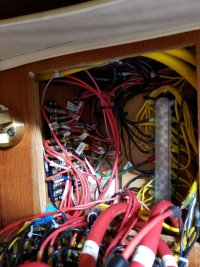
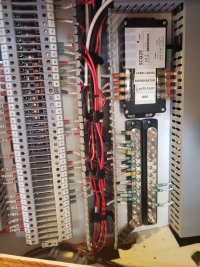
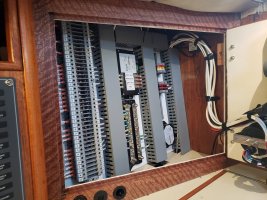
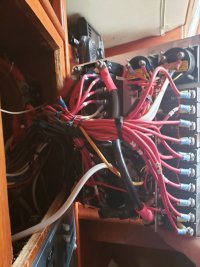
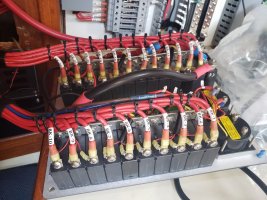
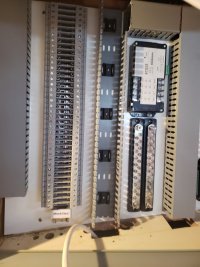
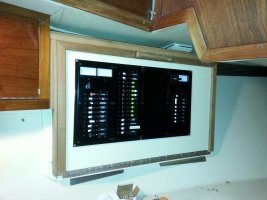
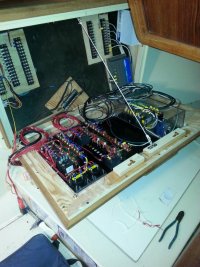
Here's what mine looked like, months ago, amid the pandemic, as I began the process of the DC Panel re-wiring, which I still believe is some strange form of viking hazing. And here's what it looked like, just before we launched this a.m.
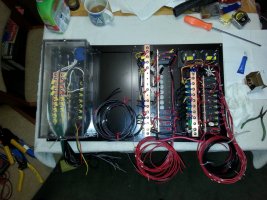
I made an error in judgment, which was to hinge the right side if the panel (temporarily), and then put my new terminal strip in the left inside wall, and negative bus in the back.. This required wires long enough to cross the space from the "door" to the opposite side. It was fun in winter, practicing my crimping and heat shrinking skills. I even increased the wire size on several circuits to prevent voltage drop. But alas, my beautiful wiring took up so much space, I couldn't close the door. Really. Finally, I switched strategies and hinged the bottom. Moved the AC wires off to the side, and folded it all in. I don't think my re-wiring did much aesthetically, but I can attest to the strength of those new connections, and I now know so much more about my boat, in particular, and marine electrical, in general. And I am quite proficient now at crimping and heat shrinking, (I've done more than 200 new connections), but I have a long way to go with planning and organizing.

")