My attempts at getting away with a project for labor-only were once again thwarted. I took the lifelines off last fall with the intent of taking them home and scraping off all the old plastic coating. The turnbuckles initially wouldn't unthread, so I took the whole tangled mess of wires and stanchions home with me. After dousing the threads in PB Blaster along with judiciously applied heat from my bernzomatic, the threads all ended up breaking once I applied any pressure. They were just too far corroded. Time for full replacement. Products used: Bed-It tape, Thixo epoxy, Suncor Quick Attach gate kit, Suncor Quick Attach toggles, 3/16" 1x19 stainless steel wire (100').
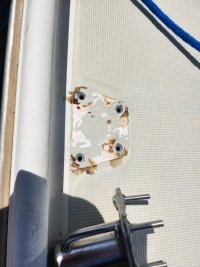
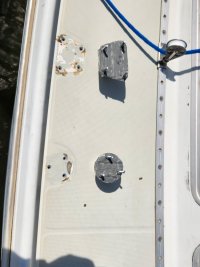
Well, let's make this a good boat project and expand the scope of the project while we're at it. I decided to re-bed all of the stanchion bases, including over-drilling and epoxy filling the holes. I used Bed-It tape to remount the bases to the deck. Many of these were not easy to get to. This project is SO much easier with a helper both for removal and reinstallation. Thankfully, I found no wet core while working on these.
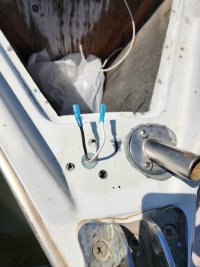
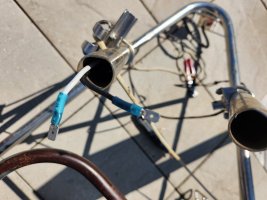
While I was at it, I decided to relocate the infamous leaky bow light wire on the pulpit. I initially thought that I could just fish the wire down the front down tube. However, after 90 mins of using both a fish tape and a pull string with magnets, I wasn't having any luck making the corner. An endoscope camera confirmed why I was so frustrated; the front down tubes were not connected. After drilling a couple of external holes, I was able to run a new wire. Another lesson learned from this was that it would have been better to drill a new hole in the base the wire passed through so as to keep the bases all in their original locations. I really had to muscle the pulpit back into place as the bases are all just a little bit different.
After weighing various options, I decided I would just replicate what the factory had done. Since I'm in landlocked Kansas, I don't have any riggers close by that could swage on fittings for me. I considered Rigging Only, but decided I didn't trust myself to be perfect on measurements. So, I purchased two of the Suncor gate kits plus four extra quick attach toggles. They are well constructed and much beefier than the original hardware. Plus, they are very easy to work with. You insert the wire into the fitting and compress the wire into the cone using two wrenches. I started with the fixed ends, either the toggles or the gate connection point. Then measured out to the adjustable fitting and marked the wire with a sharpie. I used a wheel on my Dremel to cut the wire. I expanded the turnbuckles to about the halfway point for measuring so I would have room to tighten them. The pelican hook worked best with about 3/4 expanded out. I was left with extra parts as the E26 doesn't have the traditional gate setup, but if I ever need to re-do something, I have extra wedges and washers to work with.
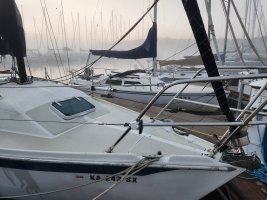
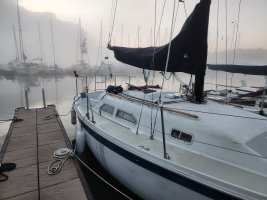
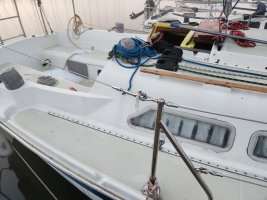
The keen observer might wonder if that's snow in my cockpit. In fact, we got hit with a pretty massive hailstorm while I was out working this weekend that caused me to retreat into the cabin while it passed. Golf ball size hail followed by a torrent of smaller hail. Apart from ravaging everyone's masthead Windex, and a few broken vents, the harbor fared pretty well. Cars and campers did not fare as well.
Overall, I'm VERY pleased with how this project turned out and with the materials I chose. The Suncor quick attach was so easy to use and I would recommend them heartily for anyone considering this project.
Well, let's make this a good boat project and expand the scope of the project while we're at it. I decided to re-bed all of the stanchion bases, including over-drilling and epoxy filling the holes. I used Bed-It tape to remount the bases to the deck. Many of these were not easy to get to. This project is SO much easier with a helper both for removal and reinstallation. Thankfully, I found no wet core while working on these.


While I was at it, I decided to relocate the infamous leaky bow light wire on the pulpit. I initially thought that I could just fish the wire down the front down tube. However, after 90 mins of using both a fish tape and a pull string with magnets, I wasn't having any luck making the corner. An endoscope camera confirmed why I was so frustrated; the front down tubes were not connected. After drilling a couple of external holes, I was able to run a new wire. Another lesson learned from this was that it would have been better to drill a new hole in the base the wire passed through so as to keep the bases all in their original locations. I really had to muscle the pulpit back into place as the bases are all just a little bit different.


After weighing various options, I decided I would just replicate what the factory had done. Since I'm in landlocked Kansas, I don't have any riggers close by that could swage on fittings for me. I considered Rigging Only, but decided I didn't trust myself to be perfect on measurements. So, I purchased two of the Suncor gate kits plus four extra quick attach toggles. They are well constructed and much beefier than the original hardware. Plus, they are very easy to work with. You insert the wire into the fitting and compress the wire into the cone using two wrenches. I started with the fixed ends, either the toggles or the gate connection point. Then measured out to the adjustable fitting and marked the wire with a sharpie. I used a wheel on my Dremel to cut the wire. I expanded the turnbuckles to about the halfway point for measuring so I would have room to tighten them. The pelican hook worked best with about 3/4 expanded out. I was left with extra parts as the E26 doesn't have the traditional gate setup, but if I ever need to re-do something, I have extra wedges and washers to work with.


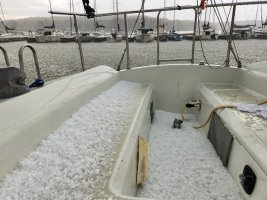
The keen observer might wonder if that's snow in my cockpit. In fact, we got hit with a pretty massive hailstorm while I was out working this weekend that caused me to retreat into the cabin while it passed. Golf ball size hail followed by a torrent of smaller hail. Apart from ravaging everyone's masthead Windex, and a few broken vents, the harbor fared pretty well. Cars and campers did not fare as well.

Overall, I'm VERY pleased with how this project turned out and with the materials I chose. The Suncor quick attach was so easy to use and I would recommend them heartily for anyone considering this project.
