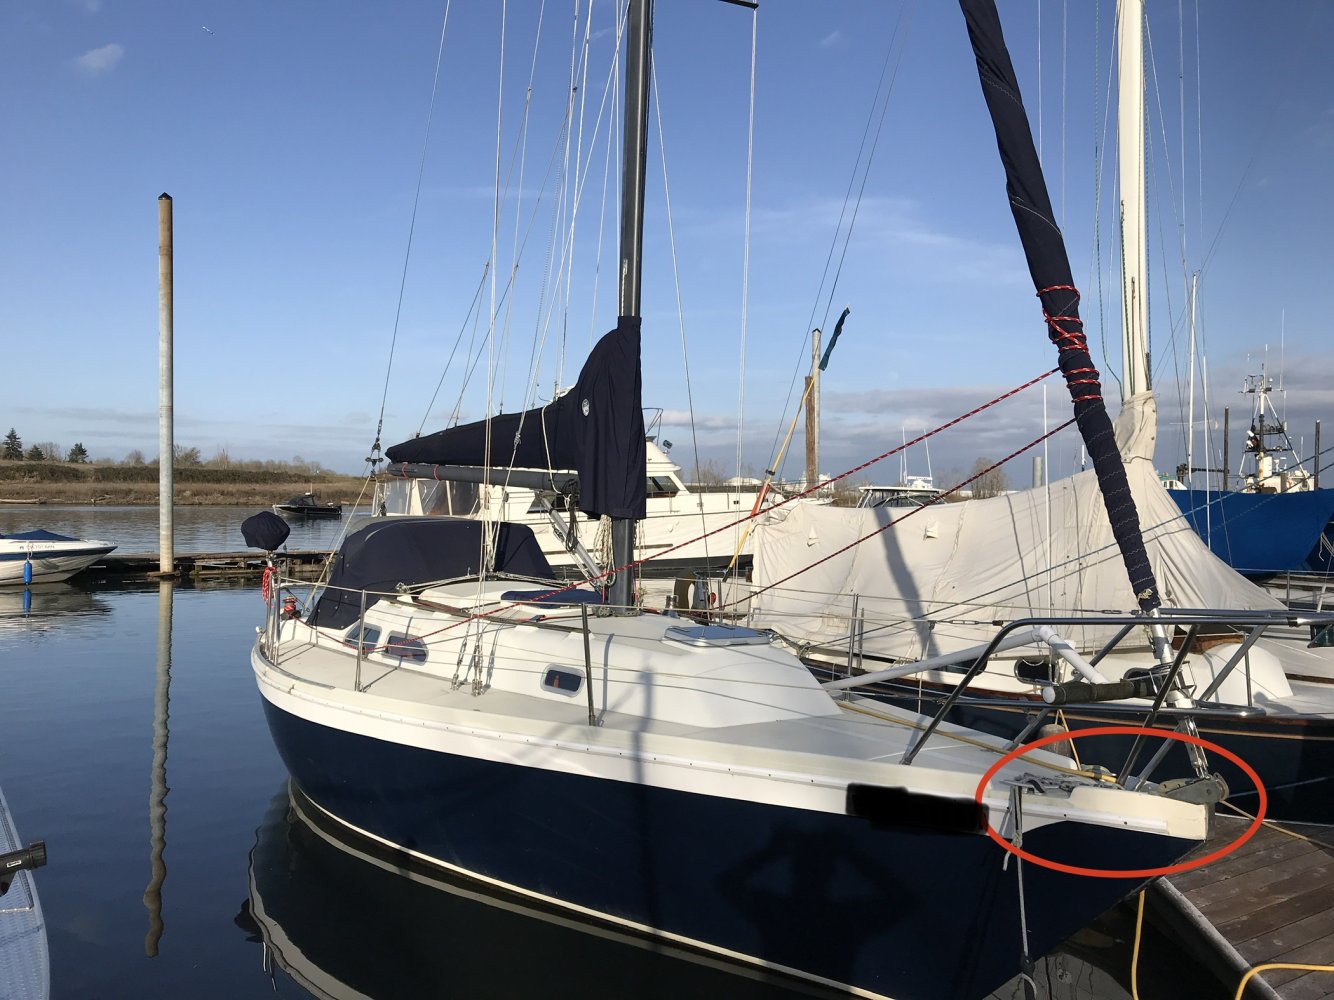
Nearly two years ago I noticed cracks appearing in the fo'c'sle area. I removed the raised portion and temporarily rebuilt the area, documented in these blog posts:
 ericsonyachts.org

 ericsonyachts.org
Originally I was planning to rebuild the fo'c'sle structure to restore the original lines of the boat. The fiberglass I had cut off was too damaged to simply put back on, so I built a wood mockup, thinking I would use it as a template. It was surprisingly difficult to manufacture this, but it matched the original contours pretty well.
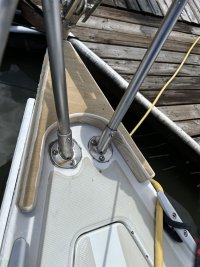
Getting the fo'c'sle recreated in G10 and glass was going to be a big effort and I spent a few months thinking about how best to do it (my projects take years nowadays). Ultimately I concluded that the boat looked pretty good without the fo'c'sle and there was no real reason to reinstall it. Some of the other Ericson models have a similar bow design and I found many other boats with this design.
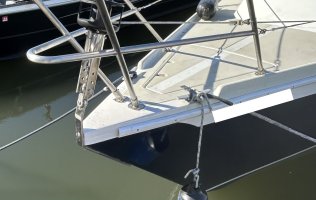
The Mantus anchor I got sets instantly, unlike the Bruce that came with the boat, but did not fit well on the old heavy bronze roller/stem fitting on top of the old fo'c'sle. https://ericsonyachts.org/ie/threads/anchor-storage-on-roller-30.20643/#post-164740
With the fo'c'sle removed and a blank canvas I had an opportunity to re-think the entire bow area and how I could make the new anchor fit better. I spent many hours looking for anchor rollers that would work and were not too flimsy. I didn't like the looks of the Mantus anchor roller which would be a guaranteed fit. I eventually found one that looked promising and made a plywood mockup, but it was clear that it wouldn't work.
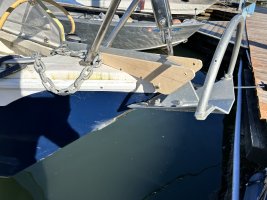
After more searching, I found one that looked like it would work better from White Water Marine. https://www.marinedepotdirect.com/narrow-mirror-finish-anchor-roller-19-7-8.html The mockup of this one looked much better, it was thicker material than many other rollers I found and it was a really good price, so I got it.
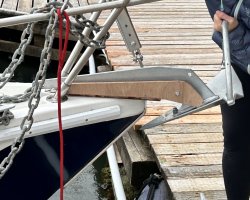
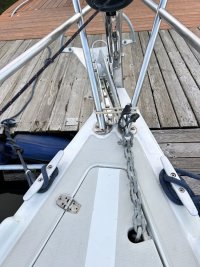
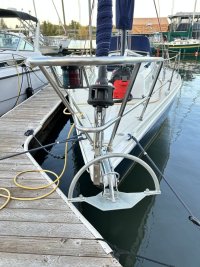
I decided to simply bolt the new roller onto the existing deck surface. The roller overhung the bow and I wanted to give it some support, so I manufactured a mounting plate out of 3/8 inch G10. I thought about permanently mounting this to the bow, but in the end decided that if I or some future owner don't like the bow roller or get a different anchor, it would be easy enough to remove and start over.
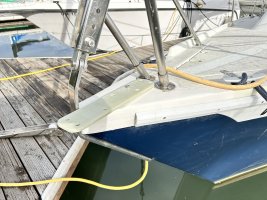
The deck camber posed a problem for getting a secure fit so I mixed some thickened epoxy and created a pad under the plate to fill the gaps. This took two pours as I weighted the aft end of it too much during the first try which caused a big void.
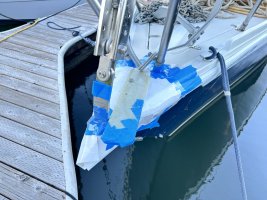
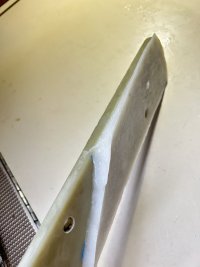
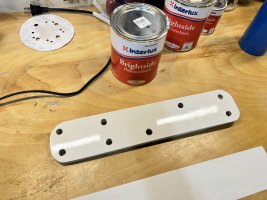
I sanded the plate and painted it with Brightsides. The 100 grit longboard sandpaper strip stuck to my workbench below the plate is how I sand G10. It works great for roughing up the flat surfaces, radiusing those wicked sharp edges, knocking down high spots, etc. Much quicker than a powered sander. I also used a diamond grit jigsaw blade for cutting the G10 which creates very little dust and doesn't get dulled like every other tool I have tried.
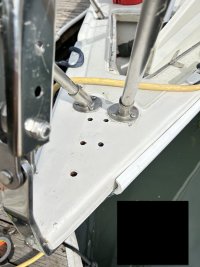
The next step was to drill through the deck and seal the plywood core with epoxy.
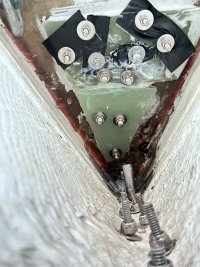
I also decided to add a G10 backing plate under the deck. In 2016 I had added a backing plate for the stanchions that had a half circle cut out of it to go around the deck fill which I removed in 2023. Of course this was right where the aft bolts needed to go. Fitting a small semicircle into that space and positioning the larger backing plate properly while working blind in uncomfortable positions was challenging and the end result looked like a toddlers art project, but it cured solid and in the correct position. Then came the hard part, actually bolting the thing down. I used butyl tape. I was also going to use marine sealant to fill any gaps around the edges but I quickly realized this was going to be too difficult and messy to manage while fitting 5 bolts into place all at once so I left it out. Getting all the washers and nuts fit and tightened required every bit of manual dexterity and core strength I could muster. If you are wondering about the socket on the chainplate nut in the photo below, it has been stuck there since 2016 and no amount of hammering or levering has been able to remove it! It must have been the wrong size.
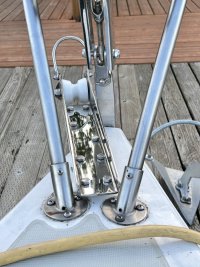
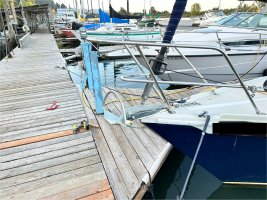
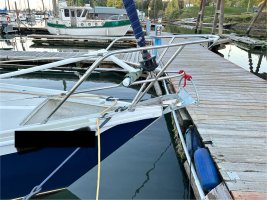
The final result is not nearly as elegant as the original roller, but it is way more functional, and it looks ok from a distance. Most importantly, anchor storage and management is much better. I still have to work out a system to keep the anchor fastened when not in use and I took the anchor locker lid off for reinforcement. Once I work those issues out I'll post a final blog.
E30-3 - Fo’c’sle Rebuild Part 1
Forecastle or fo’c’sle is the term for the forward most raised portion of the deck on a boat. On the 30+ this area is heavily built to support the loads of the forestay and provide a flat surface for the bronze anchor roller/jib tack fitting, and...
E30-3 - Fo’c’sle Rebuild Part 2
Shoot for the stars and you might reach the moon. We have had the boat hauled out over the past 5 days at a DIY yard. My wife single handledly knocked out the bottom paint over two days while I fiddled around with various projects including a...
Originally I was planning to rebuild the fo'c'sle structure to restore the original lines of the boat. The fiberglass I had cut off was too damaged to simply put back on, so I built a wood mockup, thinking I would use it as a template. It was surprisingly difficult to manufacture this, but it matched the original contours pretty well.

Getting the fo'c'sle recreated in G10 and glass was going to be a big effort and I spent a few months thinking about how best to do it (my projects take years nowadays). Ultimately I concluded that the boat looked pretty good without the fo'c'sle and there was no real reason to reinstall it. Some of the other Ericson models have a similar bow design and I found many other boats with this design.

The Mantus anchor I got sets instantly, unlike the Bruce that came with the boat, but did not fit well on the old heavy bronze roller/stem fitting on top of the old fo'c'sle. https://ericsonyachts.org/ie/threads/anchor-storage-on-roller-30.20643/#post-164740
With the fo'c'sle removed and a blank canvas I had an opportunity to re-think the entire bow area and how I could make the new anchor fit better. I spent many hours looking for anchor rollers that would work and were not too flimsy. I didn't like the looks of the Mantus anchor roller which would be a guaranteed fit. I eventually found one that looked promising and made a plywood mockup, but it was clear that it wouldn't work.

After more searching, I found one that looked like it would work better from White Water Marine. https://www.marinedepotdirect.com/narrow-mirror-finish-anchor-roller-19-7-8.html The mockup of this one looked much better, it was thicker material than many other rollers I found and it was a really good price, so I got it.

I decided to simply bolt the new roller onto the existing deck surface. The roller overhung the bow and I wanted to give it some support, so I manufactured a mounting plate out of 3/8 inch G10. I thought about permanently mounting this to the bow, but in the end decided that if I or some future owner don't like the bow roller or get a different anchor, it would be easy enough to remove and start over.

The deck camber posed a problem for getting a secure fit so I mixed some thickened epoxy and created a pad under the plate to fill the gaps. This took two pours as I weighted the aft end of it too much during the first try which caused a big void.


I sanded the plate and painted it with Brightsides. The 100 grit longboard sandpaper strip stuck to my workbench below the plate is how I sand G10. It works great for roughing up the flat surfaces, radiusing those wicked sharp edges, knocking down high spots, etc. Much quicker than a powered sander. I also used a diamond grit jigsaw blade for cutting the G10 which creates very little dust and doesn't get dulled like every other tool I have tried.

The next step was to drill through the deck and seal the plywood core with epoxy.

I also decided to add a G10 backing plate under the deck. In 2016 I had added a backing plate for the stanchions that had a half circle cut out of it to go around the deck fill which I removed in 2023. Of course this was right where the aft bolts needed to go. Fitting a small semicircle into that space and positioning the larger backing plate properly while working blind in uncomfortable positions was challenging and the end result looked like a toddlers art project, but it cured solid and in the correct position. Then came the hard part, actually bolting the thing down. I used butyl tape. I was also going to use marine sealant to fill any gaps around the edges but I quickly realized this was going to be too difficult and messy to manage while fitting 5 bolts into place all at once so I left it out. Getting all the washers and nuts fit and tightened required every bit of manual dexterity and core strength I could muster. If you are wondering about the socket on the chainplate nut in the photo below, it has been stuck there since 2016 and no amount of hammering or levering has been able to remove it! It must have been the wrong size.

The final result is not nearly as elegant as the original roller, but it is way more functional, and it looks ok from a distance. Most importantly, anchor storage and management is much better. I still have to work out a system to keep the anchor fastened when not in use and I took the anchor locker lid off for reinforcement. Once I work those issues out I'll post a final blog.


