Replacing our head hoses on Quincy has been overdue for a while, and after our July cruise to Barkley and Clayoquot Sounds we had a few down days in Seattle. I decided enough was enough and it was time to tackle a project I’d been putting off for too long. Luckily Chris was there too, so she could share in the fun. A couple of steps in the process of pushing and pulling hoses would have been a lot tougher without two people.
Quincy is 1989 38-200 with the head aft on the starboard side, a small standalone shower compartment aft of that, and access to the holding tank via the starboard cockpit locker. Here are some before pics. You can see the condition of the hoses and it probably doesn’t take too much imagination to conjure up smell-o-vision as well. There was also a fair amount of black grime from a water leak in the head sink faucet.
Green hose behind head.
Yuck.
Overboard pump in head sink cabinet.
We had the 3/4" salt water feed hose plus three 1 1/2” hoses to deal with - head to holding tank, holding tank to overboard pump back under the sink, and holding tank to pumpout deck plate. Here are pics of the holding tank side of things.
Old hoses leading out of holding tank
Holding tank in cockpit locker.
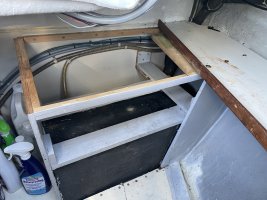
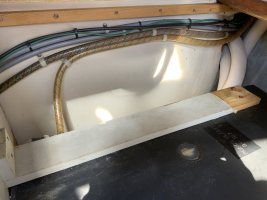
Access on the head side was pretty simple, I just took the door off the cabinet face and removed the drawer. Access to the holding tank took a little more dismantling since we needed to access the hoses on the back side of the tank between the bulkhead and the tank. I removed the shelf above the tank and most of the bracing holding the tank in. By the way, the tank is marked as a Ronco B-187 and says “E34” so it’s either OEM and they used the same tank for the 34 and 38, or it was replaced while Ronco still had units in stock marked for Ericson (or it’s coincidental). When I talked with Ronco about potentially replacing it they asked if I could find a date in yellow grease pencil, but I never could.
Getting the old hoses out was, as expected, the worst part of the job. We stocked up on pet pads, rubber gloves, aluminum baking trays, and narrow plastic paint trays. After firing up the heat gun the saltwater feed hose was relatively easy, but the hose that goes from the head to the tank was very tough to work through the small hole in the cabinet just behind the head. Un-bolting the fitting holding the joker valve helped straighten the line and made it easier. It also helped to detach the hose from the tank port and straighten it out on that end so we could keep pulling any slack out of the line while fighting it through the hole. We pulled the hoses out from the cockpit locker side after they were loose.
Old hoses leading out of head sink cabinet aft behind shower stall
Pet pads, paint trays, baking dishes.
The hose from the overboard pump wasn’t too bad. The deck plate hose was the toughest, and I finally gave up and cut it with a hacksaw. That hose was also the worst for discharge when removed from the tank. Thankfully the narrow paint tray fit under the port and between the bulkhead and the tank with a pet pad stuffed underneath. Dismantling was complete without any casualties besides seriously offended nostrils and a pretty good blister from working hoses back and forth with rubber gloves on.
On to the new hoses. I bought Trident Series 102 Premium White 1 1/2” Sani Hose for the output and Vetus 3/4” ID White hose for the saltwater feed. I overestimated my needed 1 1/2” hose by quite a bit, so FYI here’s what I’d get if I was going to do it again: Head to tank 8 feet, tank to overboard pump 7 feet, and tank to deck 6 feet. Your particular needs may vary.
The installation was pretty uneventful. We used a fish tape to help get through the space behind the shower stall but it felt like we could have probably managed OK without it. We fed the hose from the cockpit locker forward to the head compartment, opposite the way we pulled out the old hoses. Here are some pics of the installed hoses.
Hoses coming out of holding tank between forward side of tank and bulkhead - deck plate pumpout at bottom, overboard pumpout at bottom, head to tank at top, and vent at top.
Seacocks and cabinet interior after cleanup.
Two hoses coming into upper aft corner of head cabinet from behind shower stall (nearest hose is the sink drain).
Hoses out from holding tank - one to deck plate and two forward through bulkhead.
With everything installed and double clamped, we tested the system and it seems so far like everything is working well. Two things still need to be addressed. The vent port on the tank is cracked so it is a little fragile where the fitting screws into it but I’m planning to use a few wraps of gorilla tape to keep it from expanding when the vent fitting is threaded in. Not sure if there’s a better way to repair/replace those? I tried super glue and that didn’t work. More challenging, the 3/4” ID saltwater feed hose leaks at the head pump. Our head is a Raritan PHII manual that says to use a 3/4” ID hose. The previous hose was a much tighter fit on the head fitting much tighter than the hose I replaced it with. Also, the PO only had one clamp on the pump end of the hose and I have two. Unless I jamb both clamps up as high as possible to the end of the hose, the second clamp wants to pull the hose down off of the fitting if I tighten it too much. Not sure if I should try a different 3/4” ID hose (or try to find a 5/8” one?) or if I should just use one clamp centered on the fitting (not ideal to use just one clamp with a hose that goes below the waterline), or if anyone has another idea?
New hoses at head
Thanks for reading, I’ll work on a trip report from the cruise to show the brighter side of our past month on board!