Maine Sail
Member III
Over the years, especially in the last few spring weeks, via PM's/email, I have been asked how I bed deck hardware with butyl tape. I officially apologize for being so slow with completed photo examples. I have been meaning to do this but just did not have the time to complete it.
Late Sat night I was in the barn staring at a cleat, and a small scrap of clear thick Lexan, hmmmm...... A drill, counter sink, some butyl tape, my camera and a few minutes later I had the pics I needed. Sorry it took so long..
Here's how I bed with butyl.
Step 1 - Countersink the deck holes slightly and then clean everything with Acetone or a similar fast evaporating solvent.
Step 2 - Wrap Bolt Heads - You'll want to rip off a small piece of butyl and knead it into a string then wrap the underside of the bolt head.
Step 3 - Press the through bolts into deck hardware with some good pressure.
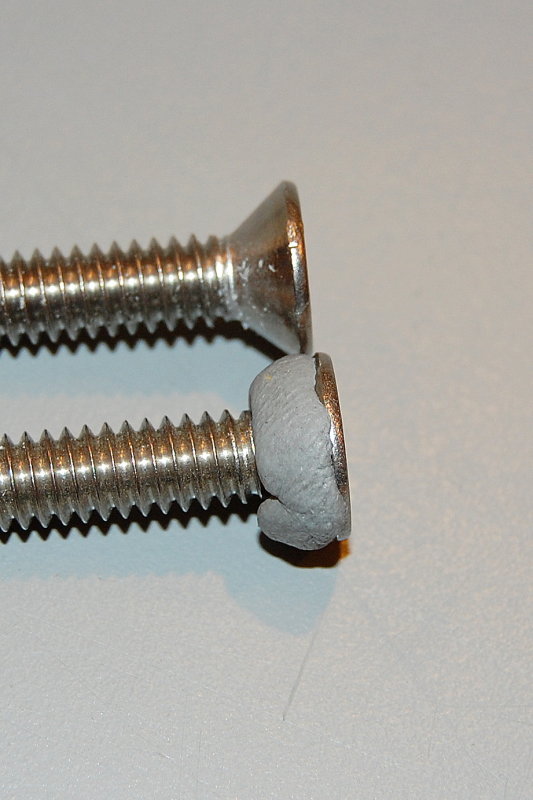
Step 4 - Strip some more butyl tape and make another round string. Wrap the string around the bolt threads or shoulder. Knead and work & twist the cones into the threads of the bolt and shape them like a cone.
Step 5 - Apply butyl tape to the rest of the base. It is perfectly ok to stretch and pull on the butyl while laying it on to make slightly thinner. I used 1/2" wide by 1/8" thick gray butyl tape for this.
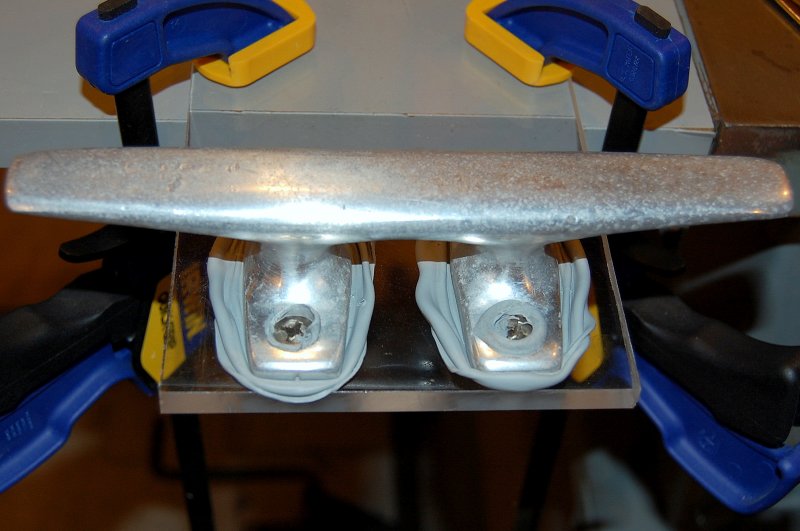
Step 6- In colder climates you may want to pre-heat the butyl to soften it some. After pre-heating with heat gun on the warm setting line up the bolts with the holes and press the hardware firmly onto the deck. For illustrative purposes clear polycarbonate was used in place of a deck (another MS first but don't worry one of the magazines will surely rip this idea off in no time...). This allows you to see what actually happens when you bed with butyl.
Step 7 - Install the backing plates, in this case I just used fender washers, and begin to tighten. You will be best to have two people or a good way to keep the bolt from moving. Ideally you do not want the machine screw or bolt to spin, but if you absolutely have to, you can slightly soften the butyl with a q-tip and some mineral spirits and go for it.
Tighten a little bit at a time as the butyl will ooze out slowly because the consistency is quite thick. Tighten, let sit, tighten, let sit etc. etc.. When little to none squishes & the bolt & nut become tight you can stop. If you have a wood deck core DO NOT crush it by over tightening, better yet bore out some core and pot the hole with thickened epoxy.
Here I have taken pictures of the underside and the top side of the fitting.
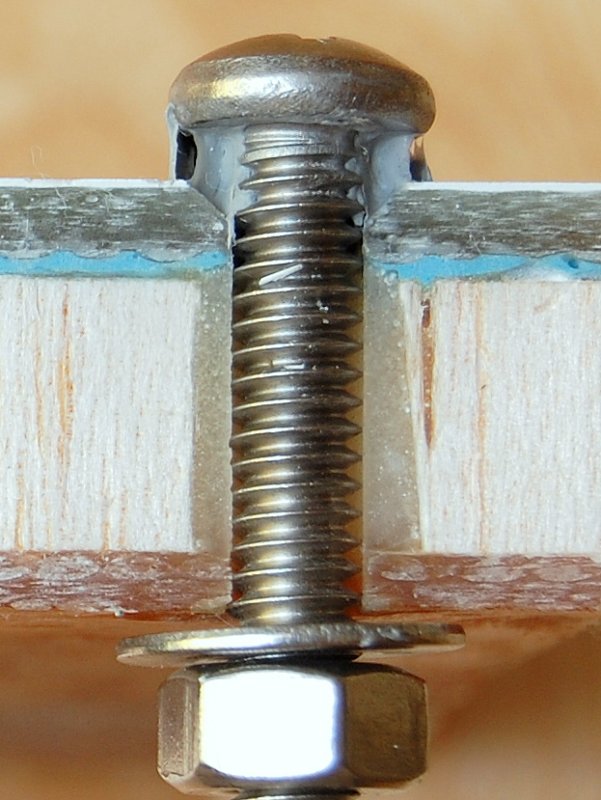
Underneath view when tight:
Deck side view:
Step 7 - Peel away excess ooze and clean with Meguiars cleaner wax, or a rag slightly dampened with mineral spirits. Do not saturate the rag with mineral spirits as it can creep under the fitting, just damp.
I find a ball of already "peeled" butyl works well at pulling away excess using a stab and pull motion. Stab the ball into the joint and pull away. The butyl will stick to the ball first and usually peel away from the joint. Alternatively you can use plastic razor blades or scrapers.
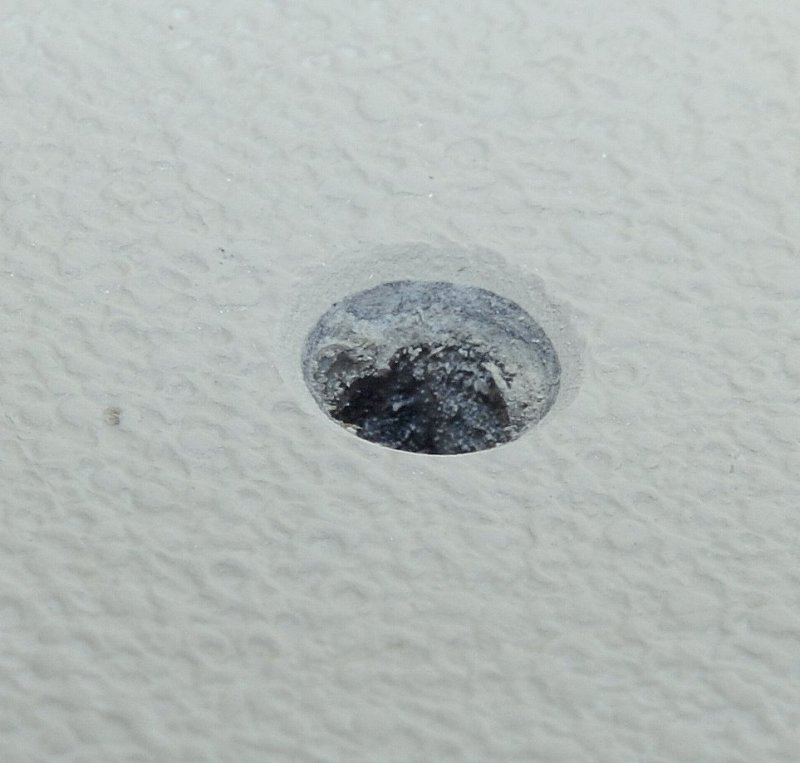
Contrary to popular myths about bedding all the butyl does not squeeze out from between the surfaces even after the fitting is fully tight. This is the magic of butyl, but it does take multiple small tightening events, ideally without letting the bolt spin, to get the vast majority of the butyl to squeeze out.

This is a view after tightening to full tight, and then removing the nut and washer. You can see how well it actually seals and also the o-ring seal of very thick butyl created by countersinking & butyl cone.

In short butyl is more labor intensive than a marine sealant but will last a very, very long time. Butyl never hardens, is significantly more flexible than any of the commercially available polysulfides or polyurethane sealants and the best part is that 30 years later it will come apart with ease. The only down side is more labor to install and it is not solvent resistant. Unless you regularly clean your decks with mineral spirits this is not a worry.
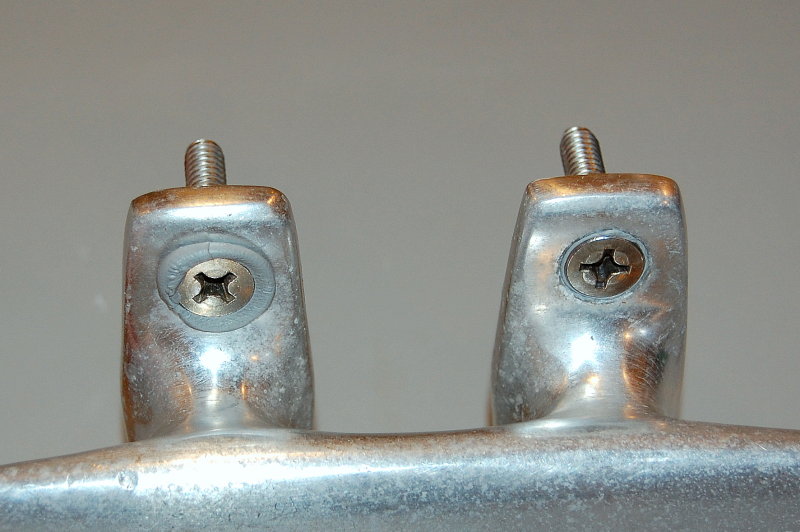
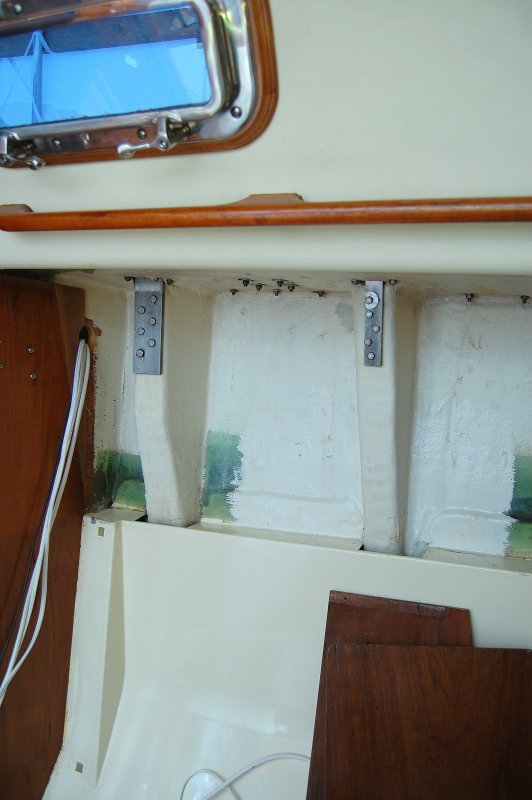
This is our 31 year old genoa track that was factory bedded with butyl, and is still bone dry 31 years later.
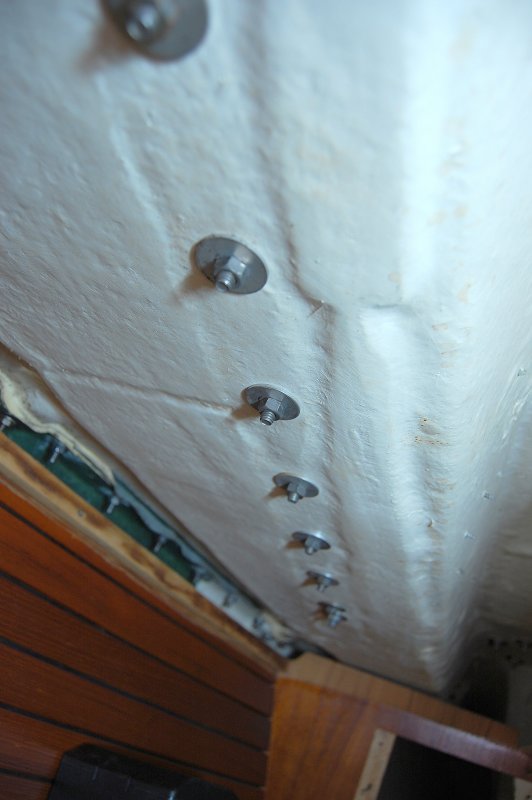
The butyl bedded chain plates also did not leak in 31 years.
If you decide to try this please take a look at Bed-It Tape..
Late Sat night I was in the barn staring at a cleat, and a small scrap of clear thick Lexan, hmmmm......
A drill, counter sink, some butyl tape, my camera and a few minutes later I had the pics I needed. Sorry it took so long..Here's how I bed with butyl.
Step 1 - Countersink the deck holes slightly and then clean everything with Acetone or a similar fast evaporating solvent.
Step 2 - Wrap Bolt Heads - You'll want to rip off a small piece of butyl and knead it into a string then wrap the underside of the bolt head.
Step 3 - Press the through bolts into deck hardware with some good pressure.
Step 4 - Strip some more butyl tape and make another round string. Wrap the string around the bolt threads or shoulder. Knead and work & twist the cones into the threads of the bolt and shape them like a cone.
Step 5 - Apply butyl tape to the rest of the base. It is perfectly ok to stretch and pull on the butyl while laying it on to make slightly thinner. I used 1/2" wide by 1/8" thick gray butyl tape for this.
Step 6- In colder climates you may want to pre-heat the butyl to soften it some. After pre-heating with heat gun on the warm setting line up the bolts with the holes and press the hardware firmly onto the deck. For illustrative purposes clear polycarbonate was used in place of a deck (another MS first
but don't worry one of the magazines will surely rip this idea off in no time...). This allows you to see what actually happens when you bed with butyl.
Step 7 - Install the backing plates, in this case I just used fender washers, and begin to tighten. You will be best to have two people or a good way to keep the bolt from moving. Ideally you do not want the machine screw or bolt to spin, but if you absolutely have to, you can slightly soften the butyl with a q-tip and some mineral spirits and go for it.
Tighten a little bit at a time as the butyl will ooze out slowly because the consistency is quite thick. Tighten, let sit, tighten, let sit etc. etc.. When little to none squishes & the bolt & nut become tight you can stop. If you have a wood deck core DO NOT crush it by over tightening, better yet bore out some core and pot the hole with thickened epoxy.
Here I have taken pictures of the underside and the top side of the fitting.
Underneath view when tight:
Deck side view:
Step 7 - Peel away excess ooze and clean with Meguiars cleaner wax, or a rag slightly dampened with mineral spirits. Do not saturate the rag with mineral spirits as it can creep under the fitting, just damp.
I find a ball of already "peeled" butyl works well at pulling away excess using a stab and pull motion. Stab the ball into the joint and pull away. The butyl will stick to the ball first and usually peel away from the joint. Alternatively you can use plastic razor blades or scrapers.
Contrary to popular myths about bedding all the butyl does not squeeze out from between the surfaces even after the fitting is fully tight. This is the magic of butyl, but it does take multiple small tightening events, ideally without letting the bolt spin, to get the vast majority of the butyl to squeeze out.
This is a view after tightening to full tight, and then removing the nut and washer. You can see how well it actually seals and also the o-ring seal of very thick butyl created by countersinking & butyl cone.
In short butyl is more labor intensive than a marine sealant but will last a very, very long time. Butyl never hardens, is significantly more flexible than any of the commercially available polysulfides or polyurethane sealants and the best part is that 30 years later it will come apart with ease. The only down side is more labor to install and it is not solvent resistant. Unless you regularly clean your decks with mineral spirits this is not a worry.
This is our 31 year old genoa track that was factory bedded with butyl, and is still bone dry 31 years later.
The butyl bedded chain plates also did not leak in 31 years.
If you decide to try this please take a look at Bed-It Tape..
Last edited: