E35-3, yet another thread on Sole Replacement

Christian Williams

E381 - Los Angeles
Senior Moderator
Blogs Author
how long it's taken me to complete.

I was readied for the journey by recalling that 1911Tex took three months. Which is about right.


Prairie Schooner

Jeff & Donna, E35-3 purchased 7/21
fin sole E35-3.jpg
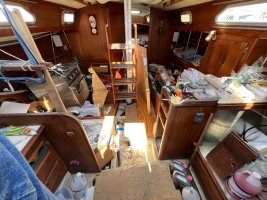
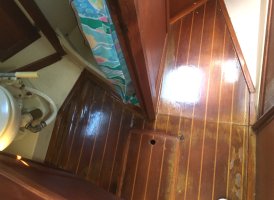
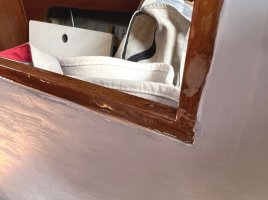
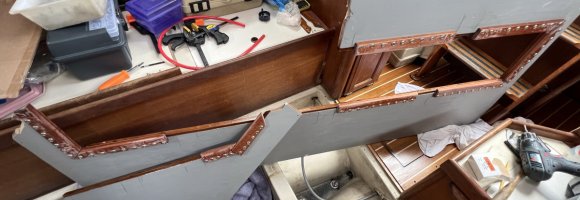
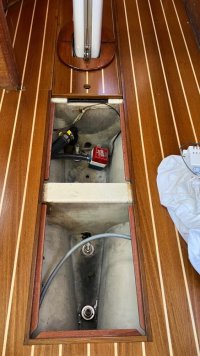
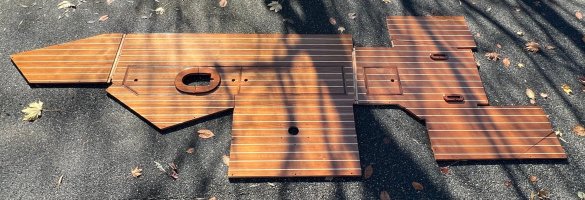
This photo was from the end of November, 2023. Our goal is to install it this March or April. In the meantime, we have plenty of boat projects. I have to make support lips for the access panels and fascia strips as detailed in post #29 here. There is a fascia shown there under the table which I was able to replace with a tiered overlap. To accommodate creating a separate panel for the head I put an angle on the foremost access panel.

We haven’t dealt with the head sole panel yet. I’ve got these visions of building a teak grate insert. As a place holder I’ll probably start with marine plywood with some non-skid.

All end-grain, including that in pre-drilled holes, was treated with a couple applications of penetrating epoxy. However, I will have to drill more holes around the perimeter and at the athwartship seams to properly secure the panels. I haven't decided whether I'll try to seal those.

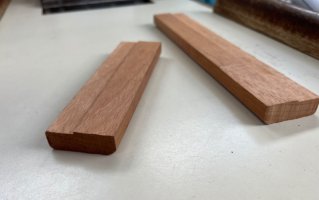
The old access panel trim was salvaged and we were able to reuse most of it. I only had to make a few strips. The shorter pieces are only held on with epoxy. Something I didn’t understand at first was the importance of cleaning with solvent before epoxying teak and didn't do so on earlier pieces. They feel solid, so, we'll see. On the longer strips I used brass screws along with the epoxy. Total Boat epoxy was used throughout for bonding. We were also able to reuse the original mast trim and ladder pads.

The finish on top is Epifanes Polyurethane 2-Part Yacht Coating, using 4” rollers. Seven or eight coats as I recall, sanded between coats. We bought the poly two years ago at the last-ever (#sadface) in-store Defender spring sale after talking to the Epifanes sales rep. I don’t remember the logic, but it convinced us at the time. We wanted the final coat to be satin to reduce slipping. The rep recommended putting on gloss for the first coats so it didn’t get too cloudy. In retrospect I wish we had finished with gloss. I really don’t think satin will make that much difference in traction and the gloss was so much more attractive.

By the way, Donna and I had a bet about how to pronounce Epifanes. We were told by the company representative:
ɛp ɪ fɑn ɛs (ep as in set, i as in sit, fan as in father, es as in set)
I won’t say who won the bet.
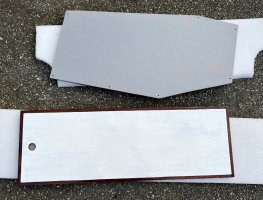
fin under panels E35-3.jpg
The bottom surfaces were coated with Total Boat 2 Part Epoxy Primer. For any panels that are removable, I also put on white BilgeKote.

I’d wanted to avoid encapsulating everything in epoxy. My thoughts on this are in post 33 of this thread, with some interesting followup from others. I thought an oil base coating would be semi-permeable so got the BilgeKote thinking it could be put on the raw wood. Reading the (extremely) fine print I found it needed a primer, which was epoxy based. I even called Interlux to confirm and the response was something like, ‘BilgeKote only keeps stuff from getting in but doesn’t seal/stick to the base.’ I threw in the sponge at that point and covered all under surfaces with TB epoxy primer.

We were able to salvage all the perimeter trim, which we have yet to refinish. We haven’t decided whether to leave exposed screws there or put in bungs.

This pretty much brings things up to date on this project.
 

Prairie Schooner

Jeff & Donna, E35-3 purchased 7/21
Well, we got things far enough to go for our first cruise.

May 22, 2024
Kismet Sole 2024_5-22 611 sm.jpg

July 12, 2024
Kismet Sole 2024_7-12 296 sm.jpg

Kismet Sole 2024_7-12 317 sm.jpg

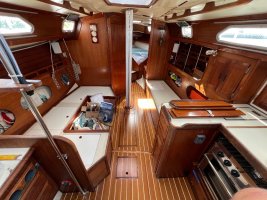
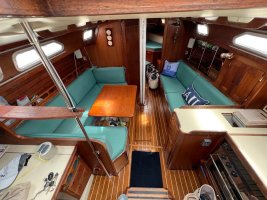
Still a number of details to go. Trim at the panel joints. Perimeter trim. Sole for the head . . . I've got this hairbrained notion of doing the teak grate treatment. But we went on our first cruise with Kismet, spending five nights at Block Island, about 20 miles offshore. I'll post some more details of this work later, but I'm happy to be able to share this milestone with you.

Cheers,
Jeff
 

bsangs

E35-3 - New Jersey
Well, we got things far enough to go for our first cruise.

May 22, 2024
View attachment 50583

July 12, 2024
View attachment 50584

View attachment 50585

Still a number of details to go. Trim at the panel joints. Perimeter trim. Sole for the head . . . I've got this hairbrained notion of doing the teak grate treatment. But we went on our first cruise with Kismet, spending five nights at Block Island, about 20 miles offshore. I'll post some more details of this work later, but I'm happy to be able to share this milestone with you.

Cheers,
Jeff
Looks fantastic, Jeff. Did you have fun playing the open mooring ball game on Block, or did you luck out and find one right away?
 

Prairie Schooner

Jeff & Donna, E35-3 purchased 7/21
Looks fantastic, Jeff. Did you have fun playing the open mooring ball game on Block, or did you luck out and find one right away?
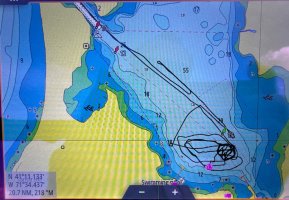
Thanks Brian. And, you're right, snagging a mooring is the worst part of Block Island in busy season! (They're first come, first served.) We arrived on a Tuesday around 6, there were no town moorings so the harbormaster rented us a private mooring. We were up and on the prowl the next morning at 8, weaving through the rental field, finally identified a boat that was rigging for sea, confirmed this with them, then circled their boat for about an hour. They signaled us when they were leaving and we pounced on it. The unwritten rules, manners, and machinations of the process rival Edwardian aristocracy. We found out we got one of only two openings that day. We had a chance to pay it forward when we left Sunday.

BI 2024_7 mooring search sm.jpg
 

bsangs

E35-3 - New Jersey
Thanks Brian. And, you're right, snagging a mooring is the worst part of Block Island in busy season! (They're first come, first served.) We arrived on a Tuesday around 6, there were no town moorings so the harbormaster rented us a private mooring. We were up and on the prowl the next morning at 8, weaving through the rental field, finally identified a boat that was rigging for sea, confirmed this with them, then circled their boat for about an hour. They signaled us when they were leaving and we pounced on it. The unwritten rules, manners, and machinations of the process rival Edwardian aristocracy. We found out we got one of only two openings that day. We had a chance to pay it forward when we left Sunday.

View attachment 50591
8 am? You lucky bastard. Similar for us last year. On a private mooring the first night. Next morning at 5:30 am I was on the prowl. Saw an opening, rousted Kim from sleep, we headed over to the ball about to be vacated - only for there to be an unnoticeable power boat already circling its prey. Fortunately, about a half hour later, we saw signs of another impending departure. Sidled up and asked nicely, they said they were leaving in about 15 minutes, so we began the circling, fending off the other predators, and eventually bagged the ball. There was nothing else vacated after 8 am that day. Decided to skip Block on our Nantucket trip this August because I did not want to play mooring ball bingo again, and I’m not rafting up four deep at one of the docks available to be reserved.
 

Prairie Schooner

Jeff & Donna, E35-3 purchased 7/21
8 am? You lucky bastard. Similar for us last year. On a private mooring the first night. Next morning at 5:30 am I was on the prowl. Saw an opening, rousted Kim from sleep, we headed over to the ball about to be vacated - only for there to be an unnoticeable power boat already circling its prey. Fortunately, about a half hour later, we saw signs of another impending departure. Sidled up and asked nicely, they said they were leaving in about 15 minutes, so we began the circling, fending off the other predators, and eventually bagged the ball. There was nothing else vacated after 8 am that day. Decided to skip Block on our Nantucket trip this August because I did not want to play mooring ball bingo again, and I’m not rafting up four deep at one of the docks available to be reserved.
Yes, the mooring gods smiled on us, for sure.
 

Prairie Schooner

Jeff & Donna, E35-3 purchased 7/21
Sailing season is winding down here in New England and I'll try to back-fill some of the details of this project.

E35-3 sole head 2024 original sm.jpg

E35-3 sole head 2024 a sm.jpg
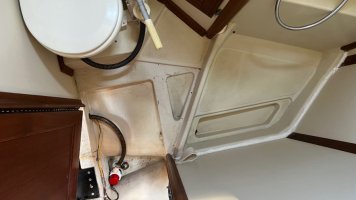
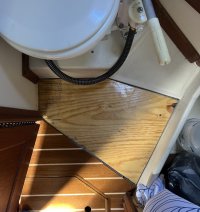
The original head sole was of one piece with the the main saloon panel. Almost certainly the sole was laid before trim went on the cabinetry, maybe even before the cabinetry was installed. It would have been too hard to get the old sole out in one piece and even harder to put in the new one. Also, doing it as one piece would have meant buying a third sheet of T&H. So, it is separate. I'm toying with the idea of doing the teak grate treatment for this panel. For now we just use the old plywood panel from the temporary sole that served us for a season.

E35-3 sole head 2024 b sm.jpg
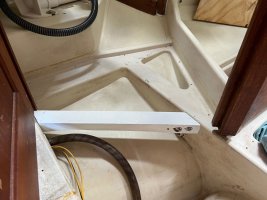
Because of this split, I felt it needed extra support at the joint. This arch is made from some sort of mahogany, all end grain soaked with penetrating epoxy, coated with epoxy primer, then BilgeKote.

E35-3 sole head 2024 c sm.jpeg
You may notice here that I put a angle on the foremost bilge access panel. This was to accommodate the separation.

If this proceeds like some of my other 'temporary' solutions in life, it may be there for a few years. There is enough T&H plywood left over to make it and match the stripes. That would be smarter than the teak grid, from a life priority standpoint. I'm kicking that can down the road. Maybe I should put some non-skid on this though.
 

Prairie Schooner

Jeff & Donna, E35-3 purchased 7/21
E35-3 sole lip 2024 a sm.jpg E35-3 sole lip 2024 b sm.jpg
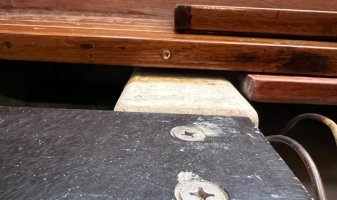
Virtually all of the access panel trim was salvageable. There are more details in post 42. For the access panel support lips I made new stock from some mahogany I'd scrounged. (What's a better word than 'lip' for them?) The trim was just a little thinner than the sole laminate which left a little step underneath. And I didn't like the rounded upper edges of the original teak lips. A router table was used for the new stock. Once cut to length they were coated with penetrating epoxy.

All along here I made decisions to not fuss about finish on surfaces that would not show once installed. There are drippy crappy surfaces throughout that kinda bother me. But time was valuable, so onward.

E35-3 sole lip 2024 c sm.jpg E35-3 sole lip 2024_6-14  915 sm.JPG
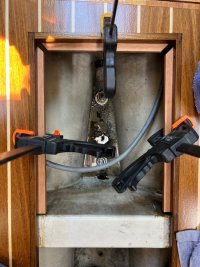
The lips were installed first with adhesive, iirc, Gorilla glue. After it cured, SS screws were added. The old lips were screwed in from the top with bungs, which is stronger I think. Throughout this I wanted to avoid bungs so I screwed in from the bottom and used lots of them with finish washers.

E35-3 sole lip 2024 d sm.jpg
 

Prairie Schooner

Jeff & Donna, E35-3 purchased 7/21
E35-3 sole lift 2024 a sm.jpg
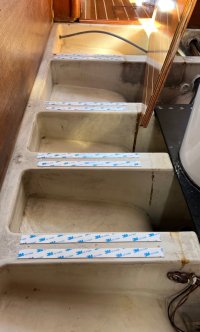
My quest continued to not use screws that would require bungs in the T&H. Near the mast step there was a little lift above the TAFG. In a test I found that a couple screws at the starboard settee junction would hold it down. However, to be extra sure, I used some 3M 1600T waterproof double-stick tape. It was billed as .040" thick. This wasn't enough to make a mismatch to adjacent panels without the tape. There are surely tapes available that are more industrial strength. However, if I ever need to take the sole off I don't want it to be too difficult. I should probably say, when I eventually have to take the sole off for something . . . Anyway, with over three months of use, no squeaky spots.

E35-3 sole lift 2024 b sm.jpg
 

Prairie Schooner

Jeff & Donna, E35-3 purchased 7/21
sole oops 2024_6-20 988 sm.jpg
June 20, 2024 - OOPS.

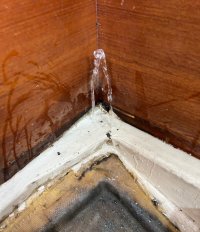
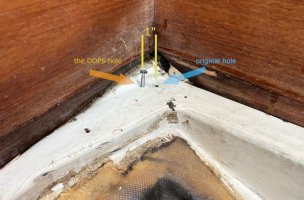
We only got one panel of the new sole in before launching at our winter yard in May. After launch we are allowed a few days in the slip before we have to leave. With even more pressing tasks for that period, we loaded the panels onboard and took them on the 20 mile trip to our summer harbor. I spent nearly a month installing them and the new stove there, while bobbing on the mooring ball. This mishap was located in the forward outboard corner dinette seating, on port in our boat. As soon as I pulled the drill out, I saw the little fountain. And the water was salty. Not a good feeling.

sole oops 2024_6-20 margin sm.jpg
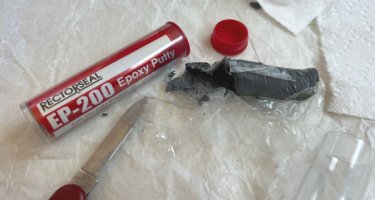
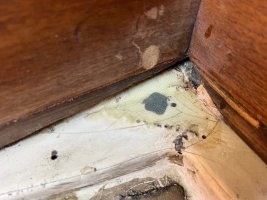
The hole I drilled was only an inch away from one of the originals, but that was enough to go all the way through. I put a screw in the hole, which stopped the geyser, though a surprising amount still got through. Letting that sit, I did a controlled panic survey of how I might fix it. Then I called @peaman to see how he'd handle a leak like this. It was really helpful to think it through with him. (Thanks Steven!) I was worried there would be a gap between the TAFG and hull so I used a large ball burr in my cordless drill to grind a divot about an inch in diameter and quarter inch deep. I've long been of the habit of keeping some epoxy plumbers putty on board. This was used to jam down into the drill hole and fill the divot. Initial cure time is about 4 minutes. I held a piece of hard plastic on it for about ten minutes. The plug seemed solid but we kept monitoring it. In the following days I put a fiberglass patch over the plug to hold it in place. And with mask and snorkel dove, hoping to see a little worm of putty hanging out. Instead there was a hole, so I put a little more putty in there.

sole oops 2024_6-25 061 sm.jpg

sole oops 2024_6-28 099 sm.jpg

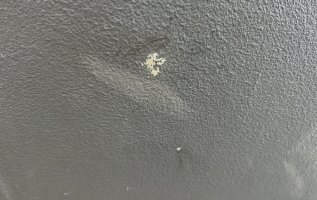
This is the external patch after haul out a week ago.
sole oops 2024_11-1_8935.jpeg

As I reflected on this experience, I'm really grateful I was installing this in the water. If I'd made that hole on land and didn't notice it in the hull, there would have been a leak and I would have had no idea where it was coming from. Once I'd narrowed it to the sole, I'd still have needed to pull up panels until I found the culprit.

Even though this patch would probably last for years, I'm going to redrill it this winter and do a bit more robust patch that is not contaminated by salt water.

Takeaway: If you're drilling holes on land, study very carefully where the TAFG leaves off and the hull begins.
 

Prairie Schooner

Jeff & Donna, E35-3 purchased 7/21
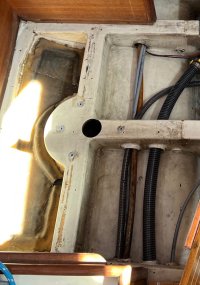
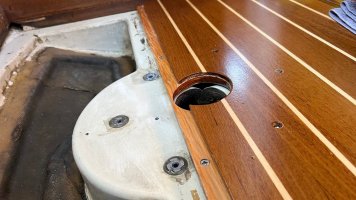
Post #2 shows what I encountered removing the sole in the dinette area. (Is there a more official boat term for that area?) Post #24 details the replacement base ring.

E35-3 sole table 2024_6-13 905 sm.jpg

E35-3 sole table mount 2024 .jpg

Eventually I realized the anchor for the base / trim ring screws didn't have to be very strong. They only hold down the ring and that area of the sole panels. The pedestal is only collared by the ring. Four T-nuts were epoxied into the TAFG. A spade bit was used to make a little relieve in the fiberglass for the thickness of the T nut. The other two holes were T-nuts driven in the sole from the bottom. It's probably overkill.

The laminated sole allowed me to create the step. Then the main sole panel could be screwed down securely. The layered small outboard panel only required screws around the perimeter with the table trim ring holding the center down. No bungs were necessary with this configuration.

In a perfect world I would have painted the bilge. I settled for scrubbing it as clean as I could.

related subject:
 
Top