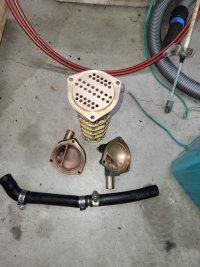
This weekend was a busy one, but not a lot of photos to show for it. I think the main take away for me is if you see something that should be fixed, trust your gut and dig in. I was avoiding replacing the bilge hoses and water lines to the head. I spent so much time working around them that it became impractical to keep them in place. every time I thought I had it cleaned enough, another swipe would expose more dirt. They are also nearing 40 years old and the only thing holding me back was the difficulty with replacing them. They've been spliced 3-4 times and are literally
crumbling as I work around them, so I finally decided to bight the bullet and cut them out. This also lead me to replacing the thru hulls under the sink.
The cockpit drain had a PVC 90 on it that felt sold, but it cracked when I pulled the hose off. When I unscrewed the fitting, I realized I wasn't going to be able to replace the 90 due to how close it is to the plywood. the plywood backing plates are also a bit waterlogged.... I finally placed the order for new TruDesign thru hulls to replace everything under the sink. Had I just committed when I pulled the boat out, I would probably already have the cabinet cleaned out and read to install the new ones.
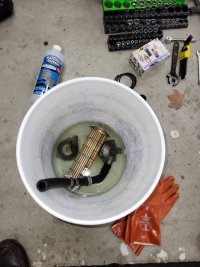
I was able to start installing new drain hose. I chose Trident 147 Vac XHD bilge hose for this. having the engine and water heater out of the way is nice, but it doesn't guarantee an easy install. There's nothing easy about laying on your side, reaching over your head, struggling to get a hose over a barb with only a few inches to spare. The port side scupper was particularly difficult as the propane tank is in the way. I had one hole to see the connection and one to access the connection. A heat gun was the only thing that made it doable.
Once I was done with the drain hose I focused on cleaning the wood surfaces in the engine compartment to prep for pain. Lots of simple green to get at most of the grime then a scrub with TSP and a rinse with water. Next time I'm down there, I'll focus on sanding and final prep before paint.
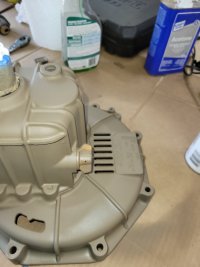
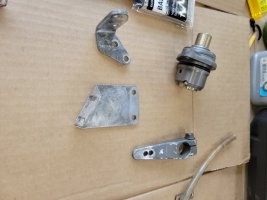
When I was at home, I focused on getting the engine ready for paint. The transmission shop recommended Napa's Zincrom 7222 primer for the aluminum transmission housing and Por-15 rust preventative coating on the steel parts. It's what they use in their shop, so I figured it was a better suggestion than what the internet had to offer. so far, it seems like good stuff to work with. I'm finished with the steel parts and just need to touch up a few areas of the transmission before I'm ready for the Yanmar Gray paint.
View attachment 44704
View attachment 44705
View attachment 44706
I still feel like I'm in the deconstruction phase of this project, but I think I'm starting to see the light at the end of the tunnel (or prop shaft)