• Untitled Document

    The 2024-2025 Fund Raising Season has Opened!

    EricsonYachts.org has opened the season for raising funds to support the expenses of the site. If you would like to participate, please see the link below for additional information.

    Thanks so much for your continued support of EricsonYachts.org!

    2024-2025 Fund Raising Info

Yacht Specialties Pedestal Disassembly, with Photos [Master Thread]

Kenneth K

1985 32-3, Puget Sound
Blogs Author
I've had my compass removed for a little winter refurb--I refilled the fluid, installed an LED bulb, polished the bakelite case, and I'm refinishing the teak base it sits on. I went to test-fit the parts last night and, OH SH!%, I fumbled one of the 1/4 x 2" screws. It dropped, of course, right down the center of the steering pedestal. I heard it make a solid, metallic "clink" when it landed about 2' down near the base of the pedestal.
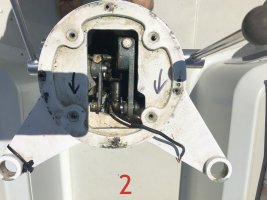
ped2.jpg
(borrowed photo, but similar setup--shows where I dropped the screw).

Short of disassembling the whole pedestal per Christian's excellent instructions above, anyone have a simpler idea for possibly retrieving the screw. A loose 2" bolt laying at the bottom of my steering chain assembly is probably beyond my comfort level for leaving as is.

Just when I though I was making headway wrapping up the winter projects.
 

Christian Williams

E381 - Los Angeles
Senior Moderator
Blogs Author
The liverwurst case scenario is the missing bolt falls through the slot for the cables in the sheaves box under the cockpit deck. It wont do any harm lying at the bottom of the tube.

What would happen if it did? Would it jam anything? Will it even fit through the slot?

I am too responsible to say just leave it there, or that many pedestals have a wrench rusting in them, or that since you know the bolt is in there, you will immediately know what is wrong if something goes wrong.
 

Frank Langer

1984 Ericson 30+, Nanaimo, BC
I think there is a hole at the cockpit deck level where the cables go through. I know it's quite small, but could you get a coat hanger or similar tool to snag the bolt and persuade it to drop down where you can catch it? You would have to do this from inside the locker under the pedestal. Just a thought...
Frank
 
Last edited:

Kenneth K

1985 32-3, Puget Sound
Blogs Author
The liverwurst case scenario is the missing bolt falls through the slot for the cables in the sheaves box under the cockpit deck. It wont do any harm lying at the bottom of the tube.

What would happen if it did? Would it jam anything? Will it even fit through the slot?

You've seen a lot more of the "guts" of the steering assembly than I have. I hadn't thought about the bolt jamming the cables--seems less likely than jamming the chain. My concern is the lower steering chain sprocket. Do you have any idea if the lower sprocket is raised up from the bottom of the assembly or if it's sitting down at the bottom where a stray bolt would be a problem?


I think there is a hole at the cockpit deck level where the cables go through. I know it's quite small, but could you get a coat hanger or similar tool to snag the bolt and persuade it to drop down where you can catch it? You would have to do this from inside the locker under the pedestal. Just a thought...
Frank

I tried that a bit last night. It's a small hole and hard to get access to even get a finger in there to feel anything. Possibly, removing one of the steering cable sheaves and the DC wiring would give more access. Might have to try that.
 

Kenneth K

1985 32-3, Puget Sound
Blogs Author
Emergency Tiller

Will the emergency tiller still move the rudder if some idiot drops a bolt down the steering quadrant and jams the main steering mechanism?

The night wasn't a total failure: When I flipped the running lights switch, the little red LED light in the compass hood came on. Gives the compass card a nice, soft glow. Even if I can't steer the boat, at least I'll be able to tell the insurance adjuster my precise magnetic heading at the moment of impact.
 
Last edited:

bgary

Advanced Beginner
Blogs Author
.....where a stray bolt would be a problem?

a while back I bought an "endoscope" from Amazon, for just such events. Pair it with your phone, shove the thing down the hole and you can see what's where, on the screen in the palm of your hand. Very handy...if for no other reason than that it gives you a chance to craft an informed plan of attack before starting to tear things apart.

Bruce
 

Christian Williams

E381 - Los Angeles
Senior Moderator
Blogs Author
lower steering chain sprocket

Kenneth,
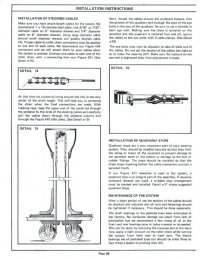
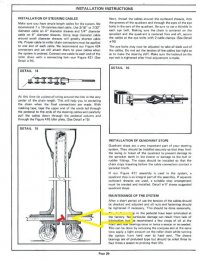
Your lost bolt is lying at the base of the tube, which is probably the top of the sheaves box. It is a plate with slots that the cables pass through. There is no lower sprocket on YS as far as I know.

[/COLOR]YS 7.jpg

This thread is the best YS manual we currently have.

http://www.ericsonyachts.org/infoex...cht-Specialties-Installation-Manual-Available

Someday the archives will be rebuilt. Maybe.

UPDATE: A better version of YS Installation is contained in this catalogue:


https://ericsonyachts.org/ie/resources/yacht-specalities-catalog-4.180/
 
Last edited:

Kenneth K

1985 32-3, Puget Sound
Blogs Author
YS 7.jpg
Fabulous. I found the bolt. It's sitting right there!

Ok, the chain-ends link directly to the cables. Gives me much more peace of mind.

And I like the endoscope idea, paired with a clawed pickup tool. Can start with the neurosurgeon approach before I resort to basic auto mechanics.

And, maybe move this project off the immediate priority list.

Many thanks.
 

Frank Langer

1984 Ericson 30+, Nanaimo, BC
Hi,
For years I have used 3 in 1 oil available at any hardware store. It has a nice consistency, a long pull out neck to get the oil on the chain, and isn't goupy (technical term). But don't get any on the area where the wheel brake is applied, as you don't want the brake to slip on the oil.
Frank
 

Christian Williams

E381 - Los Angeles
Senior Moderator
Blogs Author
Lubrication of pedestal parts

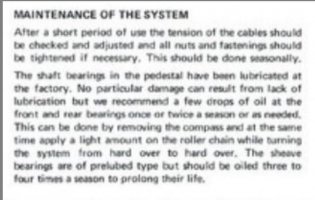
YS confirms oil for the chain ( if you can read it).

More important are the below-deck sheave bearings , which are under pressure from the cable.

Many have bronze bushings inside the aluminum sheaves.

Lotsa grease is good there (four lubes a year according to YS).

The bronze bearings are replaceable.

YS enlarge.jpg
 

Hagar2sail

Member III
Blogs Author
Bringing this thread back from the dead (or early 2018 :egrin:).

My my wife and I attempted disassembly of our pedistal this past Sunday, it generally went well except for a few issues:

1. The compas is ONLY held on by two little screws, the other 12 hold the dome to the bottom...Hope mineral oil washes out, and need to source new fluid for compass...
2. The previous owner believed in seating each section of the pedistal in sealant....thank you...no really this wasn’t hard enough already.
3. Apparently sealant is the answer to all woes, as according to him those screws in the bottom of the guard are totally not needed as long as you use LOTS of sealant to seat the guard in the bases. :0
4. When installing new electronics, just cut the wire and leave it in the guard....what do all these wires go to?
5. Going to need to clean that brake off now that I have well lubricated it in PB blaster and mineral oil....

That was the fun portion, now the serious questions

1. Christian thank you for the excellent write up. I have one question though about the “master link” of the chain, how do you recognize it and what do you use to open it?
2. What do you use to hold / drive the large slotted screws? I don’t have anything large enough that I don’t think will mess up the slots, so at this point a purchase is ok....but is it needed or am I missing something?
3. How is the guard held on for people who actually chose to install it properly?

Thanks!

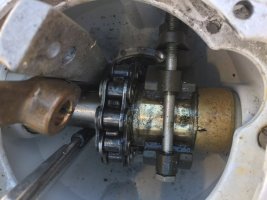
picture of where we ended....
126C51A0-5530-44F1-9625-56BDA4BD8F40.jpg
8B3FEAF2-C5A2-4AF6-88DC-D8DF53D7DDF8.jpg
 

Christian Williams

E381 - Los Angeles
Senior Moderator
Blogs Author
1.The master link is like that of a bicycle chain. One side of the link comes off. Remove circlip, if any. Pry with screwdriver. Should just pop off.

2. Buy a very large screwdriver the exact right size. Make sure it has a hex shank, so you can put a Vicegrip or a wrench on it for leverage. One trick is to buy several candidate screwdrivers at Home Depot, and then return the ones that don't fit. You can also return the one that does fit, if not in fear of a bad mark in the Big Ledger. Those big stainless machine screws tapped into cast aluminum are sometimes a problem. Various tricks can be applied, but the all-important thing is not to bugger the slots in the initial attempts.

3. The feet of the pedestal guard are secured by set screws in the deck fittings, and the set screws are very important to the integrity of the pedestal/guard unity. Some connecting arms (the delta-shaped piece) have set screws, too.

If that is your pedestal base in the photo, I would grind/sand it shiny and prime and paint. I would soak the base in a gallon of vinegar overnight to get salt out. That means taking the pedestal home.
 
Last edited:

Hagar2sail

Member III
Blogs Author
Ok, I will check the chain in more detail, I didn’t see one that looked like it came apart, but I didn’t move the rudder a lot either. Maybe my master link is on one side or the other and not near top dead center.

Thanks for the confirmation that I just need a really big screwdriver:)

That is the base base of our pedistal and is the reason for removal. Have a friend who repairs aircraft and has a sandblaster and spray facilities that I am hoping will help me for the proper number of six pack beverages, probably of the craft variety.

My biggest concern is hidden corrosion on the inside of the base, though it was sealed so well water intrusion is less of a concern for me now than when I started.

Our delta arm arm does not appear to be set screwed to the guard, and luckily looks like I will be able to free it without too much trouble. Do the set screws on the feet go into a dimple on the guard, or do they just work on friction?
 

Ralph Hewitt

Member III
need both throttle & shift control cable numbers, thanks

Some where I saw a picture of what you used.... I need to order and have someone bring them down to me. Thanks
 
Last edited by a moderator:

Afrakes

Sustaining Member
How about a tape measure?

When changing the cables on my 87' 28/2 I measured what I needed for cable length. The original cables were far too long. They were used probably because Ericson had them in stock and not because they were the ideal size. The new cables made the controls much more responsive with little effort. The ones I replaced were in good condition. They were just too long which meant too many bends.
 

David Grimm

E38-200
Ok, I give up! I've been reading and searching for hours! Is there a place I can get these shift/throttle lever bushings for the ys pedistal?
 

Attachments

  • 20211226_071049.jpg
    20211226_071049.jpg
    98.5 KB · Views: 13
Top