Summary:
I changed the packing flax material on my propeller stuffing box. It seems that no one had done this job for several years, so the difficult part was getting the packing nuts loosened up to begin with, and then extracting what I believe was the wrong-sized packing material. I am glad I completed this work with my boat out of the water.
Introduction
Changing the packing material in a prop shaft stuffing box should be a simple 4-step task:
- Loosen the...
You do not have permission to view the full content of this entry.
Log in or register now.
-
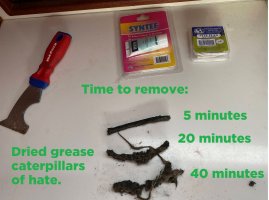 Prop Shaft Packing - Old.jpg
