• Untitled Document

    Join us on March 29rd, 7pm EST

    for the CBEC Virtual Meeting

    All EYO members and followers are welcome to join the fun and get to know the guest speaker!

    See the link below for login credentials and join us!

    March Meeting Info

    (dismiss this notice by hitting 'X', upper right)

injectadeck - Thoughts and Experiences

CSMcKillip

Moderator
Moderator
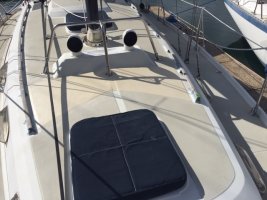
"My question is, once the cut-out portion of the deck is made and internal repairs completed, putting back the cut-out portion of the deck...what do you use to mend the cut-out edges to blend in with the rest of the deck so it does not look like a stitched patch?? "
That my dear Watson...... : ) In a few words, it will always look like a repair unless you are very very good. If it is a large area, you are just best removing ALL the non-skid and doing kiwi grip or something like it over the entire area. If the area(s) is small, you can painstakingly try to copy the non-skid pattern with chisels/awl/etc etc; or even use a flexible mould (eg. Gibco) and roll out gel on top of the repair to match existing. But very difficult, almost impossible to match perfectly.

I had a Capri 25 that had major deck damage at the edge and the non skid. The hull had a 2’ long hole from a collision and the deck was crushed. I repaired the hull and for the non skid I made my own mold from the non-skid on the other side of the boat. I have photos archived and can write up my process of the repair if you would like, when finished I was quite happy with the result. About a 3’ section 12” wide.

I also have a soft spot I noticed in the spring and will be removing the core material or coming up with some type of fix. I’m not cutting the skin off the bottom nor the non skid... thinking thru some ways to tackle this process, mine is starboard side up at the anchor locker.
 

garryh

Member III
"I made my own mold from the non-skid on the other side of the boat "
what did you use for mould material..? The 'store bought' stuff from Gibco is a perfecct match, but something like $60/SF... which is a little rich!
 

CSMcKillip

Moderator
Moderator
"I made my own mold from the non-skid on the other side of the boat "
what did you use for mould material..? The 'store bought' stuff from Gibco is a perfecct match, but something like $60/SF... which is a little rich!
I wiped the deck down with acetone, sprayed on PVA, mould release, poly vinyl alcohol. I then layed down 3 layers of gelcoat and another two layers of glass cloth. This was all polyester resin just like you were laying up a hull but in a backwards manner..

Once the repair was complete glass wise on the repair side I then color matched the non skid. This was really the hardest part of the whole process. I bought the gelcoat color kit along with a quart of gelcoat. I made a 1/2 quart of the colored gelcoat for the boat.

I filled the gelcoat flat on the first round- I wanted it solid up to the non skid, I let this totally kick. I then took a router with a 1/8” set mark and re- routed the repair area. I mixed up the gelcoat with the MEKP (hardener) and filled the 1/8” area. I took PVA and already had the mould ready to go, placed it down on the deck and put a plywood section and battery on top of the area for pressure.

once this was done I had a 1/8” to 1/16” lines that I cut out with a box knive, filled with gelcoat dropper and then sprayed the whole area with PVA.

after I did this repair, I cleaned all of my non skid with acetone, taped it off and applied new gelcoat to all of my non skid areas.... I never read why people don’t re- gelcoat the topside vs painting? I used a really small trim roller for the gelcoat that had very little nap.

this was July of 2005, the repair worked and looked great, I also looked at the rubber moulds but figured I would try and make my own... with the PVA down you can glass whatever you want and it will come up, I used 3 layers, it came in a spray bottle.. we sold the Capri that year, I disclosed the repair to the new owners and you could not see any damage... the year before during winter I spent 3 months watching and reading everything on Polyester resin and glass work.

I am fixing my core as stated last night, I might use Injectadeck- have to look at the cost... but I’m looking at a similar type foam at a much reduced cost..... I’m reading on it but you can buy it at Lowe’s and it’s a polyester resin foam.
 

wynkoop

Member III
Chris be careful that the Lowes foam is a structural foam and has good solid compression numbers. Injectadeck is 400psi in compression.

If the Lowes stuff is water activated and 400PSI I want to know about it!
 

CSMcKillip

Moderator
Moderator
Chris be careful that the Lowes foam is a structural foam and has good solid compression numbers. Injectadeck is 400psi in compression.

If the Lowes stuff is water activated and 400PSI I want to know about it!
I was going to get a bag, it’s 14.00 and do some test with it. I’m pretty sure that Injectadeck has to use a polyester foam and they are branding their application tubes and the 70.00 metal application gun..... that is being made in China for 3.00!

anyway, I have no problem spending the 300.00 for their stuff - just interested exactly what the difference is.
 

1911tex

Sustaining Member
Chris: I thought about that as well. From many marine suppliers, you can also buy a 2 part gallon of product for around $100 ( but less than 400psi). According to the instructions, there is a 6 month life to use the premix product before it ages. You have to Pour equal measured amounts into a separate bucket, hand mix quickly but throughly, then pour before it firms up.

The problem is you have to drill large 1"-2"++ plugs to pour into the deck or you will have one heck of a mess using smaller holes...you can't use a funnel as it will clog up quickly. Maybe you can reuse the plugs? Then you need to mask those off. The "$3" Chinese gun requires no hand mixing, has a nozzle applicator that can pour a click measured amount into 1/4" or less hole. Loading the double cartridge into the gun takes less than 10 seconds. The sealed cartridges can be stored for much longer periods of time. Plus the gun comes in the kit...and you can reuse it forever, just purchase new cartridges as needed over the years. It's simply a better mouse trap.

Think about the whole picture when trying to save a few bucks and have a positive result with minimum effort. However, you may have applications that will suffice with larger drilled holes other than the deck? Yes, I thought long and hard about saving $$ vs. effort...but does it really? The choice is yours.
I was going to get a bag, it’s 14.00 and do some test with it. I’m pretty sure that Injectadeck has to use a polyester foam and they are branding their application tubes and the 70.00 metal application gun..... that is being made in China for 3.00!

anyway, I have no problem spending the 300.00 for their stuff - just interested exactly what the difference is.
 
Last edited:

CSMcKillip

Moderator
Moderator
Chris: I thought about that as well. From many marine suppliers, you can also buy a 2 part gallon of product for around $100 ( but less than 400psi). According to the instructions, there is a 6 month life to use the premix product before it ages. You have to Pour equal measured amounts into a separate bucket, hand mix quickly but throughly, then pour before it firms up.

The problem is you have to drill large 1"-2"++ plugs to pour into the deck or you will have one heck of a mess using smaller holes...you can't use a funnel as it will clog up quickly. Maybe you can reuse the plugs? Then you need to mask those off. The "$3" Chinese gun requires no hand mixing, has a nozzle applicator that can pour a click measured amount into 1/4" or less hole. Loading the double cartridge into the gun takes less than 10 seconds. The sealed cartridges can be stored for much longer periods of time. Plus the gun comes in the kit...and you can reuse it forever, just purchase new cartridges as needed over the years. It's simply a better mouse trap.

Think about the whole picture when trying to save a few bucks and have a positive result with minimum effort. However, you may have applications that will suffice with larger drilled holes other than the deck? Yes, I thought long and hard about saving $$ vs. effort...but does it really? The choice is yours.

I have been 10 years working on our 33- nothing has been a cheap option and everything has been done correct... when I replaced our floor we hired a master boat carpenter that worked on Cris Craft classics to come down from Kansas to help me. The floor ended up better than what Ericson did to start with, everything was covered in layers of epoxy then varnished. The cushions were send to JSI in Florida, we have mattress memory foam that is in the births so you sleep just like home.

Nothing was a overnight choice, but we did spend time doing a lot of research to make that choice, same will happen to the small soft spot in the deck. Believe me, money at this point is not the factor that will drive the choice of what to do....

I value your experience with the product, sounds like the repair went just as planned and 6 small drill holes would be fantastic!!!

check out this site, they have a resin that is a foam at 400 psi, two part.... just some food old bathroom material...


1911tex

Sustaining Member
I have been 10 years working on our 33- nothing has been a cheap option and everything has been done correct... when I replaced our floor we hired a master boat carpenter that worked on Cris Craft classics to come down from Kansas to help me. The floor ended up better than what Ericson did to start with, everything was covered in layers of epoxy then varnished. The cushions were send to JSI in Florida, we have mattress memory foam that is in the births so you sleep just like home.

Nothing was a overnight choice, but we did spend time doing a lot of research to make that choice, same will happen to the small soft spot in the deck. Believe me, money at this point is not the factor that will drive the choice of what to do....

I value your experience with the product, sounds like the repair went just as planned and 6 small drill holes would be fantastic!!!

check out this site, they have a resin that is a foam at 400 psi, two part.... just some food old bathroom material...

Chris: Seems like you do everything to perfection...very admirable! Love to see some photos!! Note that Injectadeck is 12# density...not 2/6#. May make a difference, may not? Actually, I don't know and need educating! Maybe someone can enlighten me??

Just a thought...maybe the Injectadeck cartridges can be reloaded with 2/6# ?
 
Last edited:

wynkoop

Member III
12lb is much denser and will take much more pressure to crush than 2 or 6 lb foam. I would expect 6 lb foam to have 1/2 the compressive strength of 12 lb foam, but it has been too many years since I did strength of materials in school.
 

CSMcKillip

Moderator
Moderator
I’m a young pup and in Architecture so I love to research stuff, but I will be using the “recommended” fix or the foam. If the foam is chosen I will buy the Injectadeck materials. 12lb is Denser type material, meaning the bubbles don’t expand as much as the 6lb. The compression is the same. iE 400PFS. So the strength is the same but the expansion is x2.
 

CSMcKillip

Moderator
Moderator
I’m also having cocktails tonight so perception is 50/50.... it’s good being back on the site and working on the boat.
 

Michael Edwards

Member II
Goop and a turkey baster?!!! Try looking at some fiberglass repair videos. "Boat Works Today" is a great learning resource. I am mostly self taught from watching others. I've replaced 3 transoms and am currently building a hydroplane! West System epoxy has a great book that shows various repairs.
Buy some polyester, cloth, solvent, chip brushes, Bondo, .... learn to work cleanly, get used to the materials and techniques. A Dremel tool works well for cutting the skin off(large area pieces). Observe how the composite was constructed and do the same. MOST decks are built in the same manner.
If you can make a nice ham sandwich, you can do fiberglass repairs.
I have found that placing a lip on the underside of the repair area greatly help when replacing the skin. Work an area that you feel comfortable doing a single session. Put some water filled buckets on it and come back the next day to proceed. Non-skid deck paint follows sanding and fairing.
By the way...I don't use polyester resin anymore, nor Bondo (refer to the Epoxy Book). Becoming comfortable with filler and resin and cloth is a huge confidence builder. I've used thin layers of plywood successfully instead of balsa. And beleive it will last longer than I will care.
I just want to say; don't waste your time and money trying the "easy(expensive ineffectual) way". I once replaced a floor in a sailboat that had sat with rain water in it for years. The new owner bought a case of 3M 5200, drilled holes every two inches and proceeded to pump the Goo into the wet deck.
At the time I had AnnaDor on the hard near by....The two men doing the work were engineers ( brothers who inherited the boat)
I did not tell them that I was the one who installed the new teak and holly sole in it.
If you don't have the resources and time to do it right..........
There have been some who didn't want to cut the deck; they simply flip the boat over and did the work from the inside. PHew!!!! NOT ME!
Right side up...? fighting gravity, me neither. K.I.S.S.
 

Michael Edwards

Member II
If you want to match the non skid, simply wax a portion of the deck, dam it up , pour some resin to to make your mold stamp, add a few layers of cloth. Use it when you ready for gel-coat.
 

Michael Edwards

Member II
As for pour foam, it is great for filling spaces to provide flotation, but most don't consider it as structural. Boston Whaler is a major exception.
But in the repair described, the space is occupied by wet gram cracker goo.....the deck on your boat is likely about an inch thick, consider the expansion of pour foam.....it needs to be contained, with relief holes.
 

CSMcKillip

Moderator
Moderator
I have done a small amount of glass work, but I am leaning on the foam method 1911tex used or something very similar. A 1/2 day repair vs a month or longer. Maybe rip the deck off this winter.
 

1911tex

Sustaining Member
Ok tried Injectadeck yesterday on a 12x9" very soft spot as mentioned 4 posts above. Actually I drilled beyond this measurement to 16x16". I did 1-1/2 clicks of the juice in each of 10, 1/4" holes and the amount of dark bubbly nasty stuff that came out was amazing...I guess that was a mix of old water and rotten balsa. After a couple of minutes, the crud ceased and white foam balls appeared. I wanted to do this process without removing the original deck. This photo is 10 minutes after application, balls removed and the residue was not cleaned up quickly enough as I was doing this alone without a backup to wipe up, so it will require a repaint of this non skid deck...which is a whole lot better than the alternative of removing a section of deck. According to the instructions, I will drill a divot in each hole and fill with Marine-tex, then repaint (which was needed on all the upper fore deck non-skid area anyway). There was slight bulging along one corner and according to instructions, after 30 minutes it was ok to step and squash it and it was corrected. The salon under deck showed no after effects. Per instructions after one hour I stepped on the area and it was rock hard! Good stuff!

Edit: I used 2/3 of a single double cartridge of Injectadeck in this process. Yes recommended; however you need a backup person to quickly wipe up the residue!
Whew, finally buttoned this Injectadeck project up yesterday (see post 51 above)...used light sand color anti-slip from Jamestown. Not an exact color but close enough from a distance plus the original deck needs a good deep cleaning. Used recommended prep primer then 2 thin coats anti-slip per instructions, waiting 16 hours after 1st coat and lightly sand 220 after 1st coat. All the Injectadeck drilled holes (epoxy filled and sanded smooth) are now invisible. Yes you can still see most of the original deck non-skid. The deck is "ROCK HARD" and I feel like it's a very positive result...at least the best I could do as an amateur. The cause of the original dorade leak has been epoxy sealed as well:
 

Attachments

  • B481A181-49CC-46AD-B52B-153C55AC9F45.jpeg
    B481A181-49CC-46AD-B52B-153C55AC9F45.jpeg
    108.2 KB · Views: 27
Last edited:

wynkoop

Member III
1911tex I am a bit behind you on my Injectadeck project. Much went by the wayside this summer on Silver Maiden work due to a family matter that has taken much of my time.

Several weeks ago I injected the port side of my cabin top. I injected a bit too much and as a result had 2 issues. First lots of waste from it coming out the holes in a big way, this lead to a mess all over the deck in spite of attempts to wipe it with acetone. The second is I got foam between the deck and the headliner. I suspect this was because I took the port side rail off to use those holes for filling, and of course they went through the deck and of course the headliner. I taped over the holes at the bottom of the headliner.

I found the deck did not deform up in spite of me being overly energetic with the injectadeck on the port side, but the headliner did deform down. I will say the deck is now solid and the leaks to rain were greatly reduced. It turns out some of the injectadeck made it's way down the port side cabin bulkhead and crept out around the windows. Not past the frames, but when I removed the frames and had a look I saw injectadeck.

The port side of the cabin top took 3 of my six cartridge sets. I expected it to take a lot because the whole thing was flexing really badly. It was so bad that I put plywood on the deck to spread my weight when I was working on the boat earlier in the year. I mean you could visibly see the cabin top deck deform and the cabin port side bulkhead deform.

I have not yet plugged the holes. I left the muffin tops stay on for a few days before cutting them off.

Yesterday since we had a perfect day for injectadeck (75 degrees and dry) I did the starboard side of the cabin. It had less delamination. In fact one hole I drilled hit solid dry core! All the rest hit either no core or damp core and swinging a wire coat hanger around in the holes cleared crud out of the way for the injectadeck. On the Starboard side the area I needed to fill seemed to be about 1/2 of the starbord side, or 1/4 of the total cabin deck. I did not take off the rail. Instead I drilled all my holes "up hill" from the rail. The area took exactly 1 set of cartridges with very little waste because I did not pump in as much as I did on the port side.

At this point the port side is rock solid. The starboard side is much improved, but still has some flex in some places. I should have drilled a few holes next to the rail near the rail bolt holes. I will break off the muffin tops tonight or tomorrow. I suspect because I have to turn my attentions to other things I will not get the second round on the cabin or side deck or the foredeck done before spring. I may drop epoxy into the holes, but I am not sure I will try to duplicate the non-skid pattern. I know they say playdough and marinetex will do the job, but with winter coming I am not sure I will have the chance to do that.

On a side note I used gorilla glue (original foaming type) to inject into the screw holes in my badly damaged main hatch. The hatch has been giving troubles for years and I have been doing a reglue/rescrew dance every few years. I decided since the underlying plywood under the teak was the problem that an injection of gorilla glue was in order. Eventually Gorilla glue foamed out through the damaged ply and bonded to the teak front piece and even came out around some edges where there was missing wood from damage. In short it traveled through the entire front edge of the plywood and where it seeped out bonded to the front teak piece. Where the Gorilla Glue came out to be visible it turned out to have more compressive strength than the injectadeck. This makes me think there may be something to using Gorilla Glue instead. I have seen places on the Web where folks claim to deal with soft decks on Boston Whalers this way. In the spring I may price out Gorilla Glue vs more Injectadeck as I know I will need at least 2 more cartridge sets to finish the side decks, the foredeck and the starboard cabin top deck.

So far I give Injectadeck the thumbs up and I am looking forward to being able to finish this project and repaint the boat.

I am sort of amazed that Silver Maiden is 46 years old and still going!
 

KS Dave

Dastardly Villain
Blogs Author
So, we're at 7 and 11 months out from your projects @wynkoop and @1911tex, any additional thoughts? How has this held up? I'm considering this product to repair some area on my cabin deck. I'm quite averse to the work and mess of cutting the skin and replacing the balsa and re-glassing everything (to paraphrase what Christian said earlier in this thread).

@wynkoop - how much area did you end up repairing? I'm trying to figure out how much I should buy. Buying the 'large boat' kit seems like the best deal.

Here's the worst of my area (with repairs from previous owners).
FiberGlassRepair.jpg

Banging around with a plastic hammer, I get a hollow thump in the area in red.
StarboardDeck.jpg
 
Last edited:

1911tex

Sustaining Member
Ref: Post #51....July 16 and as of this week, almost a year....held up same as day injected...no problems. Recommended.
 

KS Dave

Dastardly Villain
Blogs Author
Ref: Post #51....July 16 and as of this week, almost a year....held up same as day injected...no problems. Recommended.
Thanks for the follow-up - glad to hear yours is still going strong. From what I can ascertain, you used 2/3 of 1 tube for an ~1.25 sq ft. section. I have an approximately 6-8 sq. ft. section where the top layer of glass has cracks. I think @wynkoop repaired much larger sections.

I have an email to the vendor, but wonder if you or Brett have any thoughts on my success given my existing damage here? If I go this route, my plan after the injection is to go back and grind out whatever filler this is, repair with fairing compound, and prime/paint (using anti-slip paint additive). But, I worry slightly about blowing out the cracks.
 
Top