This work has pushed into the holiday season which is making it much more difficult to find the time to get it all done. On top of my limited time, the yard has been hit with the flu, so they've been limited as well.
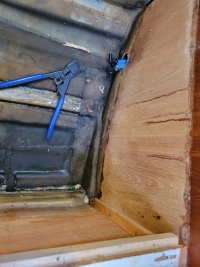
We got the last piece of insulation in:

Finished the Oil filter install and filled the engine with oil:

and completed the electrical connections:

The battery cables on top of the fuel tank always bothered me, so I relocated them to the other side of the bulkhead. I'm planning on making a box to hide the cables and support the infill. I'm probably going to have to remove the tank at some point so this will just be one less step I will have to tackle when that time comes.
We also installed new control cables, but were not able to finish the job due to the transmisison cable pivot bolt not being the correct part. Of course, being a Yanmar evertyhign is metric and the local shops only carry standard parts so I'm going to have to wait for the part to arrive.
I've also been working on modifying a Balmer Belt Buddy to fit on the stock Hitachi alternator so I don't have to wedge a screwdriver in the alternator to adjust belt tension. One of the main sources of dirt and grime in the engine compartment was belt dust, so this should help keep everything tidy. (before I started cutting it up to fit)

The water heater won't go in until after the boat is back in the water so I'm going to install some shutoff valves in the lines so I can fill the engine with coolant.
We got the last piece of insulation in:
Finished the Oil filter install and filled the engine with oil:
and completed the electrical connections:
The battery cables on top of the fuel tank always bothered me, so I relocated them to the other side of the bulkhead. I'm planning on making a box to hide the cables and support the infill. I'm probably going to have to remove the tank at some point so this will just be one less step I will have to tackle when that time comes.
We also installed new control cables, but were not able to finish the job due to the transmisison cable pivot bolt not being the correct part. Of course, being a Yanmar evertyhign is metric and the local shops only carry standard parts so I'm going to have to wait for the part to arrive.
I've also been working on modifying a Balmer Belt Buddy to fit on the stock Hitachi alternator so I don't have to wedge a screwdriver in the alternator to adjust belt tension. One of the main sources of dirt and grime in the engine compartment was belt dust, so this should help keep everything tidy. (before I started cutting it up to fit)
The water heater won't go in until after the boat is back in the water so I'm going to install some shutoff valves in the lines so I can fill the engine with coolant.
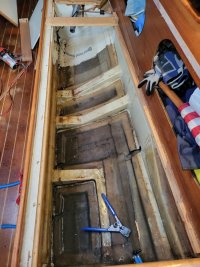
") ). I traced through the entire water system in the boat and labeled everything at the end of the summer/early fall, so I hope to clean the plumbing up quite a bit next spring. There are lots of piping going all over the place back there. Unfortunately, the yard won't let me work on the boat during the winter while it's on the hard.
). I traced through the entire water system in the boat and labeled everything at the end of the summer/early fall, so I hope to clean the plumbing up quite a bit next spring. There are lots of piping going all over the place back there. Unfortunately, the yard won't let me work on the boat during the winter while it's on the hard.